Vintage Tag Flip Book ft. Papericious With Love
Hello Friends
Greetings for the day!
Greetings for the day!
I am Parita Galani back today with tutorial post using With Love - Papericious Designer Edition Paper Pack. This paper pack with its gorgeous hues of deep purple and pastel mint green with floral elements is all you need to make gorgeous anniversary or any other such special occasion gifts for your loved ones.
So let's have a look at my project -
So let's have a look at my project -


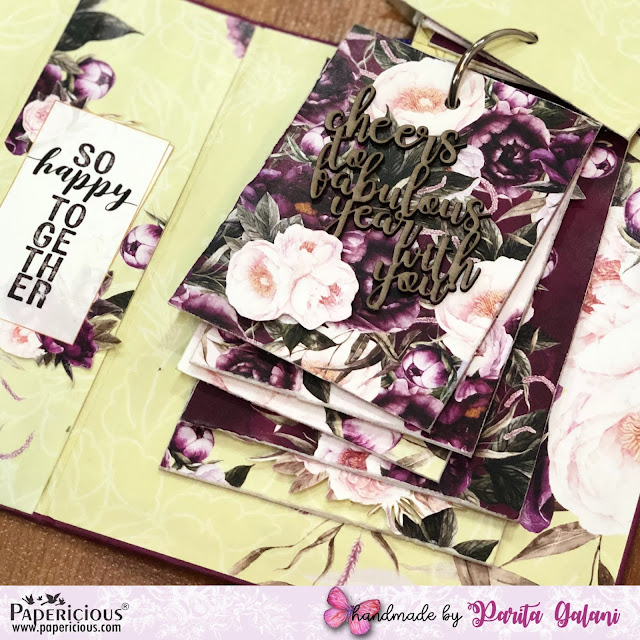
I have made a Tag Flip Book but with a twist, giving it a hardbound cover with a side pocket. So let's have a look at the step by step tutorial of this simple yet beautiful project made using very few supplies.
Step 1: I have taken a three pieces of cardboard in two different size of 6" by 5.5" for front and back and 6" by 2" for middle partition along with Purple Cardstock sized 8" by 15" to make the base.
Cut the cardboard and Cardstock of above given measurement and arrange as shown below by applying glue on back side of the cardboard.

Step 2: Now give a slight cut on all four edges and glue the outer part of Cardstock as shown in picture on all the four sides than fold and stick it on inside, using a bone folder give it a smooth finish.

Step 3: Now I have four piece of the paper in size 5.75" by 5.25" and 2 piece of paper sized 5.75" by 2" all from With Love - Papericious Designer Edition Paper Pack and glued them on inside and outside of the cover as shown below.

Step 4: I have made 10 different tags using various With Love - Designer Edition Paper Pack.
For each tag, I have used same design of paper for front and back, placed it in front and back of purple coloured Cardstock edge to edge, once it was all done I have distressed the edges of whole tag to give it a little bit of vintage effect.

Step 5: I have taken various embellishments from Papericious With Love - Cut and Create Embellishment Sheets (CCE) and placed it on the front side of each tag. I have kept back side of the each tag plain to write any message or to use it for more photos.


Step 6: I have taken a 4" by 6.5" paper and scored it at 0.5" on three sides, folded the three sides on inside and glued it with base. This pocket can be used to put in letter, photos, card, or chocolate anything of your choice.

Step 7: I embellished the front cover with cut outs from the With Love Paper Pack and CCE. Punched a hole in the centre at the back side of base cover and and all the tags using single punch machine. Using a single ring binder, I put together the tag book and finally tied some colorful ribbon on the ring binder.


Supplies Used:

I hope you all liked my creation and will try it for yourself. In case of any query, please mention it in comment section below.
Stay healthy,Stay safe and Keep crafting!
Best Regards,
Parita K Galani


0 comments: