Wallet style photo holder Tutorial
Hello crafty ppl,
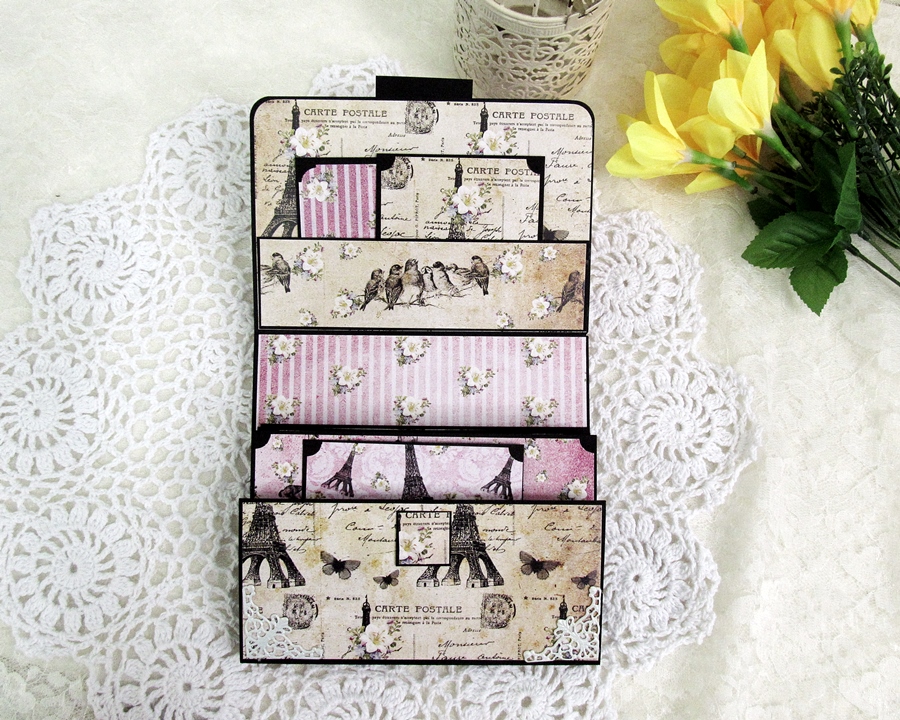
its Kavitha here today and i am sharing a tutorial to make a Wallet style photo holder using "Love in Paris collection".I so love the pinks and yellows in this collection ,perfect for vintage/shabby chic projects.

Take a card stock measuring 6 1/2" by 9 1/2 ".Score at 6" and 6 1/2"

For the flap take a card stock measuring 6 1/2" by 5" .Score at 4 1/2"

To make the accordion fold which holds the photo mats take a card stock measuring 2" by 6 1/2' and score at every 1/2"

You need two pcs like this,just fold along the score lines

Decorate both front n back using desired papers.


Now attaching the lower flap to the center using the accordion fold piece,just put some glue to both the end of the accordion piece and stick it together

I added a lot of phot mats in different size-4 by 6", 4 by 4",3 by 3" and 3 by 4".Added a pocket to the flap to hold more photo mats.

I used black card stock for the photo mats and decorated with pattern paper on one side,left the back plain to add journaling.You can use pattern paper on both side if you wish to have lots of space for pictures.
Hope you liked my tutorial.The possibilities are endless with this one,just change the color of the card stock used to make it in vintage/shabby chic/or modern style.This can be used for any theme-Feminine/masculine/baby etc,you just need to choose the right kind of pattern paper,just imagine this one using our latest collection "Naturals",with denim print n more it will be perfect for masculine project or make it using our Baby papers range to store all those precious first year photos:)
This can be made in any size,the measurements are super easy,almost like an envelope except the accordion part,you can have space for more photo mats by increasing the size of the accordion fold piece(length wise).For the measurement i have given you have space for 5 photo mats,you can even have space for 10 photo mats.So are you going to give it a try?would love to see if you make something similar,just drop in a comment with the link:)
Thank you for stopping by.
Happy crafting,