Showing posts with label fleur fun. Show all posts

March Challenge - Inspired by Moodboard


Hello everyone
Good Morning!
Welcome to another month of the Papericious Monthly Challenge.
 This is Priya from Palchin Creation. I am super excited to share with you all that Me and Neha are hosting this month's challenge.

March Challenge : Be Inspired by Moodboard
The projects must be made inspired by this Moodboard.
It could be the colours, the elements, the kind of flowers, the fresh spring look, anything.
 Be inspired by them and create any kind of project that you come up with and share it with us in this months Challenge.


Challenge Rules:
1.You can create any project - Altered Items, 3D projects, Home Decor, Cards, Layouts, Mini Albums, Scrapbooks, etc.
2. Remember that you need to use Papericious Products as your main focus to qualifying for the win.
3. The last date of submission of your projects is 9th April, 2019 at 11:55pm IST.
4. Please go through the general guidelines HERE before you link up your projects. Any project not following the rules will be disqualified and it will not be eligible for the prize.

Prizes:
The Design Team will be selecting a Merit based Winner at the end of the challenge who will stand a chance to win a gift voucher worth INR 1,000 from the Papericious Store. 

We will also be picking three entries as our Top 3, who will be awarded a badge to flaunt on their blog.


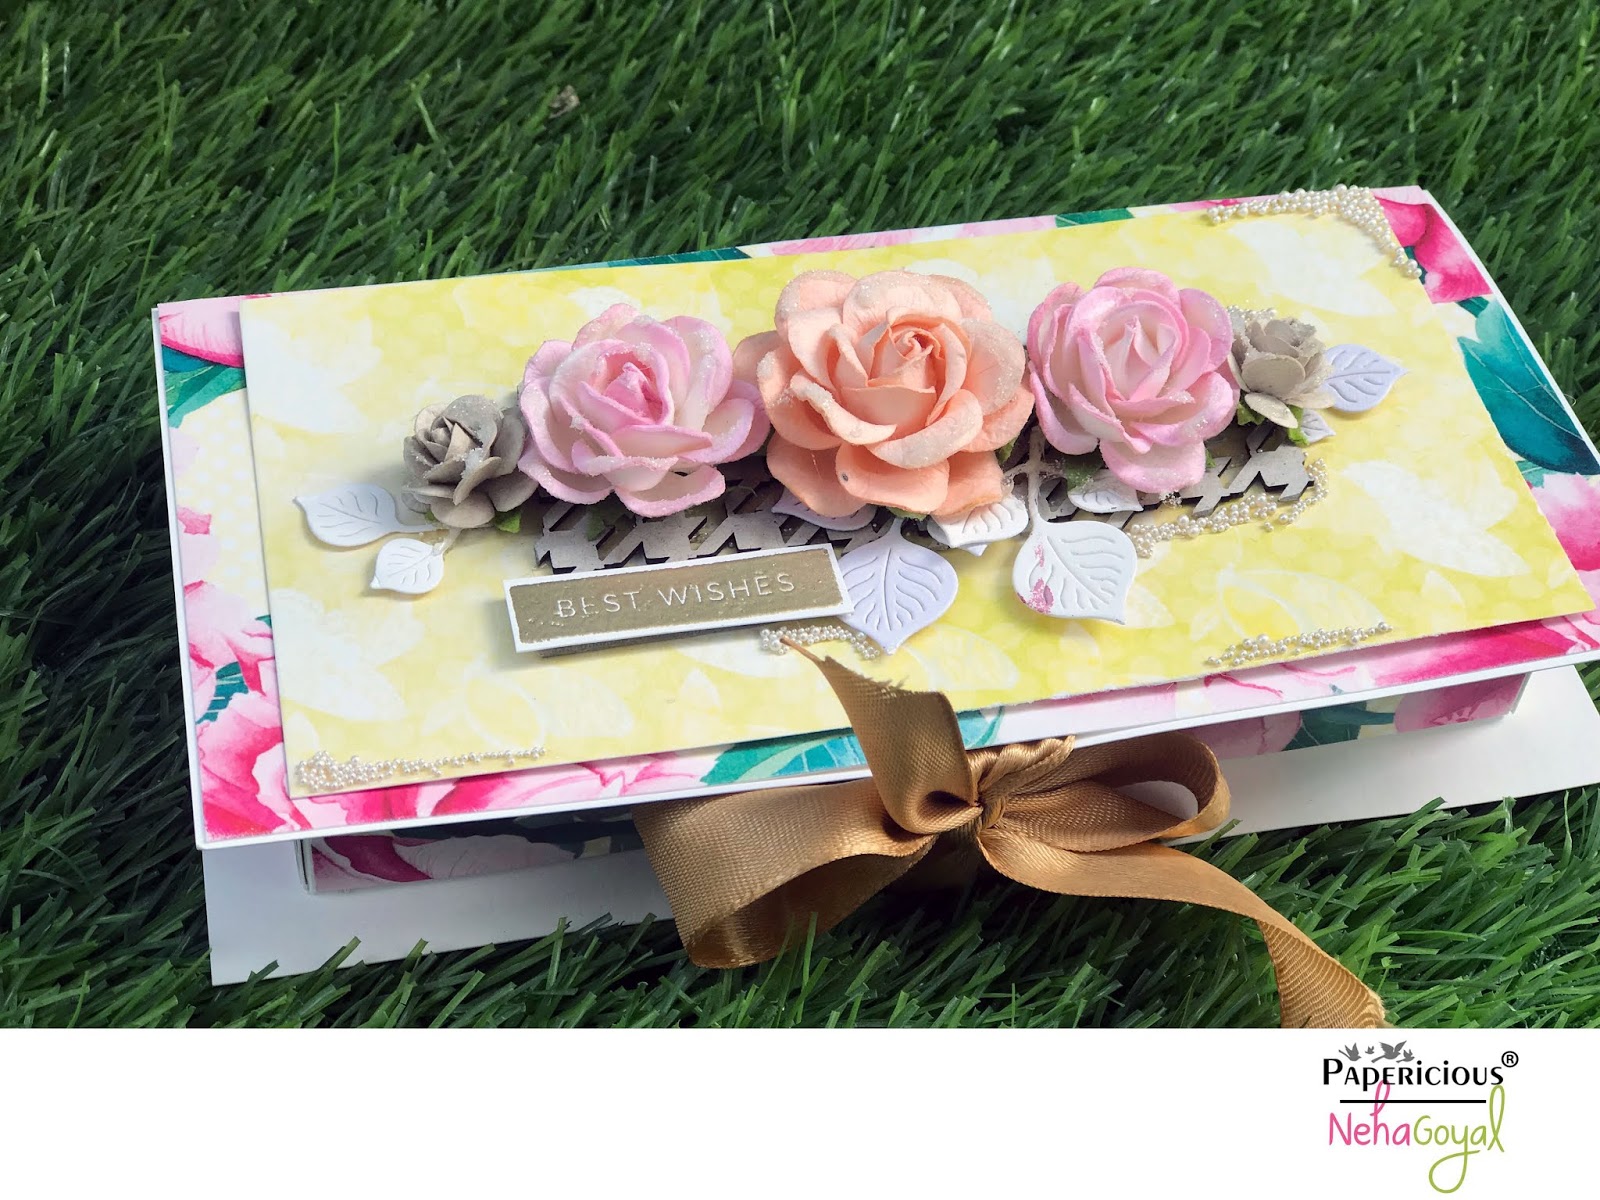
BOX ENVELOPE FLOWER BOUQUET

I'm really inspired with the vibrant colors and flowers.
Flowers are the sweetest thing God ever made , and forget to put a soul into .
Here is enjoy :


Few Close Ups


Now let me share Neha's inspiration for the challenge - She has amazing money (gaddi) boxes to share with you .

Hello everyone ;
I have made two Gaddi boxes which can easily hold 100 notes of INR 2000. I have used Fleur and Fun papers from Papericious because I am inspired by the colors of the moodboard and this paper pack is perfect to depict the colors. These gaddi boxes serves many purpose like these can be used as chocolate boxes or gift boxes.


I hope you are inspired by our projects and will be playing along our challenge this month.

Thank you for taking out time for us!
Happy Crafting!
Love,
Priya

January Challenge - Scrap Your Scraps

                                         
 Hello friends!
Welcome to the first challenge of 2019!

For this month, Nikkita and myself (Tanvi) are very excited to be hosting the Papericious Challenge.  

As crafters we all love paper & I know you all must be hoarding tons of scrap paper. We want you all to begin the new year by digging into stash for those scraps & create something! Yes, it is ANYTHING GOES using SCRAP PAPER
January Challenge- "Scrap your Scraps"
Please note - The main focus should be on Papericious products

Challenge Rules:


1.You can create any project - Altered Items, 3D projects, Home Decor, Cards, Layouts, Mini Albums, Scrapbooks, etc.

2. Remember that you need to use Papericious Products as your main focus to qualifying for the win.

3. The last date of submission of your projects is 9th February, 2019 at 11:55pm IST.
4. Please go through the general guidelines HERE before you link up your projects. Any project not following the rules will be disqualified and it will not be eligible for the prize.

Prizes:
Now onto the exciting part, the prizes! Papericious will be giving away TWO prizes every month:
The DT will be selecting a Merit Winner at the end of every challenge who will stand a chance to win a gift voucher worth INR 500 from the Papericious Store.
We will also be having a Random Winner from all the entries who enter their projects every month to win a Papericious 6"x 6" Pattern Paper Pad.
Everyone gets an equal chance here, so whether you are a novice or an experienced crafter, all are welcome to play along with our challenges.
When I started working on the theme, I realized it was not as simple as hoarding these scraps......so many possibilities - cards, layout, embellishments, handmade journals, tags, envelopes, the list is endless! 
I finally narrowed down on using the "Fleur Fun" scraps from my last project & worked on an art journal page. 
I started the layout with torn pieces of paper to make the background.
Played around with some gesso, chalk paints & stencils to create layers and textures.
The bright color was perfect to bring in some sunshine to a rather foggy & chilly winter morning!
Supplies used -
Fleur Fun 12" X 12" Patterned Paper Pack
Gesso
Soft Gel
Now let me share  my teamie Nikkita's inspiration for the challenge - She has a card & tag for us.
For the card , she has used the "Fleur Fun" paper pack scraps, distressed them  using distressing tool and adhered using 3D tape to give dimensions and added Rajni Chawla's Frosting Powder to give glitter effect and then embellished it with flowers and butterfly chippies.
For the tag, she used scraps from "Jack and Jill" paper pack and fussy cut the cute girl and used some leftover chippies from her stash.
Well, that's all from me today!
Thanks for stopping by!
I hope you have a great day & share your projects using scraps!
Love,
Tanvi

Waterfall Calendar - Tutorial


Hello everyone, this is Tanvi with my tutorial post for this month, showcasing the beautiful Fleur Fun paper pack.
 It is time to say good bye to 2018 & welcome another year. I love making my own calendars & sending them across to near & dear ones. Am sharing one such make for 2019 – a mini calendar cum note holder that you can carry on the go.
Before moving to the tutorial let me share a few pictures of the finished project -


I have used a mini envelope slider die on the cover & will use them to insert mini tags with names & the year.


.
This booklet measures 5x7” & holds a calendar on one side & on the other is a pocket insert and a sticky note pad. On the spine (inside) I have a pen holder too! No more digging in my bag for a pen now.


For the calendar pages I have made a waterfall insert.


TUTORIAL –

You will need chipboard, card stock & pattern papers trimmed to the following sizes –
Chipboard – 5x7” – 2 pieces & ¾ x7” – 1 piece
Pattern papers – 8x12” & 6 ¾ x 10 ¾” for the covers.


Attach the chipboard pieces to the cardstock. Make sure to maintain a 1/8" gap between the spine piece and the cover pieces of chipboard.  


Trim the cardstock corners at an angle and attach double-sided adhesive & Wrap the chipboard, also glue the pattern paper to the inside. This is how it will look. Gently fold the covers while scoring in the 1/8" gutter between the spine and the covers.    


Next we make the waterfall section. 
You will need –
Card stock - 11 x 4 ¼  “. Score along 11” side at 5 ½ & pattern paper – 5 3/8 x 4 1/8” – 2 pieces
 
Card stock – 4x4” - 6 pieces & pattern paper -  3  6/8 x 3 6/8" - 6 pieces
Card stock – 9 ½ x 3 7/8” score on the long side at 3 ¼ , 3 ½ , 3 ¾ , 4, 4 ¼ , 4 ½  & 4 ¾ “. Burnish all the folds. This will form the base of the waterfall mechanism. Lay it down with all the score lines to the right. Line up the first 4x4 piece along the second score line from the right. Continue gluing all the pieces with tacky tape.
For the sliding mechanism you will need a piece of cardstock - 1 x 7 ½ “ score at 1 ¾ & 5 ¾“      Wrap it around the other side of the waterfall & glue it about ½ “ from the edge. Next put tacky tape on the loose ends of this strip, line the waterfall to the fold of the 11x4 ¼ “ card stock. The waterfall insert is now ready. Print & Cut the calendar pages to size & glue.
 

Next we will need a piece of card stock 4x6” & pattern paper – 3 7/8x 5 7/8” for the pocket & 3 ½ x11” for the insert.


Here are some close ups of the project - 


Here is a flip through of the calendar - 

Hope this inspires you to make one for yourself. You can play around with the inserts & themes similarly to create your own unique organizers, planners or reminders. 

Happy & crafty 2019 friends, will be back in the New Year with some more crafty inspiration 😊
Until then, do visit & comment on all our posts to win some awesome goodies!

Supplies used -