Rustic Chic Desk Organizer

11:00 am Erum Tasneem 7 Comments


Hello!
Today I have a desk organizer to share with you.
To be honest, I am not really into decorating 3D items. If I do it, I usually keep them super simple with a clean look.
I took white acrylic paint and diluted it enough to make it runny. Then with a dry brush I painted the entire organizer.
I wanted the brush strokes to show so that it would look more rustic than polished.

After the paint dried (which didn't take long). I popped up some beautiful white chippies by Papericious, namely, the Birdcage, Mermaid Flower and Linear Flourish. These were used as is, raw, without any addition of paint. They look so beautiful.

To these I added pearls to enhance the look and make my desk organizer into rustic chic project.
I hope you liked it. I think it looks very pretty, I wish the photos did it justice.

Thank you for stopping by!
Have an awesome day.


Supplies:


7 comments:

Recipe and Ingredient Organiser

11:00 am Arjita 0 Comments

Hi friends,
I am sure you must have seen all the wonderful projects which have been created by the super talented Design Team using the new MDF organisers and today is my chance to share what I did with it. The organisers are so nicely planned that they can be used on a study table, Office table and even in the kitchen. I also like the size and quality which makes it top notch making it super durable for long run. Today I have created a simple Kitchen Organiser from the style DO103 and the adorable KISS THE COOK designer paper collection.


I covered the entire organiser with a slate/dark grey coloured card stock using strong couple sided tape. you can also paint the wood and that will look beautiful as well. I used a sharp pair of scissors and fussy cut a pattern with vegetables. Then I created a small box with the gray paper and added lots of small paper pieces which can be very handy to write the ingredients or a shopping list. At the back of the organiser there is a large slot where I added 20-25 white sheets where I can write my favourite recipes and measurements. I can simply pull the sheet out and recreate the dish of my choice.
I have left the left side of the organiser empty which can be used to store anything. The centre portion is good to store pens ,cooking thermometer and measuring spoons.
Here are some pictures of the project.


I hope you liked this post and will recreate it for yourself or as a gift for someone. Here are the things  you will need and are linked at www.papericious.com

Happy Crafting!

SUPPLIES


0 comments:

Recipe Album and Kitchen Organiser

11:00 am Dotstolines 1 Comments

Hello everyone,

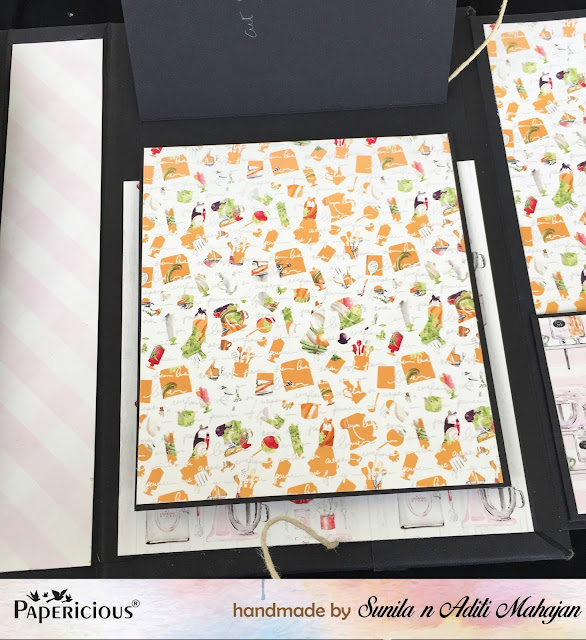
Sunila and Aditi here today with a tutorial post. We are thrilled to be working with the "Kiss the Cook" Collection today. This is such a perfect paper collection for so many projects.

We decided to use the Papericious desk organisers and make a kitchen organiser. So we've used the Papericious Kiss The Cook paper pack and Papericious Decoupage glue, to decorate the organiser. Along with this, we've made A Recipe Folder/Album. It's a simple and classic file folder style and can be adapted to any theme. The best part is we have a complete video tutorial on making this album.

Here is the tutorial. Since it's the entire process of making it from scratch, we have divided the tutorial into two parts.


Here is a look at both our creations:


Hope you're inspired! Can't wait to see your albums!
Happy Crafting!


Supplies


1 comments:

Layered Card with Kiss The Cook

11:00 am Erum Tasneem 6 Comments

Hi friends!
I have a fun, layered card to share with you today using Kiss the Cook paper pack.
It is such a simple card with a lot of layers. I started by cutting out two rectangular pieces of patterned paper which I adhered to the base in a crooked manner.

On top of these layers, I added a white panel on which I added watercolour splatters of light pink colour to balance the cut out that I planned to use as my focal image.


To add a bit of interest, I added pattern paper banners and a brad.

I coloured in the focal image with Spica glitter pen in red and brown and then added glossy accent on it. I cut this image out of one of the pattern papers.

To add a pop of just solid red, I punched a bracket frame, snipped it off from both ends and glued them under the white panel.
This is a super dimensional card with a lot of foam tape and layers. I hope you like it!
I love this paper pack. It has beautiful watercoloured images, I just wanted to make them the focus of the card. This pack has a vintage feel to it but still you can create modern cards out of it!
See you soon!


6 comments:

Ethereal Desk Organizer and White Chippies

11:00 am Chirali Shah 1 Comments

Hello people.

Chirali this side and today I have a complete 'Papericious' project. Yes, you read it right. Each element used in this project is from Papericious.

Papericious has recently released gorgeous and beautifully designed white chippies, a tempting Ethreal paper pack and some pretty different designs of wooden desk organizers.

My this project has white chippies, ethereal paper pack and one of those desk organizers.

Here it is:


Straight angle!


A bit upper angle!

Some closeups:


You must have seen the chippies very closely. They have been used as they are in the package. No alterations at all. Aren't they the prettiest. 


I have used Papericious' Duck Egg chalk paint to paint the desk organizer, lots of papericious white chippies and Ethereal paper pack (with all the fussy cutouts from the same pack)


Finally, the look when put on the desk:


Lots of things at one place and definitely giving you the beautiful look!!

So what all do you need to make your desk look prettily awesome? One word, 'Papericious'!

Hope you liked it. Thanks for stopping by.

Hugs,
Chirali. :)

Products used:


1 comments: