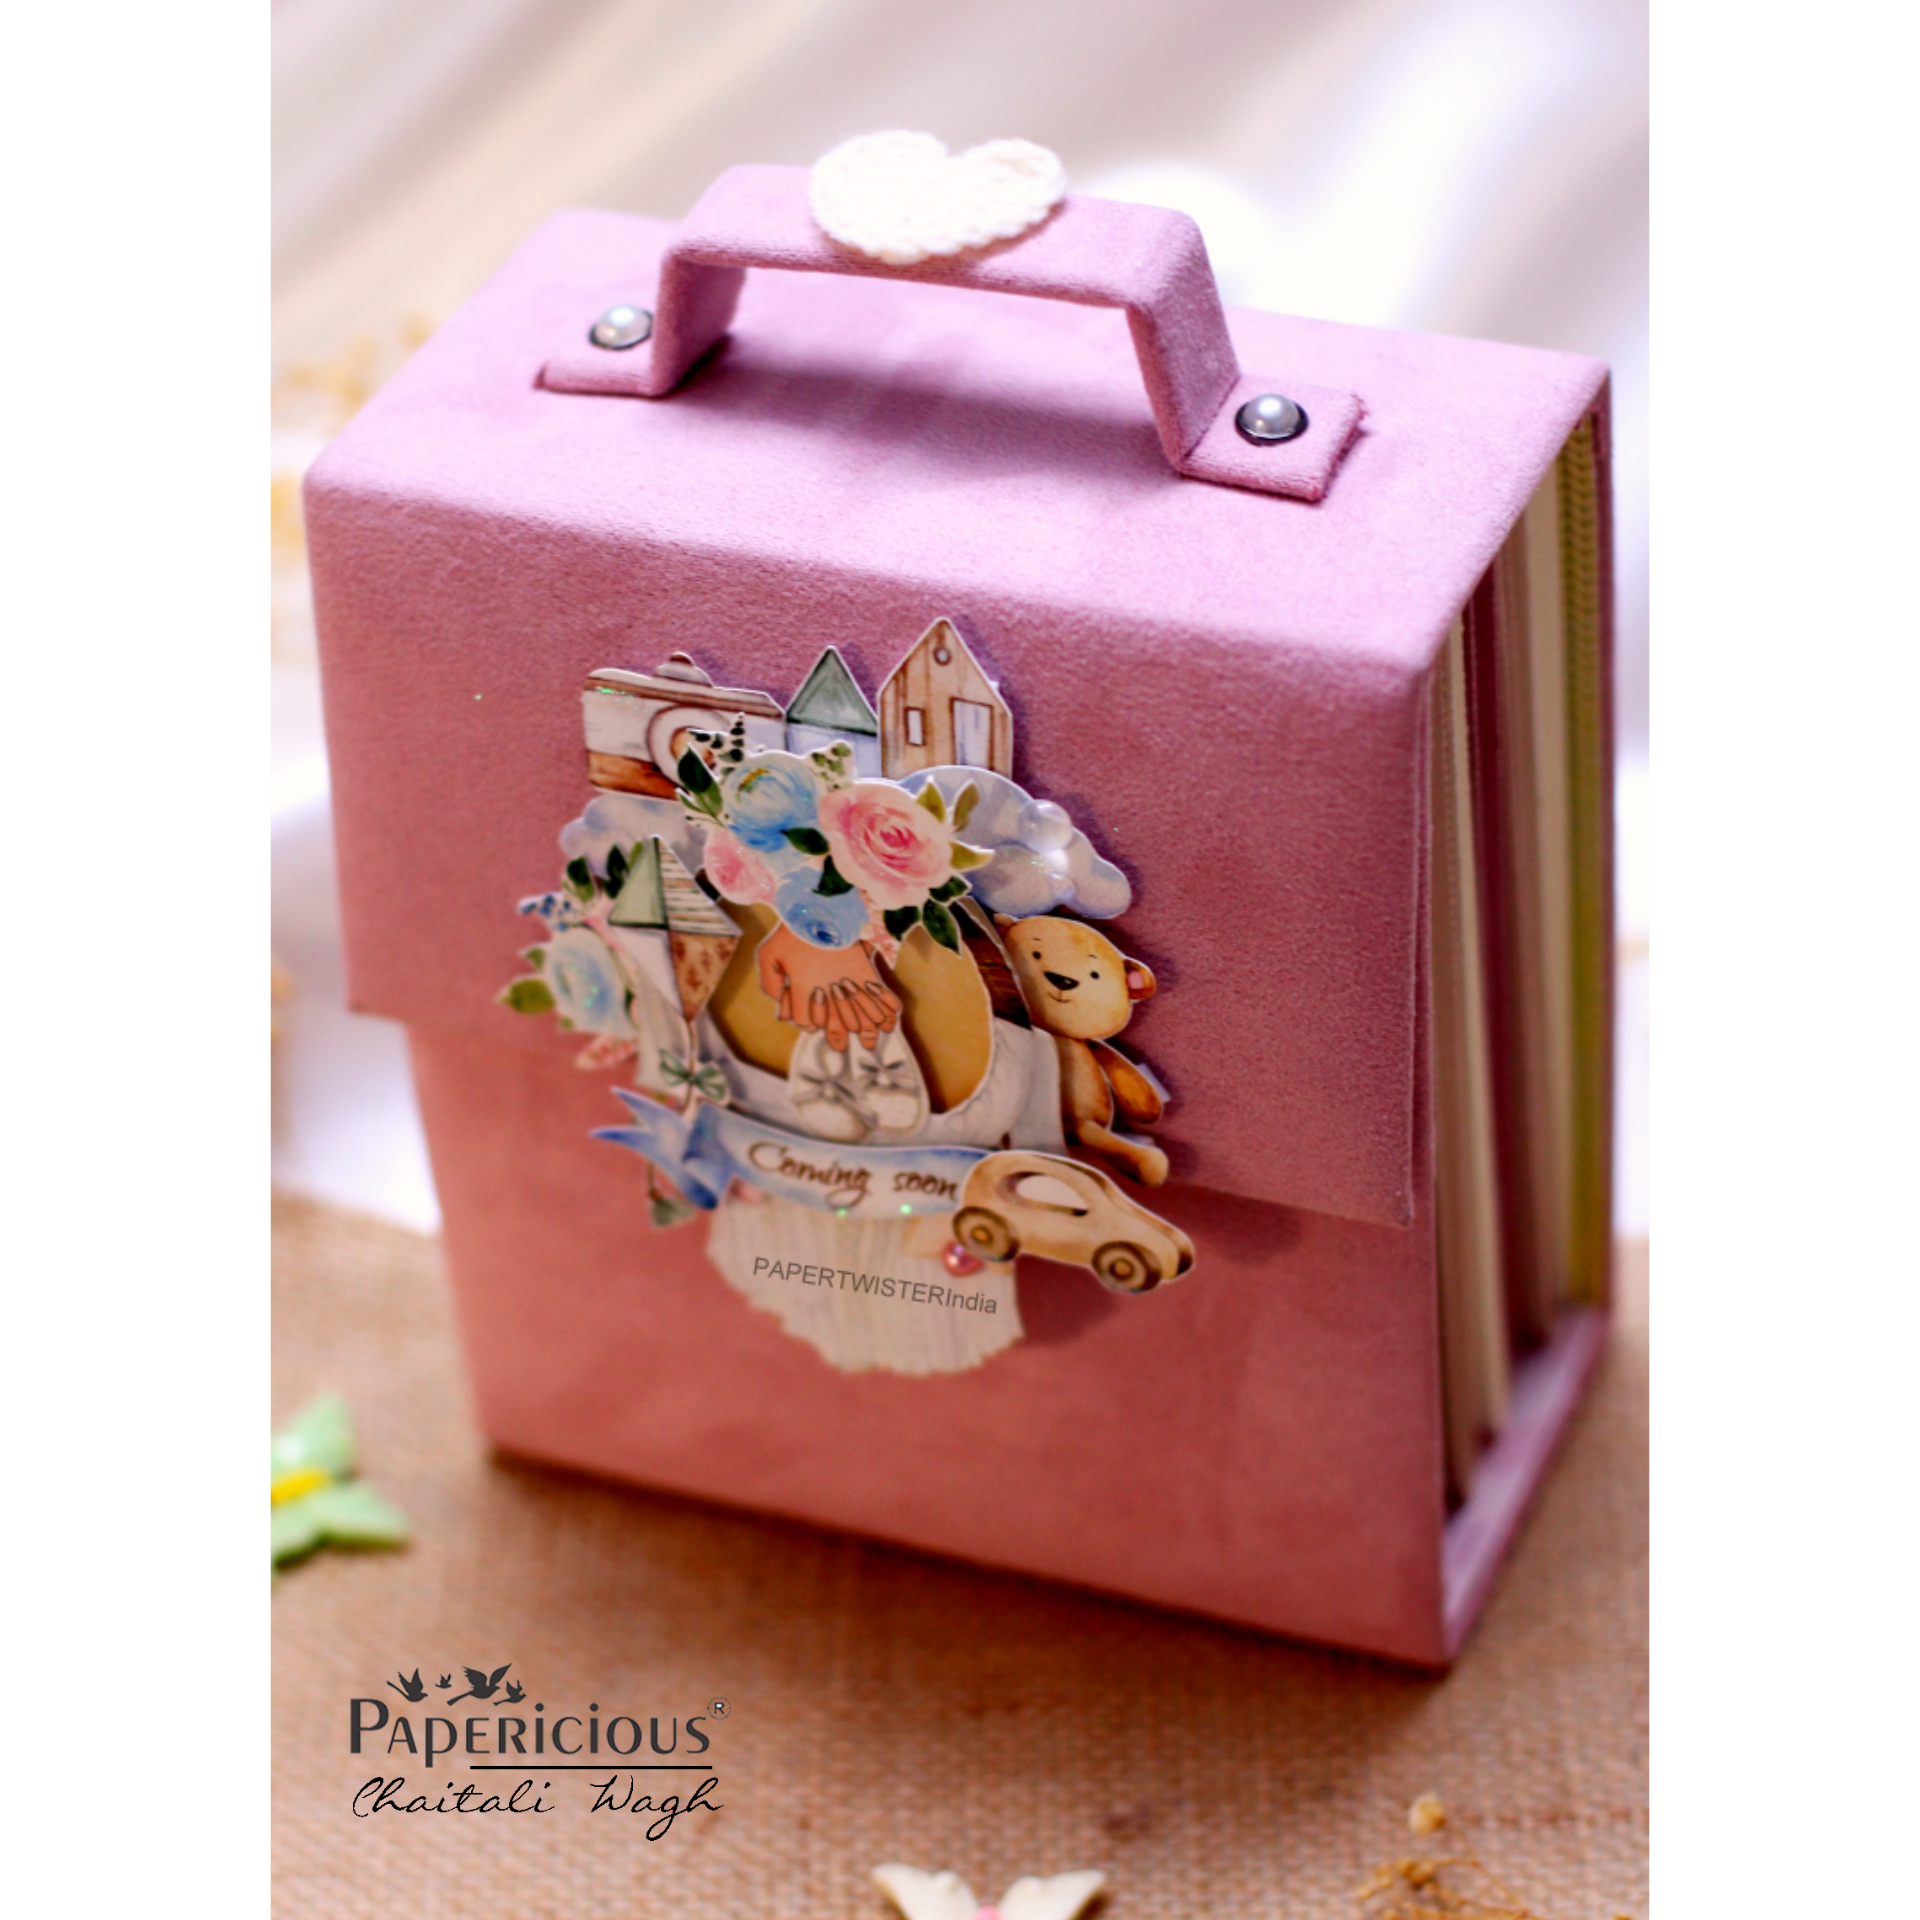
"Suitcase Accordion Album" ft Mama in the Making

11:33 am PAPERTWISTERIndia 0 Comments

Hello Everyone!

Hope you all are doing well! This is Chaitali, back with a bang!! sharing with you all the super cute "Suitcase Accordion Album."

 As we all know, the road to motherhood is one of the most eventful journey a woman can take! Each moment, day, week, month brings forth a blend of emotions that are extraordinary with their ups and downs! This beautiful suitcase album provides you space to create full of precious and fun experiences, as well as stay on track for things through your pregnancy in a joyful, creative and engaging manner! It includes the journey of nine months with all the little details from the 1st trimester to 3rd trimester. A beautiful keepsake that can be looked back upon to cherish!

Made using papericious mama in the making designer pattern papers, die-cut embellishment motif sheet and premium suede fabric. This papers are beautifully designed by Aastha Jain. She has covered every little detail in this paper pack which makes it a perfect paper pack for pregnancy album & journals!

This Suitcase Accordion Album has seven pages which includes seven different cards full of popups. It holds up to 40 pictures in it.

Now, let's see how it looks.☺


Isn't it pretty??❤️ I've done fabric binding for this suitcase using the rosewood premium suede fabric from papericious. The little detailed embellishment in the center is done using the die-cut embellishment motif sheet.

Now, let us see the insides of the album.
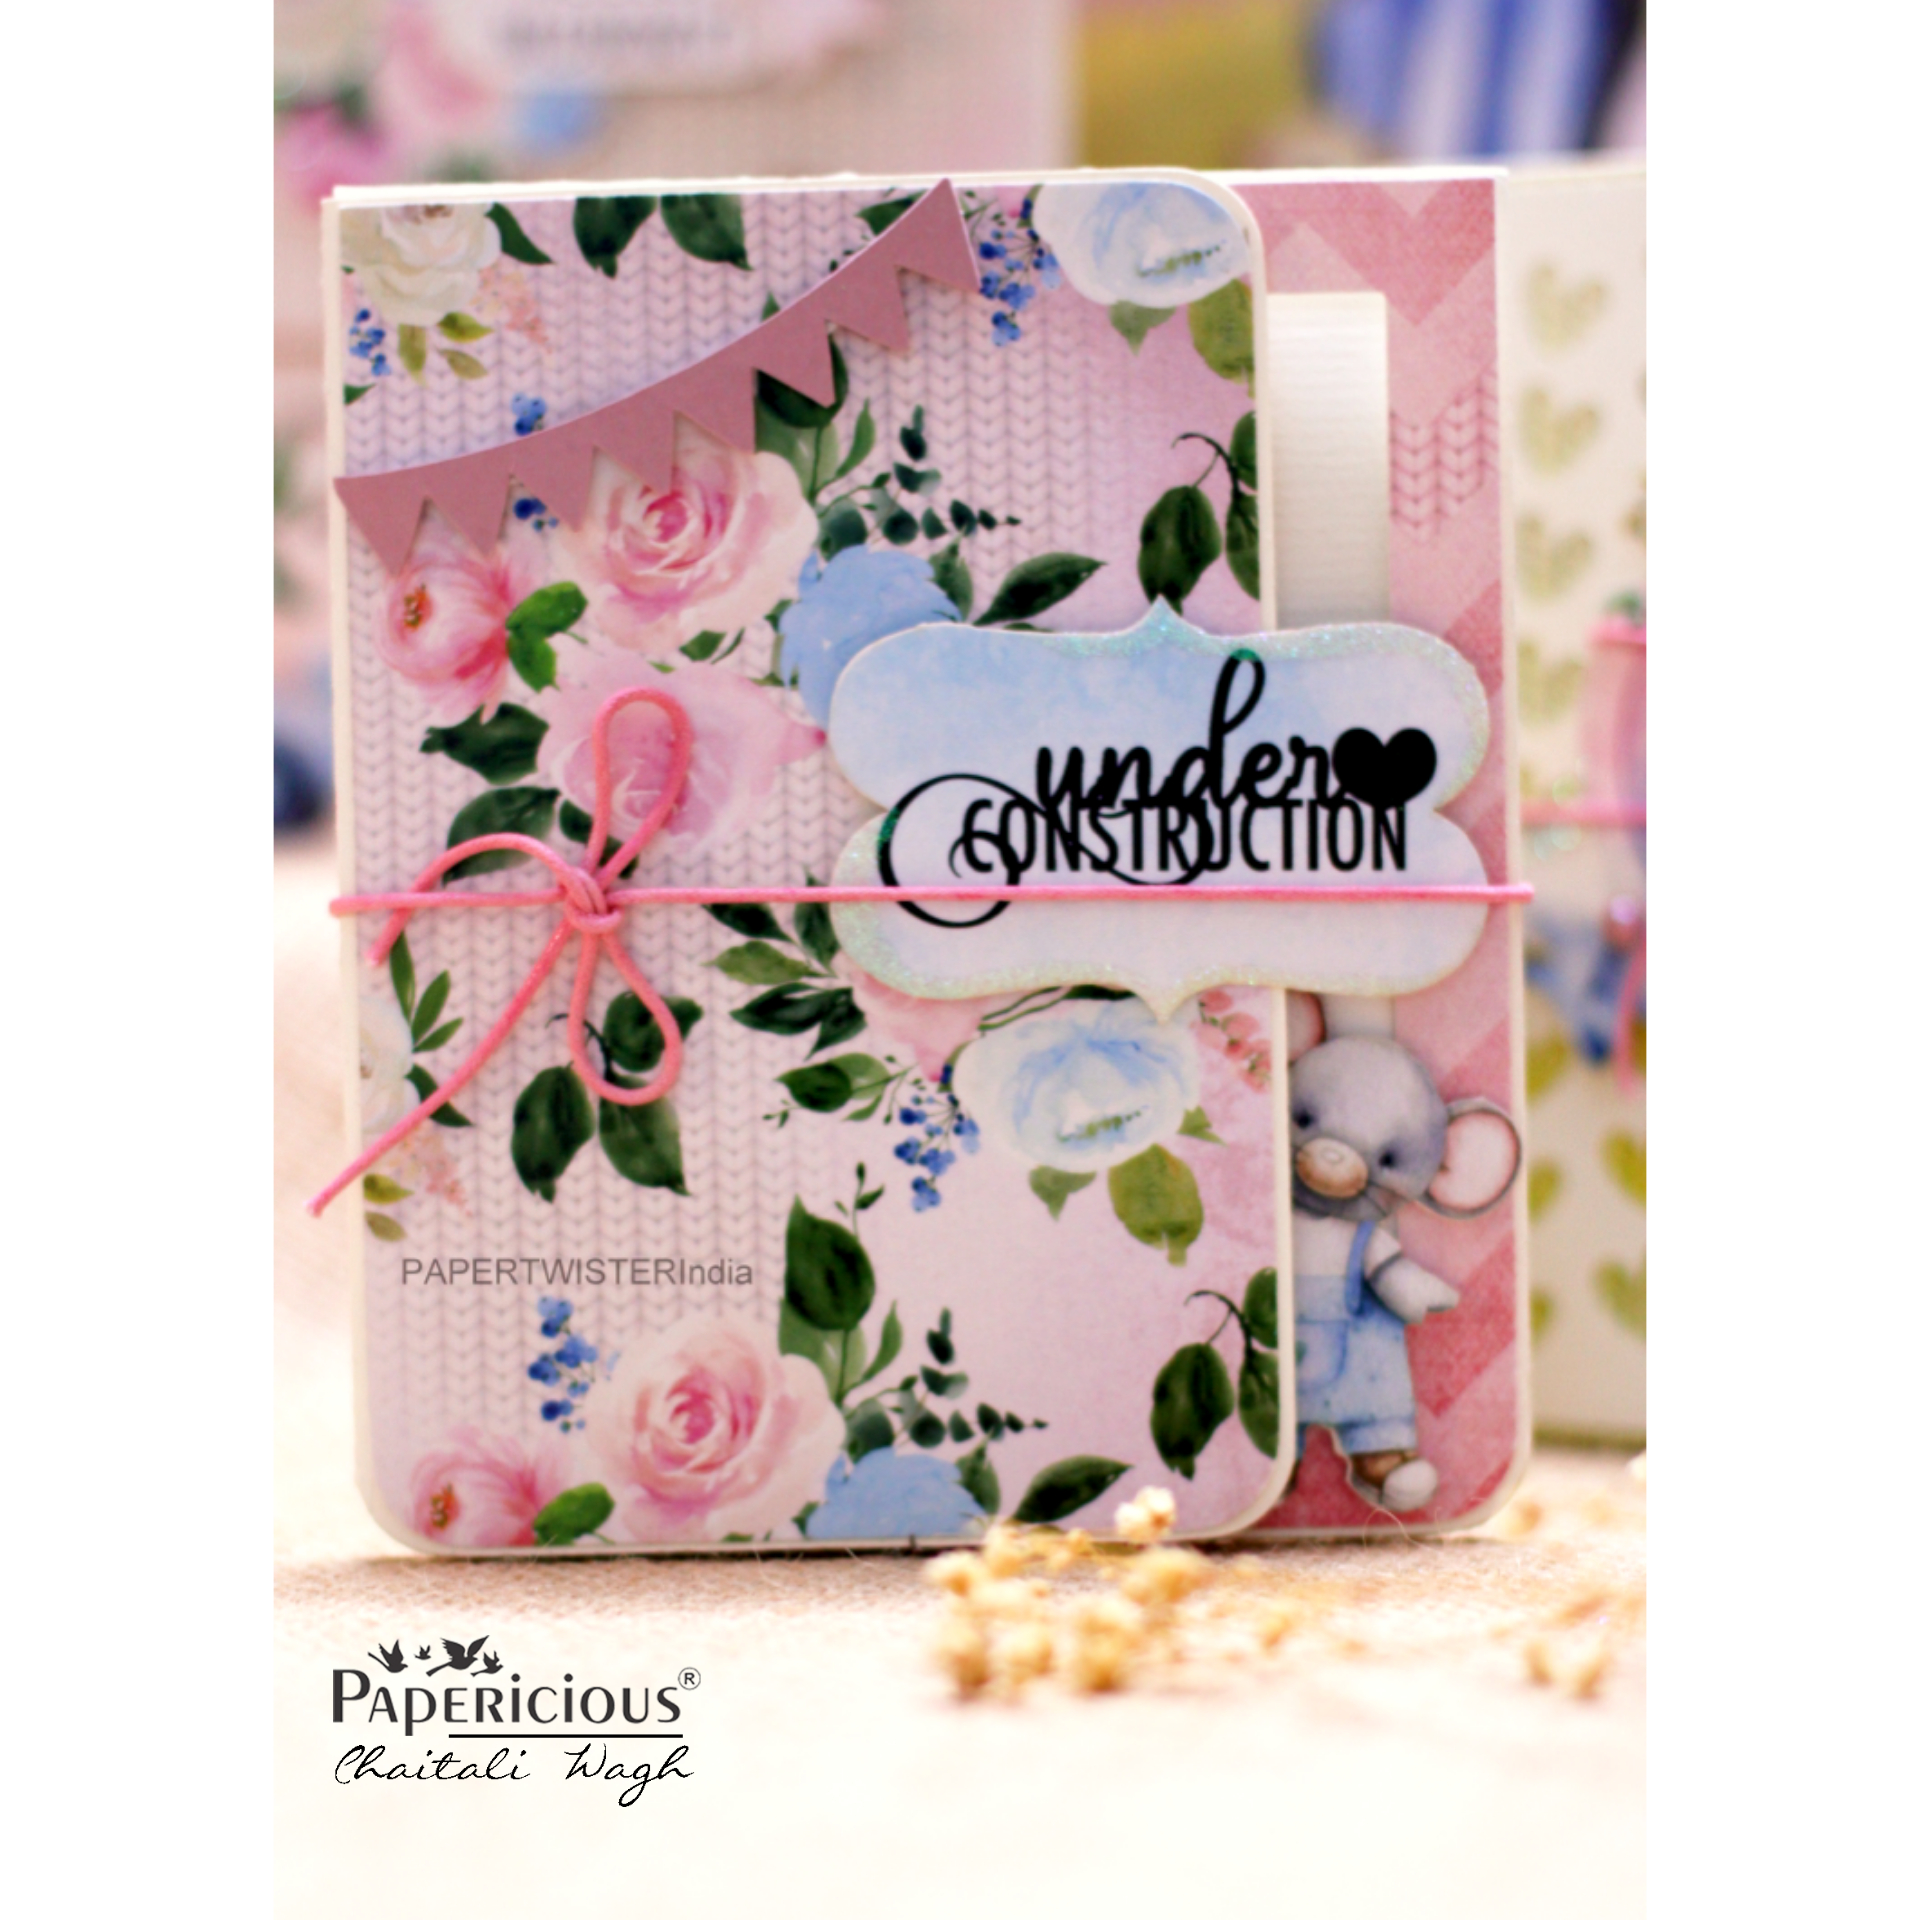
You can see seven accordion pages here. And each page has a card in it.

These were the seven cards. Now, lets see some of the beautiful popups from this album.

Gift this Beautiful Suitcase Accordion Alum to your loved ones and make them feel special all the more!❤ 
◆ Size:
L-6.5", W-4", H-8.5"

◆ Supplies:
4. Chipboard 2mm
5. Ivory, Rosewood pink, Beige, Silver mirror Card Stock.
5. Pearl Metal Brads
6. Cotton Chords
7. pink pearl crystals
8. water droplets crystals
9. Sparkling Dust
10. Acetate Sheet


I hope you all like it. Thanks for stopping by!❤


0 comments:

Envelope Box ft Foiled Essentials - Rose Quartz Paperpack

11:00 am Alisha's creation 0 Comments


Hello friends,

This is Alisha Grover, here today to share inspiration project using Papericious Rose Quartz- Golden Foiled Patterned Paper. I am absolutely in love with these Foiled Papers. These papers are just perfect for making Envelopes and Royal Wedding Cards.

I have made this Envelope box with some pretty flowers and a cute sentiment on it. I am absolutely loving how it has turned out that's the beauty of the paper.

Let's see how it looks :


Supplies used :


Hope you all like the project!!
Happy Crafting
Love & Hugs
Alisha Grover


0 comments:

Buddha Wall Frame

11:00 am Priti Kedia Meghani 0 Comments

 Hello friends,

Hope you are doing great and having a beautiful day! This is Priti here, and I am so thrilled to be back in the Papericious design team. I will be sharing some beautiful decoupage projects with the Mdf bases, Decoupage papers and Decoupage mediums from Papericious. 
Today, I have this wonderful piece of art on the blog - a Buddha wall frame, which is sure to bring a lot of positive vibes.

This is such an amazing base. I totally love the design and this hand carved frame. I am sure that it will look as beautiful with any design of decoupage paper.

I first cut the Buddha printed decoupage paper after drawing an outline of the frame. I made sure that the placement was right and I got the design exactly as I wanted. The best part is that these A4 size Papericious Decoupage Papers are of perfect size for this base. I primed the base with white gesso and then used the Papericious Decoupage Glue to paste the decoupage paper on the base. As a sealer, I have used the Papericious Gloss Varnish which gives this project such a nice finish.


The outer frame is coloured with Dark brown chalk paint and then I have dry brushed gold chalk paint and some art waxes to get his beautiful vintage look. 


Supplies Used:


I really enjoyed making this wall panel and I hope I have inspired you to create one for your home too. It's an easy and super quick diy project which you can make with minimal supplies. I would love to know if you liked this home decor piece. See you soon.

Love,
Priti


0 comments:

"Eid Mubarak Gift Hamper" ft Chestnut Dreams.

11:00 am PAPERTWISTERIndia 0 Comments

 Hello friends! 

Eid is just around the corner and we all are super excited for the celebrations! This is Chaitali, today sharing with you all the very beautiful "Eid Mubarak Gift Hamper." 

Made using Papericious Chestnut Dreams Foiled Essentials Paper Collection. I am absolutely in love with this Foiled Papers. They are just perfect for making festive hampers and wedding invites.

This Gift Hamper includes a Beautiful Box which has a Greeting Card in it, little "Eid Mubarak" Banner and some chocolates for your loved ones.

Let's see how it looks.😊


This Gift Box and Greeting Card has an intricate laser cut design in the front and the Eid Mubarak logo in the center made using Gold Mirror Acrylic. A combination of white, gold and blue shades creates a very unique look for the gift hamper and makes it a perfect hamper that will keep your guests in awe!
Gift Box
Banner

Greeting Card


 Papericious Chestnut Dreams Foiled Essentials Paper Collection. 

Gift this beautiful "Eid Mubarak" Gift Hamper to your loved ones and make them feel special all the more. Whether you want to give fruits, nuts and chocolates or even more precious "eiddi" you can use these strong and sturdy gift box hamper.

◆ Size:
Gift Box- 8×8×2.75 inch
Greeting Card- 6×6 inch
Banner- 2×4 inch

◆ Supplies:
1. Papericious Chestnut Dreams Foiled Essentials Paper Collection. 
2. Gold Mirror CS
3. White Metallic CS
4. Chipboard 1.5mm
5. Gold Mirror Acrylic 2mm
6. Satin Ribbon

I hope you all like it. Thanks for stopping by!


0 comments:

Set of Royal Wooden Wall Plate & Up-Cycled Lamp

10:52 am crafterstudio 2 Comments

 Hello Everyone, today I am on the Papericious blog to share with you a set of up-cycled bottle lamp and decoupage wall decor I created using amazing  Decoupage papers by Papericious.

I created the wall plate using amazing MDF bases which have smooth and perfect finish.This royal wall plate handcrafted to perfection will add warmth to any corner of your home.It goes well with modern/ethnic/boho decor.

SUPPLIES NEEDED

  • Round 8" decoupage base 
  • Decoupage Paper
  • Decoupage Glue
  • Varnish
  • Various shades of chalk paints
  • Scissors
  • Sanding Block
  • Drill Machine 
  • Empty wine bottle
  • Bulb holder and bulb
  • Electric wire
I started with a vision for making a wall plate which can be used as table decor as well.
 First I used the chalk paint " Sheep Skin" as base coat and then I used the Papericious decoupage glue for sticking the decoupage paper on the base. 
                                               
Further I sanded the extra paper off the MDF base and shaded the edges of the plate using coordinating colors.Finally I sealed my project with  Papericious Varnish
You aren’t going to believe how easy this is, there are minimal ingredients and steps and you really can’t mess this up. I am happy with the final result and enjoyed the work so much so that, I can foresee additional pieces in my future. This is a great beginner craft, even if you’ve never done anything creative before. This plate makes an  ideal gift for yourself or your loved ones during the festive season/house-warming/anniversary/wedding. As I said, if you are a beginner, you should try this project. You’ll love it and because there isn’t much too it, wrinkles are easy to avoid. I hope you like what I have created. 

For making lamp first I cleaned my bottle using alcohol swab to remove any stickiness. Then I drilled a hole in the bottle for inserting wire.     

Later this beautiful, up-cycled bottle was hand painted in white color. Then it was decorated with a decoupage technique, using this gorgeous,butterfly decoupage paper. I pasted the paper using Decoupage Glue .To add shabby chic, aged kind of look I distressed the bottle and added splashes of colors on it. Outside of the bottle is varnished for durability using Papericious Varnish . I  inserted wire and attached a bulb holder and I finished it off with a lamp shade on top. It creates unique, decorative centerpiece that brightens up your decor with this simple yet elegant country style accent.


I really enjoyed creating this lamp which makes a great gift as well. So, what are you waiting for? Pick up any empty wine bottle and decorate any space in your home or office with this beautiful bottle lamp.

SUPPLIES USED 

                                                                   Papericious Varnish.


2 comments: