Showing posts with label Papericious The Vintage Attire. Show all posts

Quick Layout with The Vintage Attire


Hello friends! 
Erum here today with the quick layout. I used on of the papers from The Vintage Attire Paper Pack. I also used a panel from Wooden Paper Pack.


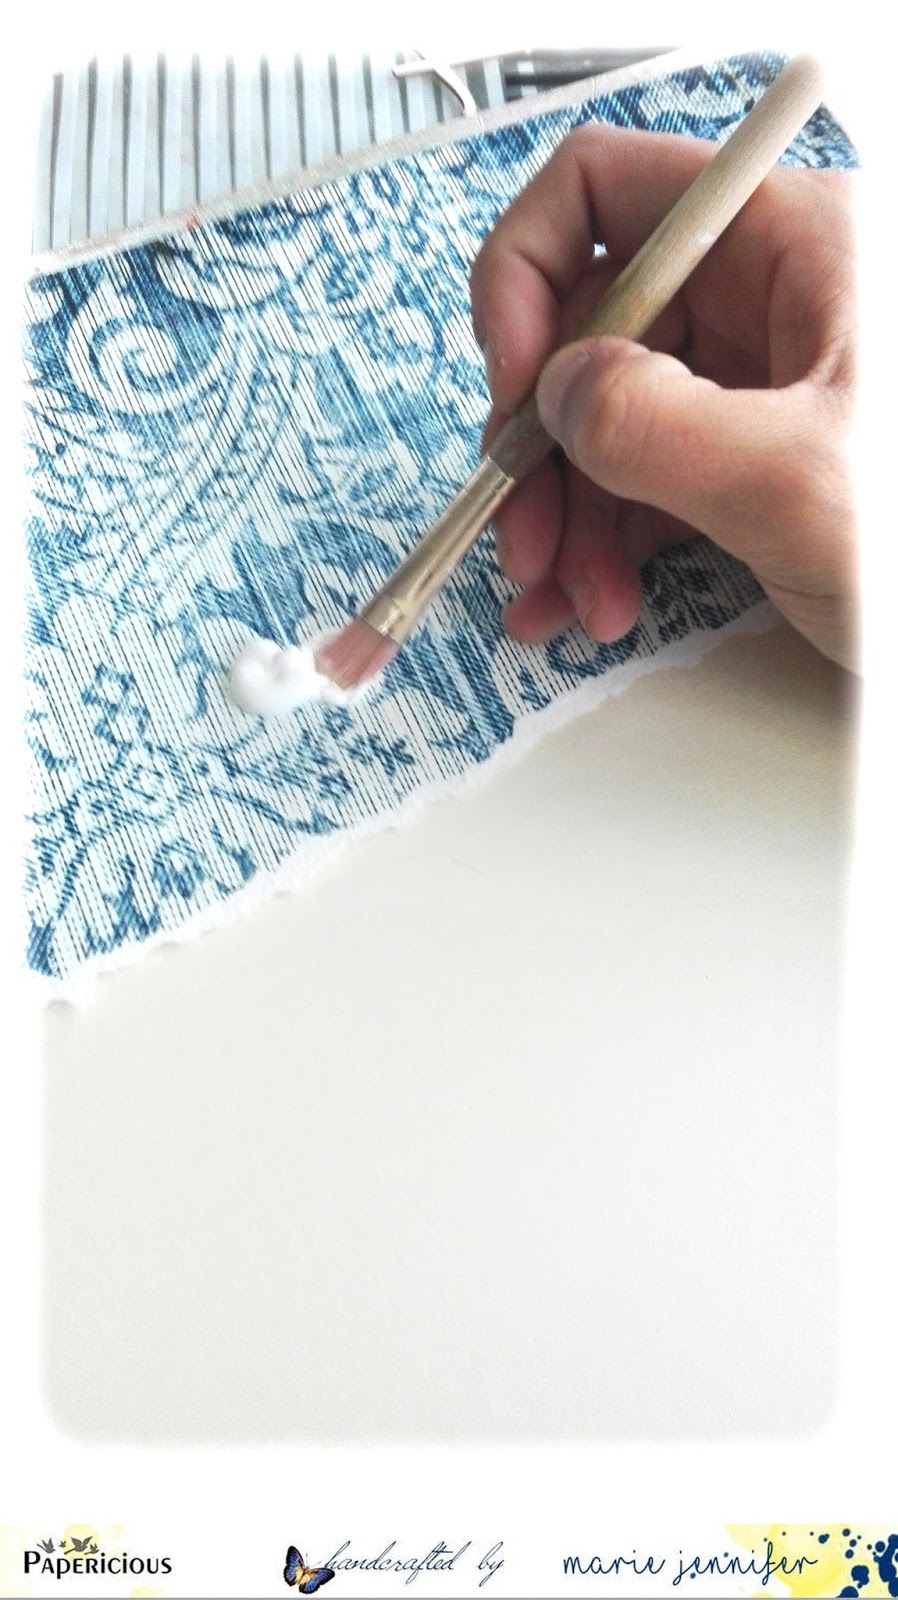
I started by making by base, which I did with the help of a stencil and gesso. I actually dont have texture paste, so what I do is add baby powder to gesso to make it more "texture-y".


Next I stamped several florals, watercoloured them roughly and fussy cut them out.
Then I cut a panel from the Wooden Paper Pack and popped it onto the base.

On top of the panel, I popped up the photo and arranged the fussy cut flowers. Then I added some white chippis as embellishment. They matched flawlessly and looked so good.

After I was done adhering all the elements, I added tons of white and black paint splatters and then popped up the butterflies and the die cut sentiment.

This layout came together so fast. The only steps that took a bit of time for letting the gesso air dry and then fussy cutting the images.
I hope you like the layout. If you were wondering, the photo is of me and my nephew. We were cleaning out roof, hence the messy hair, and snapped a a couple of photos.
That is all from my side.
Thank you for stopping by♥


Something for a girl and for a boy

Hello.
Today I`d like to how you two projects. First is a very girly card, with lots of flowers and a pony.


To made this card I used Ephemera Premium paper pack, it`s delicate and lovely.


The second project is a gift set for a little man. I packed a book with a paper from The Vintage Attire premium collection. It`s a book about minerals, this paper is a perfect match, look at this gorgeous patterns.


I also made two pillow boxes with two different papers from  The Vintage Attire collection. 
This paper is heavy, a perfect material for boxes.


The whole set looks like this:


Papericous products used:
 Ephemera Premium paper pack
The Vintage Attire premium collection

You can find the information about all our retailers all over India and abroad HERE.

Thank you for watching :)
Best wishes,

Papericious November Challenge - Falling In Love With Fall

Hello friends,
 This is Nupur here from Nupur Creatives & I am bringing you a new challenge for the month of November.  This month the theme is :

 Falling In Love With Fall

You can make a card / project on the theme of Fall or Love or both.


{Papericious Challenge #7 Guidelines}
  • You can create any project - Cards, Layouts, Albums, Altered items, 3D projects, Home Decor etc.
  • The challenge theme is "Falling In Love With Fall". You can make a card / project on the theme of Fall or Love or both.
  • The last date for submission of your projects is 9th December 2016 at 11:59pm IST.
  • Please go through the General Guidelines HERE before you link up your project. Any project not following the rules, will be disqualified and it will not be eligible for the prizes.

Now, what's a challenge without prizes, right?! Papericious will be giving away TWO prizes every month -
  • The DT will be selecting a Merit Winner at the end of every challenge who will stand a chance to win a gift voucher worth INR 500 from the Papericious store.
  • We will be also be having a Random Winner from all the entries who enter their projects every month to win a Papericious 6 X 6" Pattern Paper Pad

Everyone's got a equal chance here so whether you are a novice or an experienced crafter, all are welcome to play along our challenges :)

And as always, we have some gorgeous inspiration lined up for you. Here's a look at the creations :

DIANA
She has made a beautiful card for November challenge


NUPUR
20161110_213348


Tutorial page "Together" by niniscrap

Hello everyone,

I am back on the blog for you are my new page and its tutorial
A stepper easy to achieve with a single printed sheet and a bazzil. Full effect.


Let's go:

Step 1:
- Take a sheet bazzil you find in the city pack at the end of the article, as well as a printed paper.
- Torn a portion of the printed sheet and the paste at the top of bazzil


Step 2 and 3
- Apply gesso on the entire surface.
- Coming up with your stencil and modeling paste, on the corner of your page


Step 4 and 5
- We will process the embellishments of the page ...
Placed a gauze on your page.
- Cut the rest of your printed paper matted to your photo.
Crumpled this one.
Stuck your photo


step 6
- Place your embellishments, here you have flowers and chipboard. and sewing thread to give texture to your page.


step 7

- It's time for the media. Here I started with gold acrylic, diluted with water and pure.
- I also colorized some flowers with my acrylic


step 8
- We will go to the blue ink out the color of the printed paper.
Apply here and there do not forget a few drops on EVERY side embellishments


step 9
- We now placed sequins and some beads


Your page is completed


used collection


Feel free to leave me a comment so I can come your comment sheaves
big kiss


Vintage Pocket Letter with Irit


Hello my dear crafty friends and welcome to my Papericious new post.
After a whole Wedding month I was in this Steampunk trendy mood and decided to make a steampunk Pocket letter.
Pocket Letters are very trendy. You use this Baseball/Football cards plastic pockets and make 9 cards that are close to ATC size. Usually this is folded after it's done and you can mail it to the friend.
You also can add some small crafty supplies inside, but I didn't do it this time as this is not for shipping.
One great thing about making this project was to use the collection cover and to cut the cards, almost all of them, from the collection cover only.
Pretty much recycling thing to do.
So on the top you can see all 9 cards that all were made with the same stitched rectangle die as the background using one single sheet of Papericious Pretty Basics cardstock.
Then the top pieces were die cut with the smaller rectangle die mostly from The Vintage Attire cover and glued over the basic cards.
Each card was embellished with die cuts, chipboards, twine, sequins and yet they all should be flat as this " letter"  is going to be folded after all.
I made the central card as the letter title and this is all about a Celebration!
So two cards around are with dancing people die cuts  and they sure celebrate something.
Chipboard words were added over some cards and I added a lot of Papericious sequins on most of the cards using glaze.


An now the next three cards here:

Same paper collection, but a bit different in style. I added painted chipboards, gears die cuts (all die cuts are made from the same Papericious paper collection) and made die cut walls on some cards.


And here are a couple more of cards- colors are brighter and I die cut stars and added some Papericious twine over them.


I know that this kind of paper crafting is new to some of the blog readers.
But you can Google this Pocket Letter thing and to see that it's just fun to make them, to ship them and to get them.
Go for it! Step out of your comfort zone! Crafting can be different and still fun!

Papericious product used:

Pretty Basics collection
The Vintage Attire collection
Sequins
Twine

All these products available at:


www.lulupu.com

www.thecraftshop.in

www.craftadda.com

www.imaginationsonline.com

Anantha Stationery

www.krafterscart.in


Nirmal Stationers, Delhi