'True Love Stories' ft. Aurora

11:30 pm Nd’s creation 0 Comments

Hello friends
Nandini here, I am back with a beautiful inspiration using the newly released paperpack "AURORA" from Papericious. Each paper from this collection is unique in design with its pastel colour scheme and delightful florals.
Checkout the full process video
Some more pictures:
Material Used
Hope you like the project.
Love & Hugs
Nandini Ramchandani


0 comments:

Hamper Box ft. Imperfectly Perfect Paperpack and Die Cut Motif Bundle

11:00 am Alisha's creation 0 Comments


 Hello everyone,

Hope you are doing good and ready for a wonderful weekend! This is Alisha here, and I am so excited to share another beautiful inspiration with you using the Imperfectly Perfect Paperpack and Imperfectly Perfect Die Cut Motif Bundle from Papericious. Each paper from this collection is unique in designs, perfectly fit for any masculine project.

One day is not enough to honour how special is a brother/father because he's amazing everyday of the year. I had made this gift hamper using beautiful collection by papericious. It can be used in any occasion to celebrate or offer as return gifts to your friends/cousins.

Let's see how it looks :


Supplies Used :

Imperfectly Perfect Paperpack


Imperfectly Perfect Die Cut Motif Bundle


Hope you all like the project!!

Love & Hugs

Alisha Grover


0 comments:

Easy MDF Coasters

5:04 pm Prackriti Creations 0 Comments

Hi Everyone,

Let's come out of this fear of using resin. I have come up with simple and easy project of creating Coasters using MDF Base & Resin. But before that we need to do some preparations and grab some art material that's required.

Preparations Required

  1. Prepare your workstation - I use a flat Lay water resistant background which can be easily wiped off.
  2. Gloves - Always wear gloves while working with resin . I prefer Nitrile gloves when handling resin . You can also use surgical gloves . Never do any of your resin projects with bare hands, as it can cause serious skin infections.
  3. Respirator- Always use a respirator while working with the resin specially when you blow torch over it.
  4. Plastic/Silicon cups & popsicle sticks - You need some measuring cups and popsicle sticks to pour your resin into. You can also use disposable cups and wooden popsicle sticks.
  5. Weighing scale  Always measure your resin in the proportions mentioned on the resin bottles. Never mix your resin by approximation as it will lead to failure of your project. Try to be as exact as you can with Resin & Hardener ratio.
  6. Blow Torch - You need a blow torch to get rid of the bubbles in the resin.

Art Supplies Required

  1. Resin Part A and Part B
  2. Deco paper
  3. MDF Coaster Bases
  4. Glue

Let's start with our coasters. First, with the help of scissors, cut the deco paper as per the size of MDF coaster base. I have taken Papericious deco paper & MDF coaster bases of 4" diameter.

Then, I used soft acrylic glue to stick the deco paper on the MDF base and let it dry for 10 mins.

In the meantime, I mixed papericious resin part A:B in the ratio 20:10 grams (as mentioned on the bottle) in a plastic cup using a popsicle stick for about 10 minutes.  Slowly moving the popsicle stick for mixing to avoid bubbles in the resin. After mixing the resin I leave the resin for 5-7 minutes so the bubbles in the resin settle themselves. Once it's done, I applied a thin layer of resin on the coasters using a popsicle stick and let it dry for minimum of 12 hours. Once dried, I Applied another thin layer of resin and again let it dry for another 12 hours.

Tadaa your coasters are ready.!!! 


All art supplies used in this project are from Papericious. Will be coming up with more super easy projects using Resin & Alcohol inks. Till then try this project and share on your social media accounts by tagging me & using my hashtag #prackriticreations.

Looking forward to your projects :)


Keep growing & keep glowing ;)
Lots of Love
Prackriti Siingh
IG: @prackriticreations

0 comments:

Mixed Media art on Glass

9:49 am Mayank Arthub 0 Comments


I have  always seen you working hard and selflessly for us. You have always inspired me to be like Dad!

The only person who would wear a slipper to gift her a Jimmy Choo is her father''

Hi everyone! Hope the week is going great...

Today on the Papericious blog, I bring to you another father's day project, but this time not a card, but a layout. This is no ordinary one, but is based on a plexiglass, interesting right? This layout features the newly launched (imperfectly perfect ) paper pack.

This paper pack has patterns, elements and designs perfect for masculine projects. It also coordinates with various other products in the same theme to go along with it.

Let me show you its construction here in;


  So to start with, I used a stencil and used texture paste directly over the glass. Then, I layered the paper from the IMPERFECTLY PERFECT paper pack from papericious for the base.

 Following that, I added dimension using some chippies and the frames.

 Towards the bottom left, I created the same vintage rustic effect and embellished with flowers and ephemera pieces and sentiment.


For the central part, I used the images along with the mat layers and added additional layerings to 
pop-up the layout .


Then I simply attached the florals and other embellishment pieces and paint splatters to finish the distressed look. I also added a few tags and twines here and there to create an off centered interface...


I hope this mixed media layout inspired you all to create a something magical...
You still have time to gift him a beautiful memory and show him you care!
Don't forget to comment and check our social medias for more inspirations...
Thank you for stopping by..

See you all soon

Chipboard 

0 comments:

Pop up box

11:03 pm Rustic Designs by Hemali Shah 1 Comments

 Hello crafty souls.. This is Hemali Shah.  Today I am here to share a beautiful and super adorable pop up box feat Moonlight Bella. 


I have made this super adorable pop up box using Moonlight Bella paper pack and some chipboard frames and 3D chipboard carriage from papericious.  

Have a glimpse on some close ups. 


Would you like to check what's inside the box??

Check out the video below to see what's inside the box.. 


I hope you all liked it. Shower some love by commenting below.

Thank you for stopping by.

Keep crafting and stay healthy. 

Love 

Hemali Shah 


1 comments:

IMPERFECTLY PERFECT CARDS

10:19 pm Mayank Arthub 0 Comments


The heart of a father is the nature's masterpiece...

Hi everyone! Hope the week is going great...

Today on the Papericious blog, I bring to you some masculine father's day cards, feat. the newly launched (Imperfectly perfect) paper pack.


This paper pack has patterns, elements and designs perfect for masculine projects. It also coordinates with various other products in the same theme to go along with it.

Let me show you my creations one by one


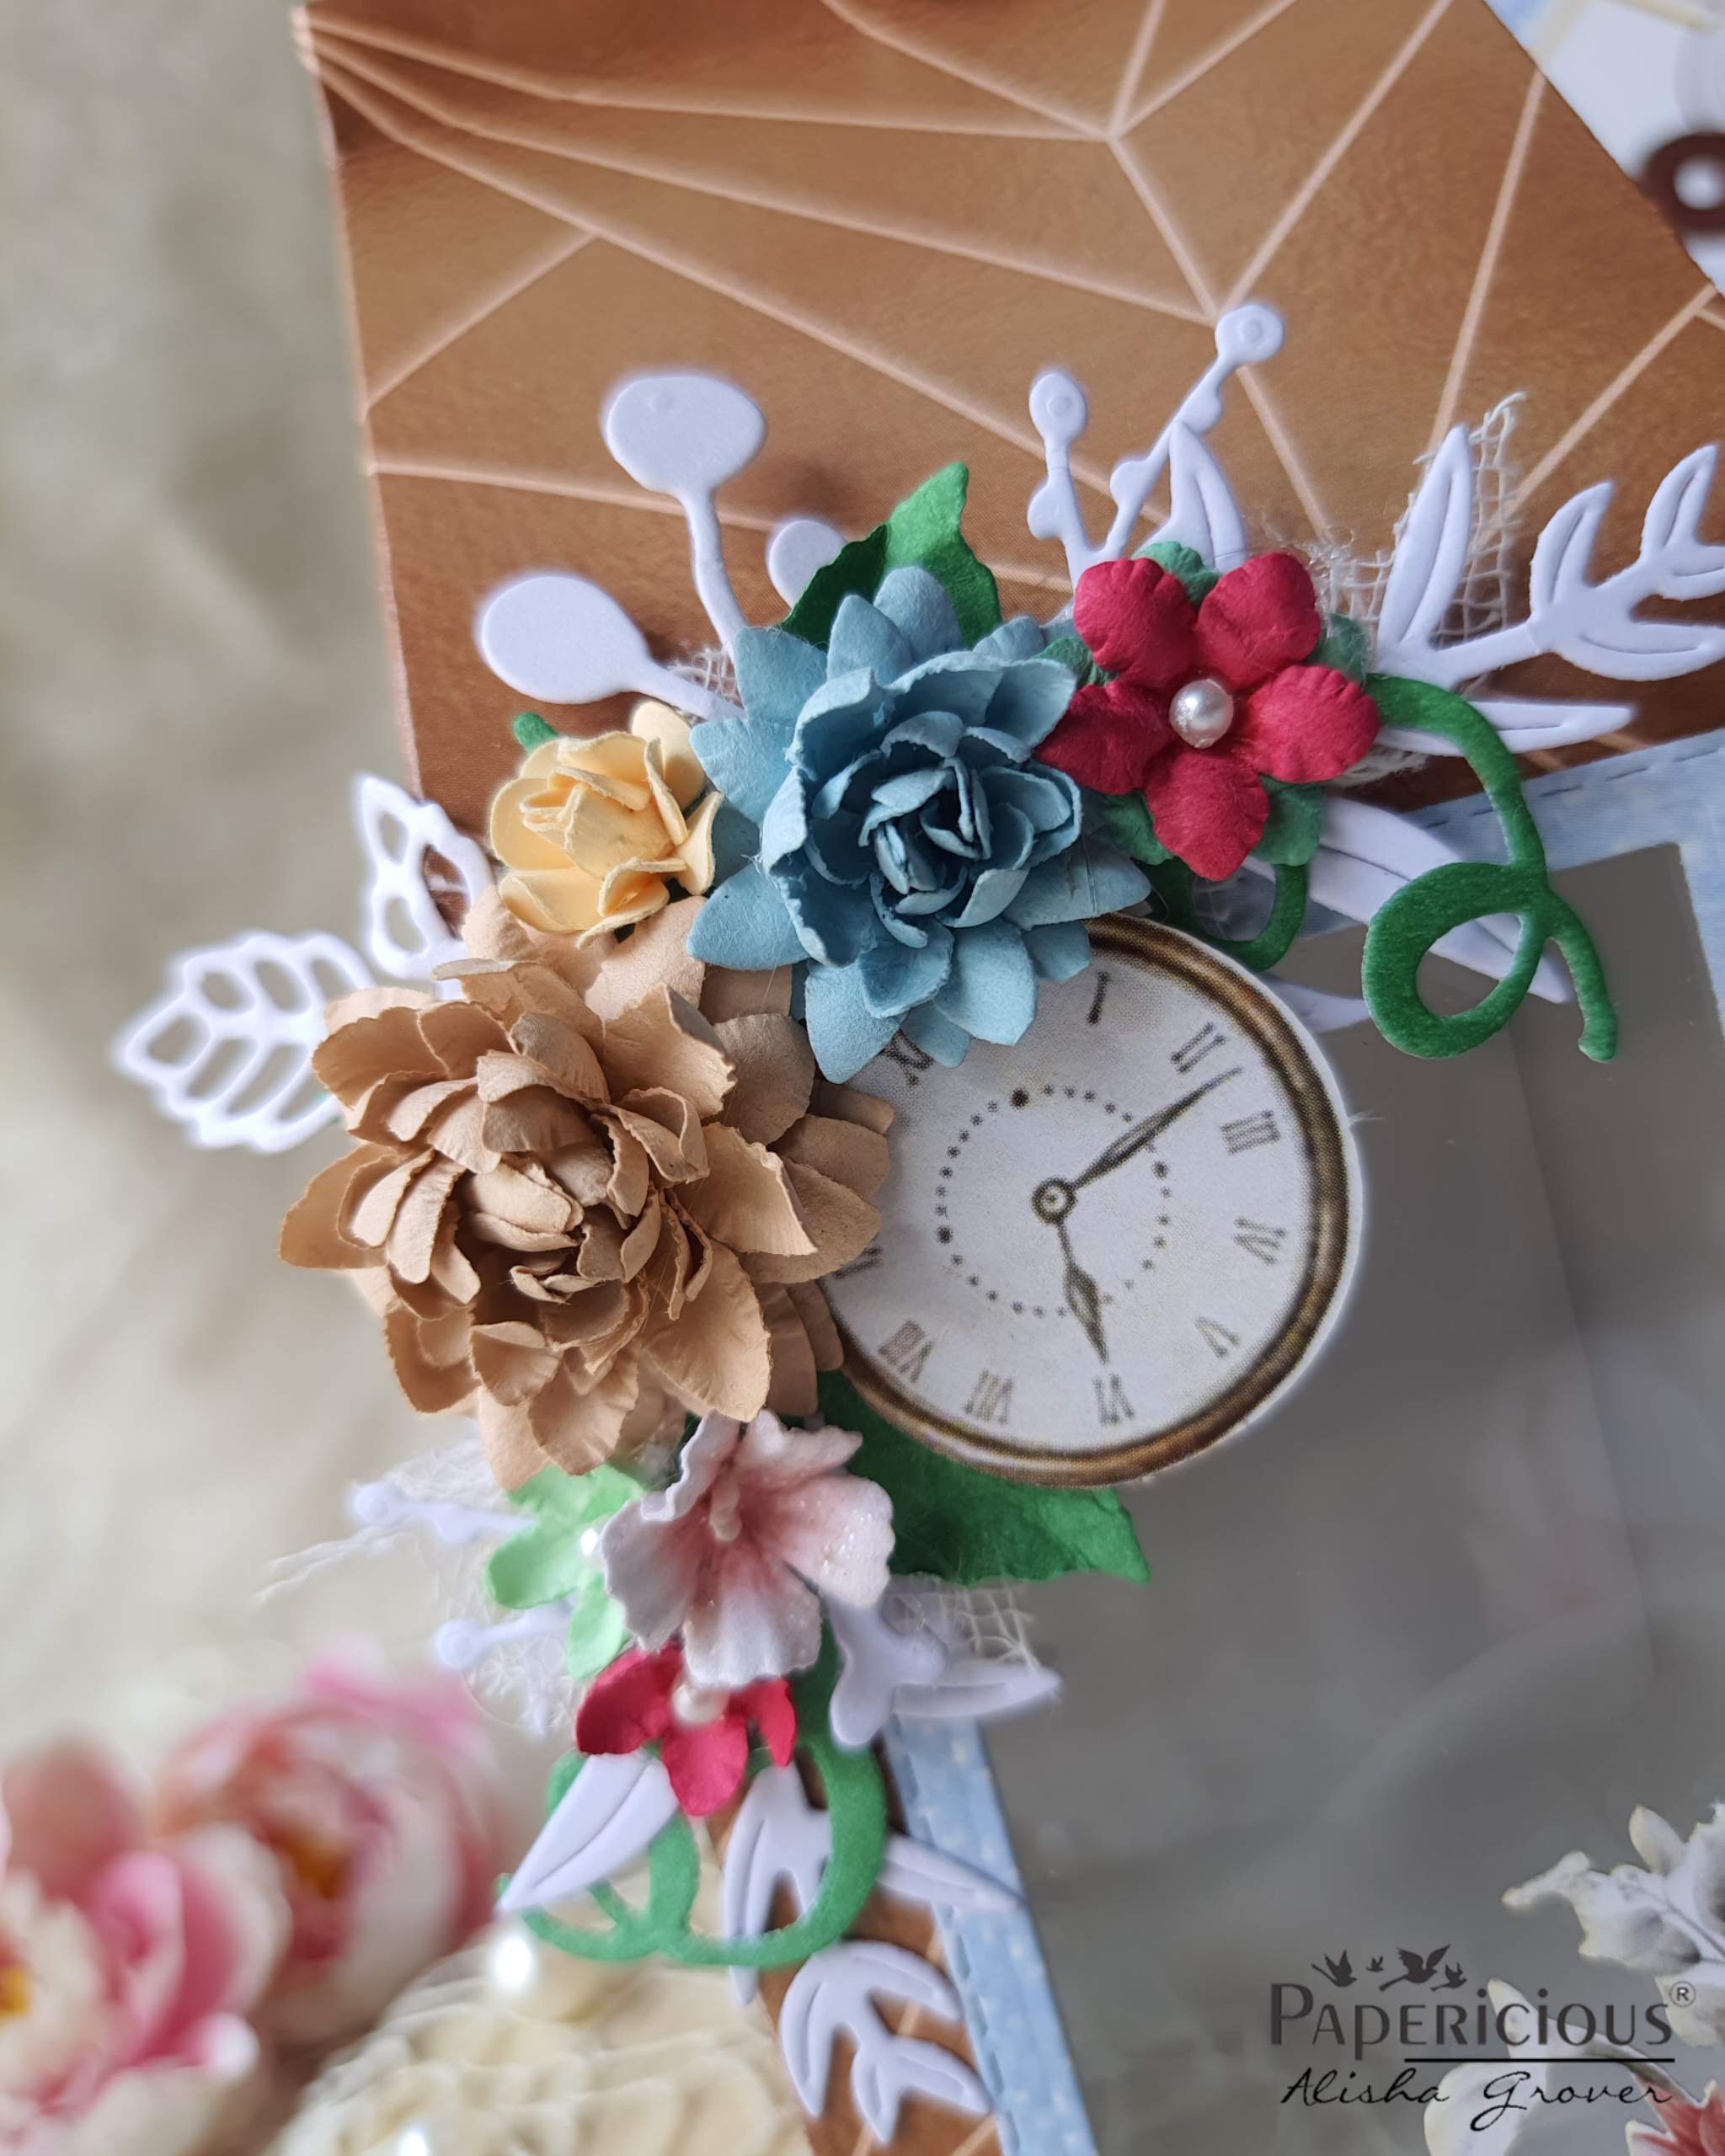
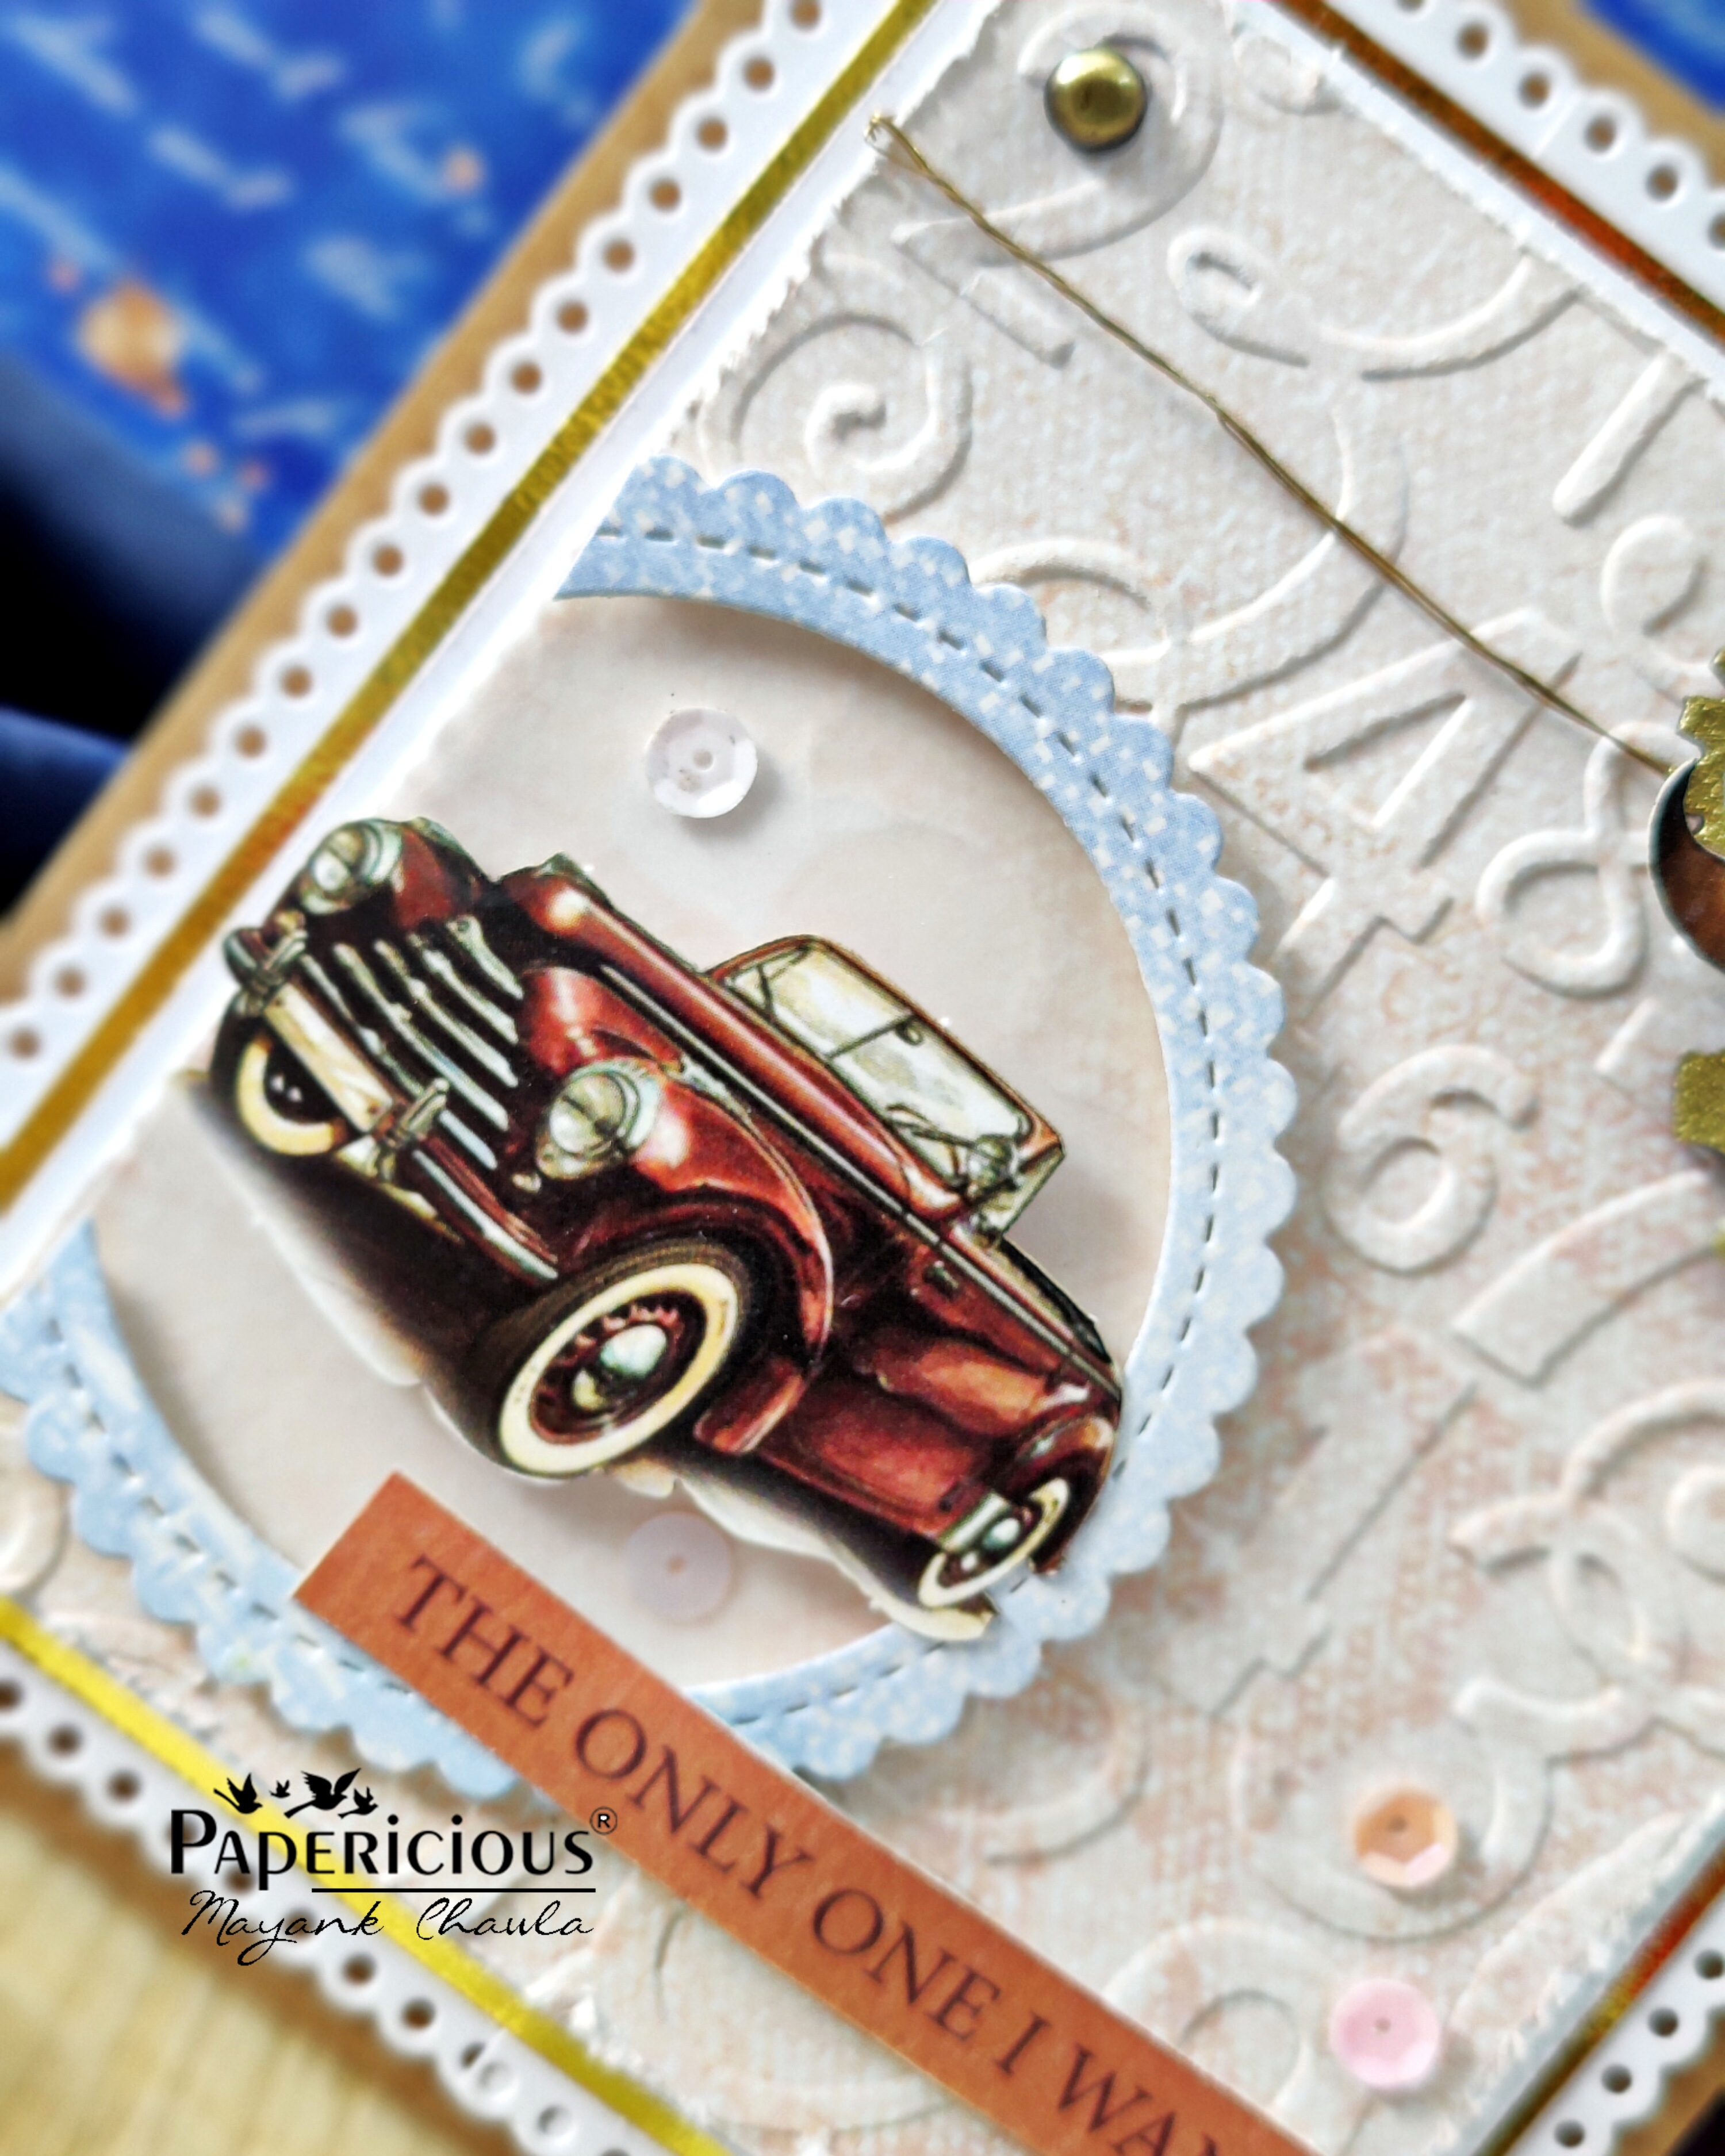
 This card measures 4-6 inches.

To start with, I used the images of a car and some gear chippies and layered on some moustache element over it.

Layering atop an embossed card front, I used a scalloped circle die to cut a window and enhance the layers using gold mirror cardstock then some detailed scalloped frame over card base.


For the sentiment, I chose the THE ONLY ONE I WANT  from the paper pack/element sheet.

And there is the quick card done!


This card measures 4-6 inches and is an interactive shaker card!

To start with, I created the shaker using various layers of paper and foam tape stacks. Then I added the gold and blue edges to the shaker. 

For the imagery, I used the images of a beer glasses and finished it off with the sentiment, I chose brads and same layers as on previous card.


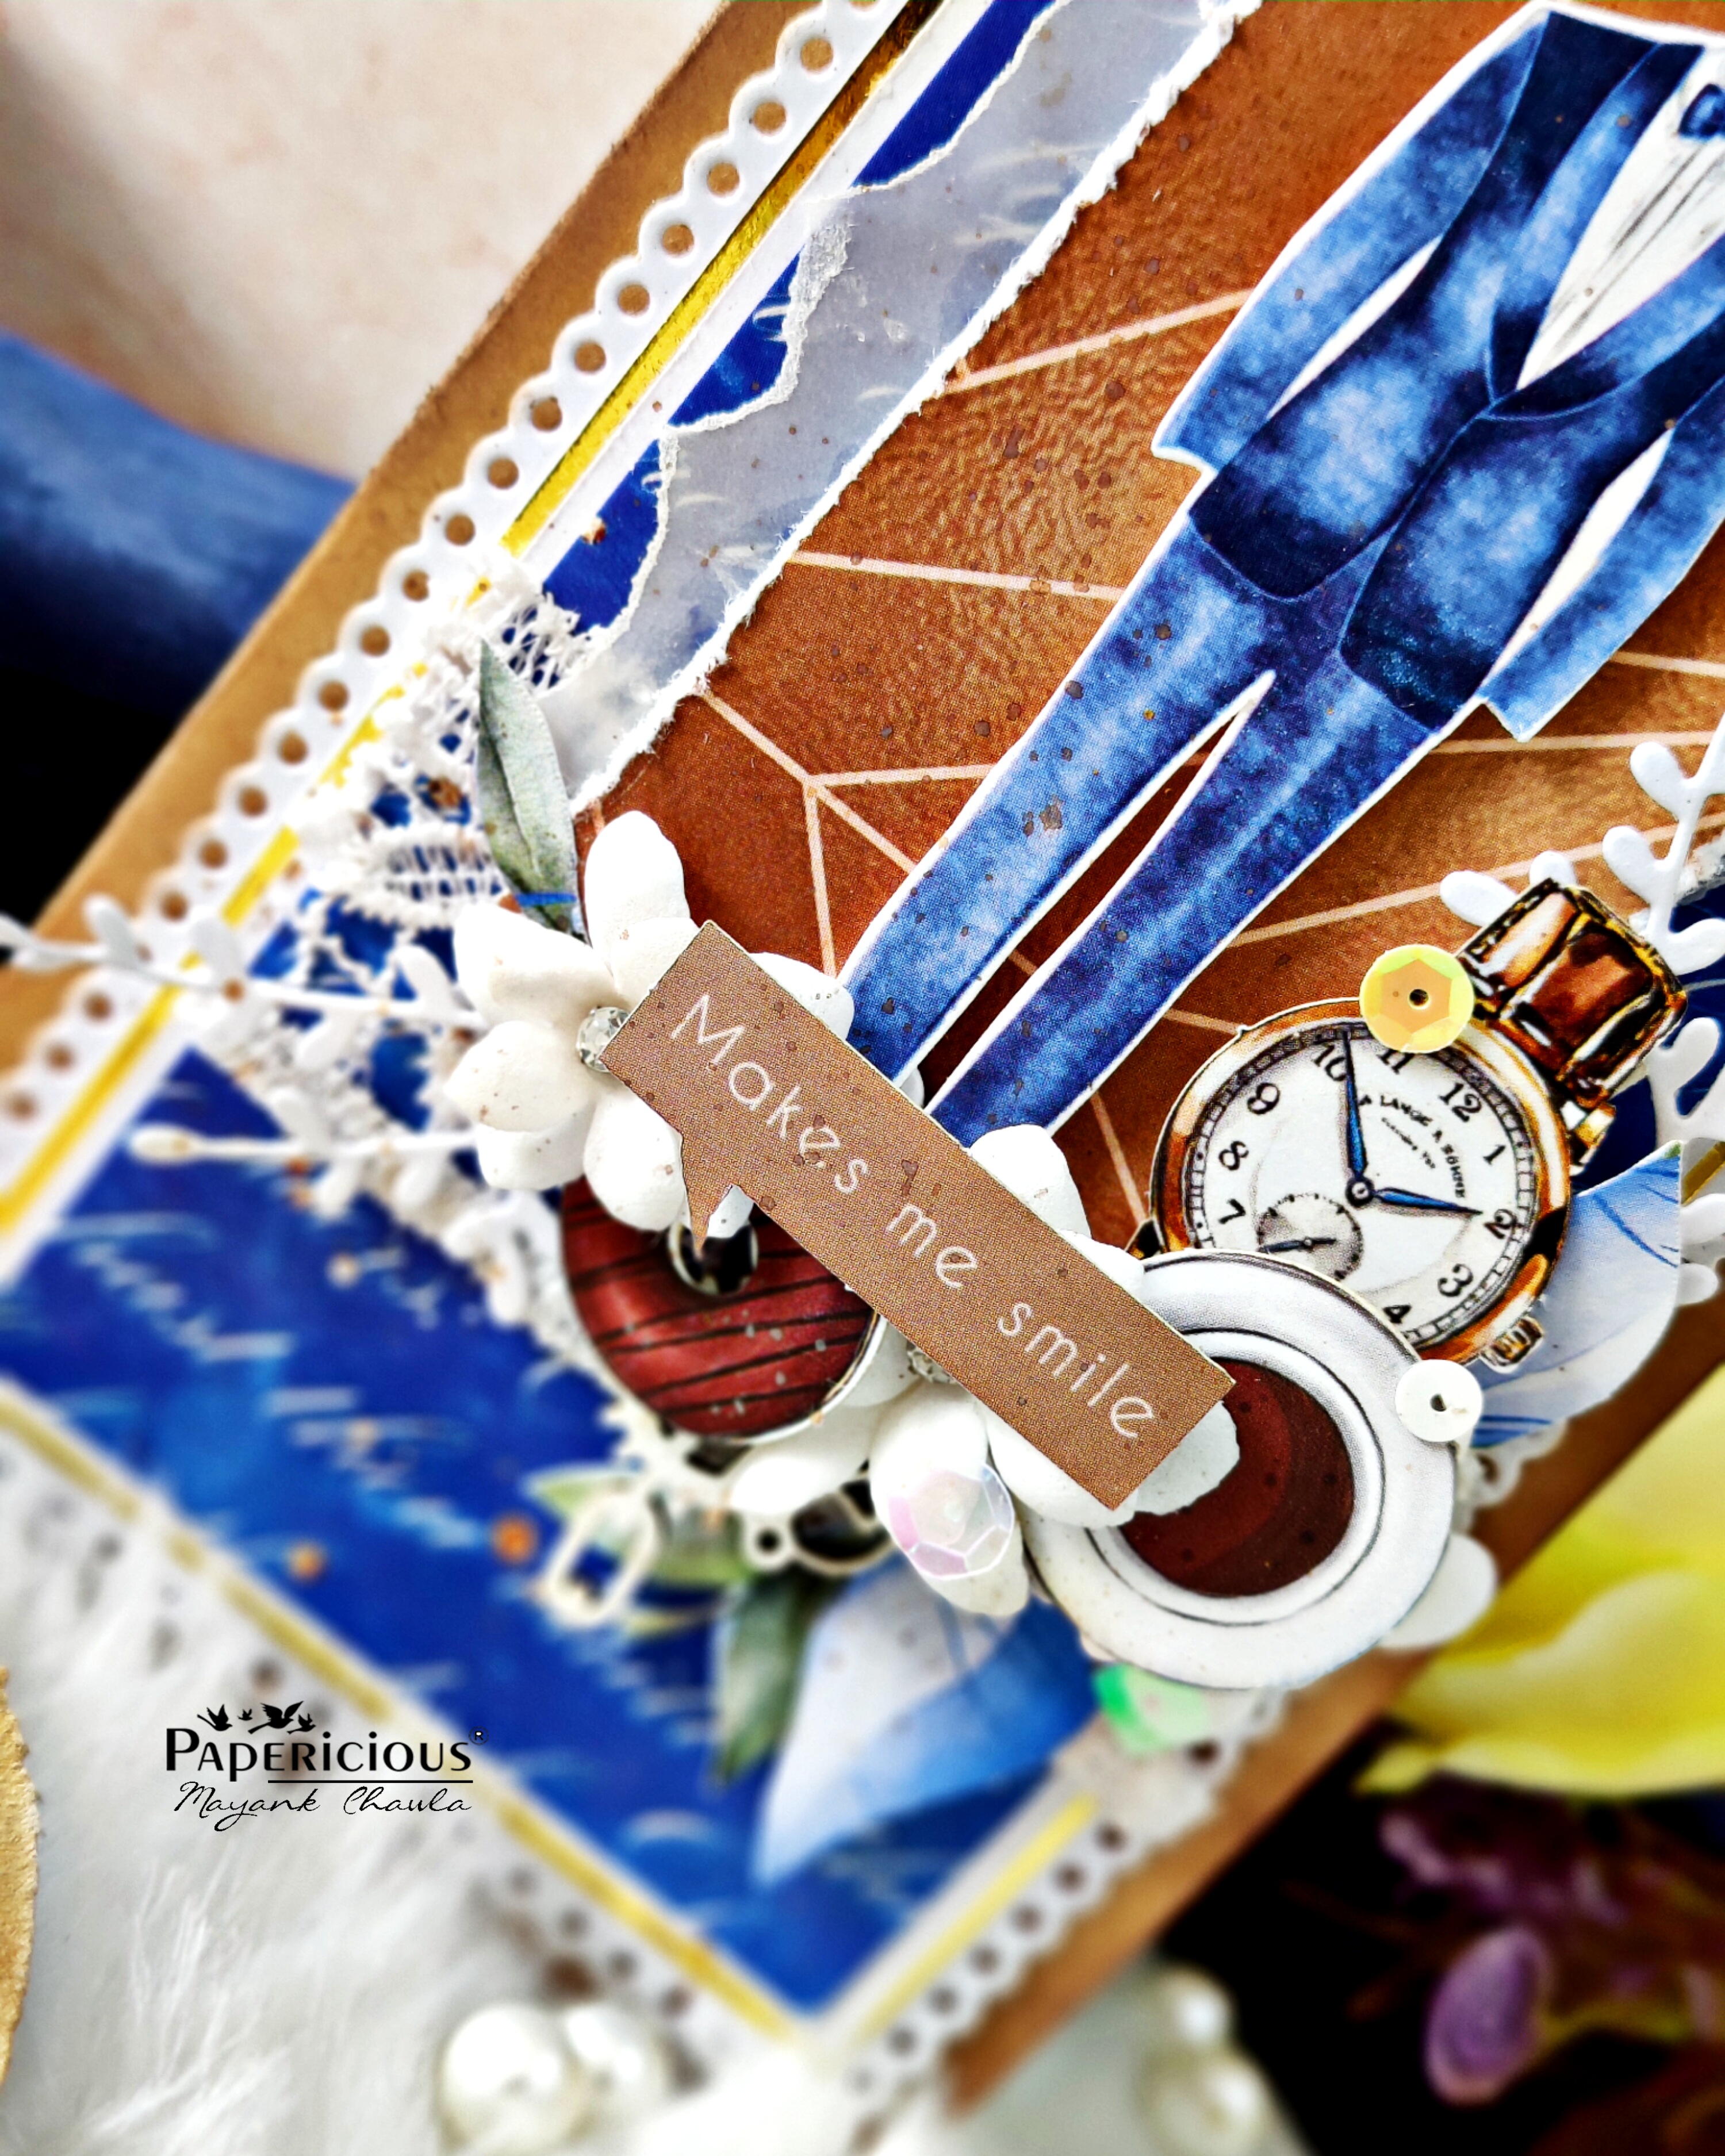
This card measures 8-5 inches and my fav creation so far in cards!

To start with, I created the card front using various layers of paper and ephemera over layers of pattern and base papers using brads. Then I added cotton batting under these layers for added dimension. 

For the sentiment, I chose 'Mr. Perfect' And finished the card with same layers as on previous cards.

Aren't these cards awestruking ? I hope these projects inspire you all to create a special project for the most spectacular person in our lives, our papa, our role model.

You still have time to gift him a beautiful card and show him you care!

Don't forget to comment and check our social medias for more inspirations...

Thank you for stopping by..

0 comments:

Masculine Theme Slimline cards

11:08 am Mayank Arthub 2 Comments

 Masculine slimline cards


The power of a dad in a child's life is unmatched...

Hello Everyone!

Hope you all are doing well! This is Mayank Arthub sharing with you all my slimline cards for papericious

Today on the Papericious blog, I bring to you more slimline father's day cards for the upcoming celebration on 19th june!!! feat. the newly launched ( Imperfectly perfect ) paper pack.

This paper pack has beautiful patterns, elements and designs perfect for masculine and unisex cards, layouts and mixed media altered art projects. As a bonus, this is coordinated with various other products in the same theme to go along with it.

This paper pack is such a versatile and stylish one, fit for any masculine project and it has s lot of coordinating products to go along with it.

Let me show u the creations one by one


I hope these projects inspire you all to create a special project for the most spectacular person in our lives, our papa, our role model. Show him you care and give him a keepsake to cherish forever..
.
Don't forget to comment and check our social medias for more inspirations...

See you all soon!

2 comments:

"sweet little one" mixedmedia layout

12:05 pm madhabi's craft studio 2 Comments


Good morning Papericious fans! Madhabi here with you today. I created a mixedmedia layout "sweet little one" using the  new paperpack collection "moonlight Bella" and lots of  die cut embellishements from the same collection.

Products used : Moonlight Bella paperpack,  die cut embellishements, mini chipboard, clear gesso. All these products are from Papericious and are available at www.papericious.com

I took 2 background design paper from the collection to create my layout. Applied clear gesso all over the paper before creating the composition. I also used texture paste with the help of stencil to create some pattern texture to the background. Applied little amount of colour similar to the die cut embellishments and created the composition.

Here are some more pictures of the layout.


I hope you liked my project. Do let me know in the comments below. If you feel inspired and create something using the "moonlight Bella" paperpack than please do not forget to share with us, will be very happy to see your creation. 
Till then, keep creating and happy crafting!
love
Madhabi


2 comments: