Let's go SOS Flight box

1:48 pm Irit Shalom Designs 2 Comments

Hello my dear crafty friends! This is Irit from Irit Shalom Designs here today and I am going to share my May tutorial made with Let's go pack.
Actually I needed to highlight the new Papericious flowers in this post together with this paper collection,
but as this collection is so much " out of the flower zone" I decided to skip this part of a tutorial and to make something that each and every one can use-  Flight survivor First aid box.
This is not a real First aid box and you wouldn't see much medical things inside (you sure can add some analgesic or sleeping pills there). This is a box that everyone who flies needs badly and I made it for my  oldest son's family who had a very long connection flight from Israel to L-A about two weeks ago right when I had to make my project tutorial.
The first good thing in this project is that you really need it.
The second good thing is that you can recycle an old box and to make the Earth a bit more green.
So this is what I call a WIN-WIN project and I hope that you think so too.
And all you need is Papericious most gorgeous new collection " Let's go" and a bit of imagination.


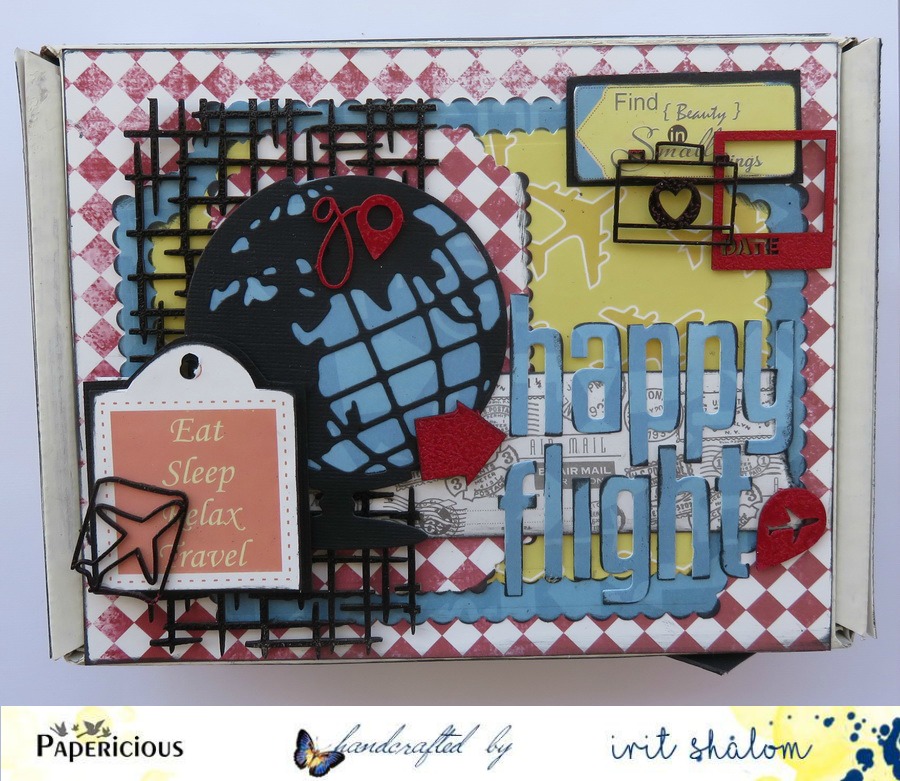
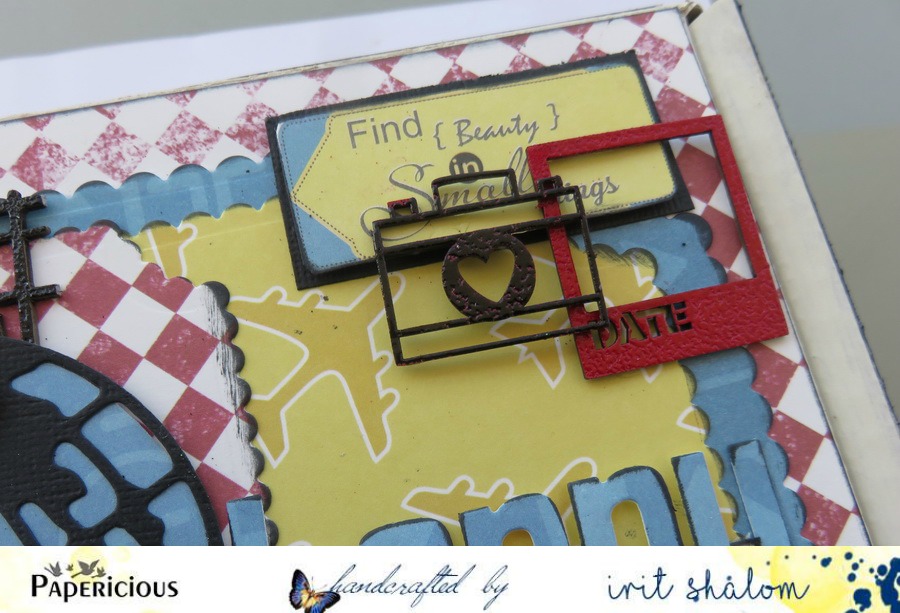
So here are a few close- ups for the finished project and the full step by step tutorial will come after the introduction.


 And now for the full step by step tutorial:

1. Find and box that is big enough to include the pocket size book inside and a bit more of things.I really advice you to recycle!
This is a box that I found and was in the perfect size for this project.


2. Paint all over the box with white Papericious gesso . If you really like the Kraft color you can leave the box in the original color as the Let's go collection fits this color too.


3. Die cut the paper layers to cover the lid and front and the inside of the box.
I used Cherry Lynn Designs very old set of nested scalloped dies , but any set of nested dies that fits the size of your box will do the job.Pick three cardstocks  and try to stay in three colors system as I did here.


4.Cover the front with the half of die cut pieces as shown.  Ink all edges with black ink .Add the saying made from the  collection cardstock.


5. Cover the lid with inked die cut cardstock pieces as shown.


6. Cover the inside of the box as shown:


7. Arrange the first embellishments layer over the lid . I made some themed die cuts; painted and heat embossed Papericious chipboards and added some more cardstock pieces form Let's Go collection.


8. Arrange all other embellishment piece as shown on the finished box. Some of the Papericious themed chipboards were heat embossed with red embossing powder to make a bit of a color pop.
I die cut the letters using MFT dies and Papericious patterned cardstock and inked the letter edges with black ink. More cardstock sayings were added over the finished box.


9. And now for the purpose of this box: things I added inside.
First I was thinking about the " flight" book and decided to make a couple of book marks from the leftover cardstock pieces. Pieces of Papericious yellow cord were added on the top.


 And this is what I put inside the box.
 Don't you want such a nice haul for your next flight?
But first you need to make this lovely Papericious box!


Papericious product list :
Let's go paper pack

Papericious Designer Edition - Let's Go

Let's go themed chipboards

Theme Chipboard - Let's Go
Criss Cross chipboards

Chipboard - Criss Cross
Jute cord Yellow
Jute Cord - Yellow

2 comments:

Tutorial Part 2 : Making Mini Albums : Different ways of Using 12x12 Cardstock

11:00 am Priya 2 Comments

Hi All,
I hope you all liked 2 mini albums I shared with you previously made out of 12x12 cardstock. I couldn't stop myself and made few more. Today I am showcasing one more mini album which has multiple pages and pockets to keep messages and stick photos/notes etc. 
It's a 3x3 inches album with 16 3x3 inches pages.  I have used Femina Paper pack to decorate my mini album. The theme of  my mini is "Love" which anyone can give it to their loved ones. Here is the front look.
I have used MFT Because You stamps and dies, Scalloped edges dies, Stitched flowers dies and Corners dies to accentuate the mini album.
Let's have a look at the individual pages.
For each page, the left side will hold photos while right one has a pocket to keep my messages.
Isn't the girl from Papericious Femina pack diecut sheet is super cute and stylish? I fussy cut various elements from Femina diecut sheets to decorate the inside pages and pockets.
Since the album had 8 pockets, I created 8 2.25x2.25 inches message tags of different types. I stamped various sentiments from MFT Because You stamp set on back of Papericious Femina papers. I also used Papericious Pink Jute cord to create the pullout.
Since few of the sentiments were longer in length, I cut 4.5x2.25 inches pattern paper and folded into half so that it can fit into the 2.5 inches pockets. Here are all the tags when opened. Isn't the sentiments cute? I also decorated the insides by die cutting stitched flower dies from Papericious Femina Papers.
Here is how the tags fit into the pockets.
Another look with all the tags kept inside and album tied up with Papericious pink ribbon.
Here is a brief pictorial of how I created the base of the album.
Step 1 : Score the 12x12 paper at 3,6 and 9 inches. Rotate the paper and score the other side at 3,6 and 9 inches at well. it will give you 12 3x3 inches squares.
Step 2: Score and cut as shown in the picture. Start folding each 3x3 inches square. Once it reaches to the end, fold over to next row and glue these 2 square together.
It's easy peasy to put it together and looks really cute too.
I hope you enjoyed the 3 albums I shared and showcasing different ways to use 12x12 sheets of cardstock.
Supplies Used :
Papericious Femina Paper Pack
Papericious Wine Red Jute Cord
I hope you will give these minis a try. If you use Papericious products, don't forget to share it on social media with #papericious hash tag.
Have a wonderful weekend!
- Priya

2 comments:

Mixed Media Card with Whimsical Collection

10:00 am Erum Tasneem 12 Comments


Papericious card made by Erum Tasneem @pr0digy0

Hello everyone!
Erum here today bringing to you a mixed media card using Whimsical Paper Pack.
This card design is an almost replica to the very first card I made for Papericious.
But this time I used Sigma Cardstock to make my roses and covered them with Crystal Clear Glitter.
They look absolutely beautiful.
The whole card is covered in the Crystal Clear Glitter, I love it and can not recommend it enough!
Papericious card made by Erum Tasneem @pr0digy0
I used a stencil and Gesso to add texture to the background, leaves and parts of the doily and then sprinkled the Crystal Clear Glitter over it while it was still wet.
This card gives such a winter like feeling especially after adding gesso and glitter.
That is all from my side.
I hope you like my sparkly card. 
See you soon :)
-Erum


12 comments:

Mixed Media Art - Lotus Pond + Video Tutorial!

11:00 am Ujjwal 4 Comments

Hello,

This is Ujjwal and today I am sharing another mixed media project. I am in love with the recently released art mediums by Papericious and can't stop using them.

This lotus pond scene has been in my mind for a long time and Mudra Lotus stamp was perfect for it. I used the beautiful Femina paper which already had a watercolor print and that reduced my effort of painting the flowers. The art work measures 6"x8" and would make a lovely gift.


Here's the complete process video of how I created this art piece,


I hope you enjoyed this project and would give it a try.
Thanks, Ujjwal

Supplies used


4 comments:

Shadow Box with Whimsical collection

11:00 am Shilpa Nagaonkar 3 Comments

Hello Everyone,
Shilpa here,

Today, I would like to share with you a Shadow box I created with Papericious Whimsical Collection.


have you checked these new design papers yet?


these are BEAUTIFUL...

here are more close up views...


I've used reverse side of canvas here...
And all papers and diecuts are from Whimsical Pack.


Thanks so much for stopping by.
Get your own copy of Whimsical pack

Don't forget to join us at Papericious May Challenge to win some exciting prizes.


3 comments: