Showing posts with label Priti. Show all posts

Papericious Design Team Reveal | 2022-23


Hello, everyone!
This is Hussena, with the much awaited post for this year! :) We have been working behind the scenes to recruit the ultimate design team for this year and we're so excited to finally spill the beans! 

On behalf of the entire team of Papericious, I'd like to thank everyone who applied for our Design Team Call this year. We were totally BLOWN away by all your talent, and it was very difficult for us to narrow it down to a team of THIRRTEEN, but here we are with our super talented creative teams for the coming year! 

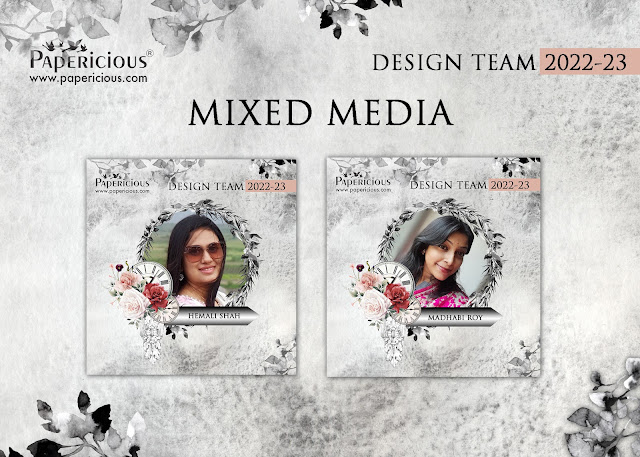
Presenting, the Papericious Design Team for 2022-23! 


SCRAPBOOKING

MIXED MEDIA

DECOUPAGE

ALCOHOL INK & RESIN ART

Blog & Social Media Coordinator


We're already inspired just looking at the line-up of such talented and wonderful people! Please give our new team a warm welcome in the comments below.

We will add the announcements on our Instagram Feed starting at 12:00pm IST! We will be tagging each team member in the announcement photo, so it's a great way to easily follow each member if you don't already.

We are so excited for 2022, and all that we have planned! Thank YOU for your continued support, as it wouldn't be possible without you.

And for now - leave some love to all these talented ladies and let's celebrate the beginning of a new chapter!

Papericious November Challenge | Anything Goes


Hello friends!
Hope you are doing well and your family is staying safe and healthy! 

This is Priti here, and I am here to host the Papericious Monthly Challenge for the month of November. We have an easy theme for you this month as you may be busy with the festivities and we really hope that you will participate and create something with Papericious products. So let's have a look at the challenge rules and the inspiration projects from myself and Tulika.

Here is the theme for our November Challenge:
Anything Goes

Let us have a look at the challenge rules:
1. You can create ANY project - Altered Items, 3D projects, Home Decor, Layouts, Mini Albums, Scrapbooks, etc.

2. Remember that you need to use Papericious Products as your main focus to qualifying for the win.

3. The last date of submission of your projects is 9th December, 2020 at 11:55pm IST.

4. Please go through the general guidelines HERE before you link up your projects. Any project not following the rules will be disqualified and it will not be eligible for the prize.

5. If you are entering the challenge via social media platforms like Instagram or Facebook, please remember to write in your post that you are participating in the Papericious Monthly Challenge and give a direct link to the challenge blog post in your post description. Mention the Papericious products used in your post as well. Then, come back and link your entry using the InLinkz tool provided at the end of the post.

PRIZES:
The Design Team will be selecting a Merit based Winner at the end of the challenge who will stand a chance to win a gift voucher worth INR 1,000 from the Papericious Store. 

We will also be picking three entries as our Top 3, who will be awarded a badge to flaunt on their blog.

Now let's move on to my creation:

I had this cute bedtime picture of my daughter that I had been wanting to scrapbook and since I saw the New Release from Papericious which was launched last month, I knew the Dream Big Paper Pack will be just perfect for it. So I made a 12"X12" scrapbook layout documenting this beautiful memory of both my daughters cuddled together in bed :)

I have done a mixed media background with Papericious Modelling Paste, Papericious Spritz and a star stencil. Then I added strips of pattern paper which I have distressed and folded the edges for an additional texture. I layered different pattern paper pieces under my picture with some vellum, used a 3x4 card as the title, added my embellishments from the Cut & Create Embellishment Sheets and finished off with some finishing touches like a piece of pom pom lace, a paper clip, some star stickers and splatters with black ink. I have also used few coordinating Chippies embossed in white and black.

Hope you liked my recycled project and will be inspired to create something for this challenge.

Here are some pictures of my project with few close ups.


SUPPLIES USED:


Now let's have a look at what Tulika has created for this challenge.

Hi everyone,
This is DT member Tulika here from "C 4 Craft" with my inspirational project on this month's challenge theme - "Anything Goes".
I have created a Dual Picture Shadow Frame using Papericious 'Billet Doux' and 'The Flickers' Pattern Paper Pack. Check the pictures -


SUPPLIES USED:
I hope you liked both our projects with various Papericious supplies. And we really hope that we have inspired you to create something for this challenge. Please do participate as we are always looking forward to see your lovely creations. Wish you a very happy, safe and joyous Diwali!

Love,
Priti


Interactive Card with Photo Inserts ft. Tranquil | Photo Tutorial


Hello friends,
Hope you are doing great and ready for the Diwali festivities. This is Priti here and I am back with a new inspiration project which is probably my last one for Papericious this year. I have had a such a wonderful time creating for them and working with their beautiful paper packs. Tranquil is no exception. It has such gorgeous colours and floral elements. I chose to create a beautiful interactive card for a friend which has some space for photos and photo mats reminding her of some good times that we spent together.

This collection also has co-ordinating Cut & Create Embellishment Sheets which are perfect for any kind of project. 


This is an interactive card with a simple and easy design and guess what, I have a tutorial for you so that you can easily make one for yourself and also add around 7-8 pics in it. So let's get started with the step by step photo tutorial for this card.

Step 1:

Cut 1 piece at 12"x10.5".
Score on 12" side at 3.5" and 8.5".
Score on the 10.5" at 1.5" and 9".

Step 2:

Cut out the boxes formed in the corners by score lines as shown by the Xs.

It will look like this when done.

Step 3:

On the bottom flap, measure 0.25" from each side and make a small mark. se a ruler and drwaw a line from the mark to the corner and then cut on this line. Do this on both the sides so that the left and right edges are tapered. Repeat this on the flap on the opposite side also. It will look like this.

Step 4:

Fold the tapered flaps inward and burnish. Fold the wider flaps inward and burnish. And this is what it should look like now.

You can add few photo mats/tags/journal cards and also some photos on the flaps as per your requirement. 
Choose a cut-out or a shape of your choice for the closure and attach it with a brad on the right flap.
And our interactive card with photo inserts is ready.

Here are some more close ups of the card.


Supplies Used:


I really enjoyed making this project and always love to create such little project for special occasions. Thank you so much for all the love and always liking my work. See you soon.

Love,
Priti

Scrapbook Layout ft. With Love


Hello friends,
This is Priti here, and today, I am going to share an inspiration project with the most gorgeous paper pack on anniversary and love theme from Papericious called "With Love". This is a part of the New Release from Papericious and we also have the coordinating Cut & Create Embellishment Sheets and Chippies as part of this amazing collection.

I have made a scrapbook layout with a picture of me and my hubby to celebrate our 17 years of togetherness. This collection was just perfect for this theme with fantastic colour combination, beautiful florals and lovely sentiments.

I have a special pattern paper in this With Love Patterned Paper Pack with many triangles in different designs, and I have used the same triangles on this layout to create a geometric star pattern. I have layered fussy cut frames from another sheet of Pattern Paper and some Vellum under my picture and popped it using 3D foam tape. To embellish my page, I have used the fussy cut elements from the Cut & Create Embellishment Sheets and a Chipboard piece from the Chippis. Lastly, I added my journaling and some Papericious Sequins along with Nuvo Drops to finish off my project. I have used two layers of pattern papers as my base to highlight my page design and the star pattern.

Let's have a look at some more pictures of this layout.


Supplies Used:


I hope you liked this scrapbook layout and will definitely create something with this paper pack. Have a wonderful day!

Love,
Priti

Layered Cards ft. Dream Big


Hello friends,
This is Priti here, and I am so excited to be back on the blog after a long gap, but with a super fun and cute project featuring the Dream Big Collection from this month's NEW Release by Papericious. I can't tell you how much I love the paper packs from this release. The colours, the design, the flowers, the cute critters, everything from this release has my heart. I hope you have already checked out the New Release, and if not yet then don't forget to have a look. I am sure you will love everything about it.

Now, let's talk about my inspiration project that I will be sharing today. I have made two 5"x7" cards on the "Dream big" theme with the Dream Big Paper Pack and the Cut & Create embellishment Sheets.

I chose white cardstock as my base and I wanted to make cards which inspire the recipient to dream big. The galaxy, the planets, the rainbows, the clouds, the stars, the moon and these super cute critters make it the most wonderful and fun paper pack to work with. For my cards, I have used the Cut Apart Sheet which has the 3"x4" cards and the fussy cut outs from the Cut & Create Embellishment Sheets to form the focal element. And I have played with different pattern papers and layered them together to build the composition in each card. I have also used 3D foam tape to add dimension to some of my layers and finished off the cards with some dark blue and black enamel dots.

Let's have a look at some more detailed pictures of the cards.


Supplies Used:


I had a great time making these beautiful cards and working with this amazing paper pack. Hope you liked my project and found it inspiring. Please don't forget to leave me some love. See you again very soon!

Love & hugs,
Priti