
Always You Fairy Land mini album tutorial
Hello my dear crafty friends and welcome to my new Papericious tutorial.
It's Irit here from Irit Shalom's Designs and I made a small lovely tutorial for you all.
This time I made a 6*6'' mini album using Papericious Fairy Land collection and added two 6*6'' acrylic album covers.

I made my own binding system here and made a full step by step tutorial here on Papericious blog.
There are two cardstock pages in this collection that have 4 pieces of 6*6'' cardstocks, same as the 12*12'' pieces. I added one 12*12'' cardstock from the collection to make this album from 12 pieces of cardstock, five cardstock hinges and there are 10 photos in this album.
You can add 6*4'' photos as is, but I die cut most of my photos with double stitched die for the interest.
Here is another look to the cover that was made over the acrylic cover with Papericious chipboard that was painted with acrylic paint.
Then I added all possible paper cuts from the collection, made the lace spine and added chipboard title.

Here are some close- ups to the cover:

And now let me show you how you can make this album step by step:
11. Cut 5 strips from ivory cardstock that is a part of this paper collection measured 6*2''.
Use any scoring board and just mark the 1'' as your centre and score 1/8'' to each side.
Fold the scored strips as shown- those are our binding system.

2. Cut two cardstocks from Fairy Land collection that have 4 pieces of 6*6'' on each to 6*6'' pieces. Add 4 more 6*6'' pieces by cutting the green background cardstock from the collection.
Glue one page to the binding strip as shown- this will be own " under acrylic cover" background.

3. Flip the piece and glue one of green pages over the other side of your binding strip. Do not glue the whole page, but just the left and right sides and the bottom as we want to make pockets of each two cardstocks.
Here you can see the green page glued over the binding strip and to the cover page as a pocket.(you can't see that this is pocket for now).

4. Glue another green page to the other side of the binding strip as shown.
Do not glue the forth page on the back of this one! We work in a different way here!

5.Take your second binding strip and glue it over the first binding strip- look at the photo and see how you glue it one to another. Now we have the second green page and this flowers page as a double and can glue the pocket in the very similar way as the first one.
Continue with another flower page on the right and then add the third binding strip and so on.
Finally we have five binding strips glued one over another that make six pockets with 10 single pages and two covers.


7. Make the " overall" spine using the same ivory cardstock and glue it around acrylic covers.

8. Glue a piece of Papericious lace around the spine from both sides as shown.

9. Trim your Papericious chipboard piece to fit the size of your album (yes, the chipboard is 6*6'', but we had to cut a bit as we don't want to cover the lace).
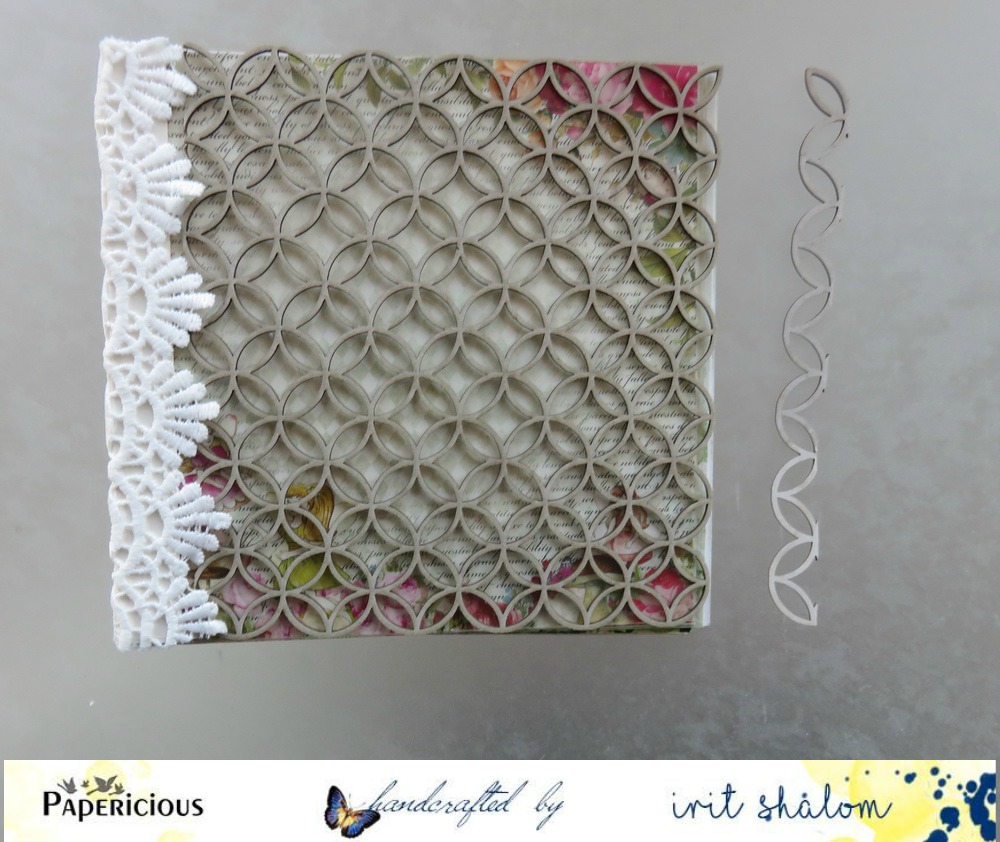
10. Paint the chipboard with acrylic paint and let it dry.


12. Trim photos to your preferred size (I use a die, but you sure can cut them by hand).
Add some small embellishments from Cut and create embellishment sheet from this collection.

13. Make a tag from Quote sheet from the collection; ink it to fit the album colors, add a piece of jute and insert into the pocket.

14. Trim all other photos, glue them to all pages and embellish as you wish.
I decided to make this album pretty flat and used only paper cuts from Fairy Land collection.
As you can see I made more tags to put into the pockets using the very same Quote sheet.


Here the Quote sheet piece was die cut to the photo size and used as a big title on the left of this page spread.


And now the last look at the cover.
As you can see I made the chipboard title using Papericious chipboards and hot pink acrylic paint.
The fairies wings were embellished with clear glitter and I added a couple of golden corners and a few golden charms on the top of the cover.


I hope that you liked my small tutorial and this most gorgeous Fairy Land paper collection.
Here is a full product list can be found in the shop:
Fairy Land paper collection

Circle Flourish

The wedding chipboards

Jute cord

Chipboard- not in the shop yet
You can also buy our products in THOSE shops.
I hope that you liked my project and it's very easy to make a similar one with Papericious great Fairy Land collection and all other new products.
See you again soon with more Papericious inspiration!


Wow! Beautiful Album with cute pics! I love the tutorial and cover page is so gorgeous with acetate sheet and chipboard! Thanks for sharing :)
ReplyDeleteThis is fantastic Irit!
ReplyDeleteBeautiful album...
ReplyDelete