
How to use stickers in your Retro Chic planner !
Hello everyone,
This is Hussena here and today I am sharing with you all the different accessories and stickers that you get with the Papericious Retro Chic planner and how to use them.
First let's have a look at what you get along with the Retro chic planner :

As you can see above, you get 3 sticker sheets and one journal tabs/tags sheet with your planner.
Here's a closer look at all the 3 sticker sheets when taken out of their packaging :

The sheet on the left hand side is the icons and tabs sheet. It contains various stickers for your day to day use and I will be showing you how I have used them in my below pictures. The sheet in the middle is a clear sticker sheet with some fun sentiments and images and when you stick them on paper they seem almost like stamped images.
The third and the last sheet on the right hand side is the hole-guard sheet and it helps to reinforce your planner pages. See the picture below to get an idea on how it's used :

The brown circle you see below the binder rings are the hole-guards.
Now moving on to how to use the Icon and tabs stickers in your planner. Here's how I have used them in mine :
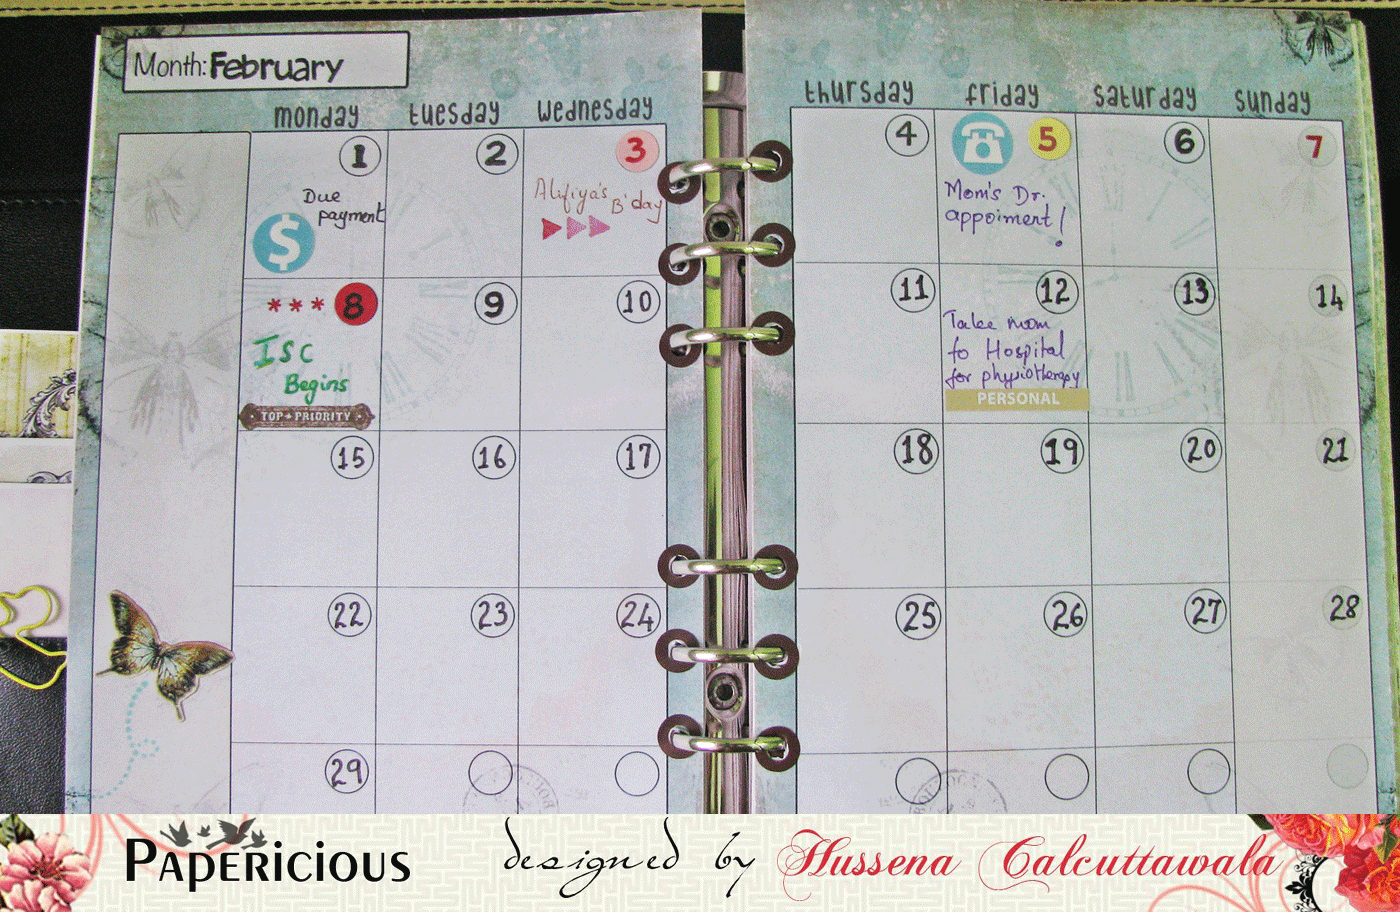
This is the monthly spread page and the dollar icon on the first represents the due payments that I have to make on the first of the month. The telephone icon against my mom's doctor appointment is self explanatory..Also notice that I have highlighted certain dates by using colored round stickers. These were actually punched from a colored cardstock. I have also done some stamping to highlight certain important dates.
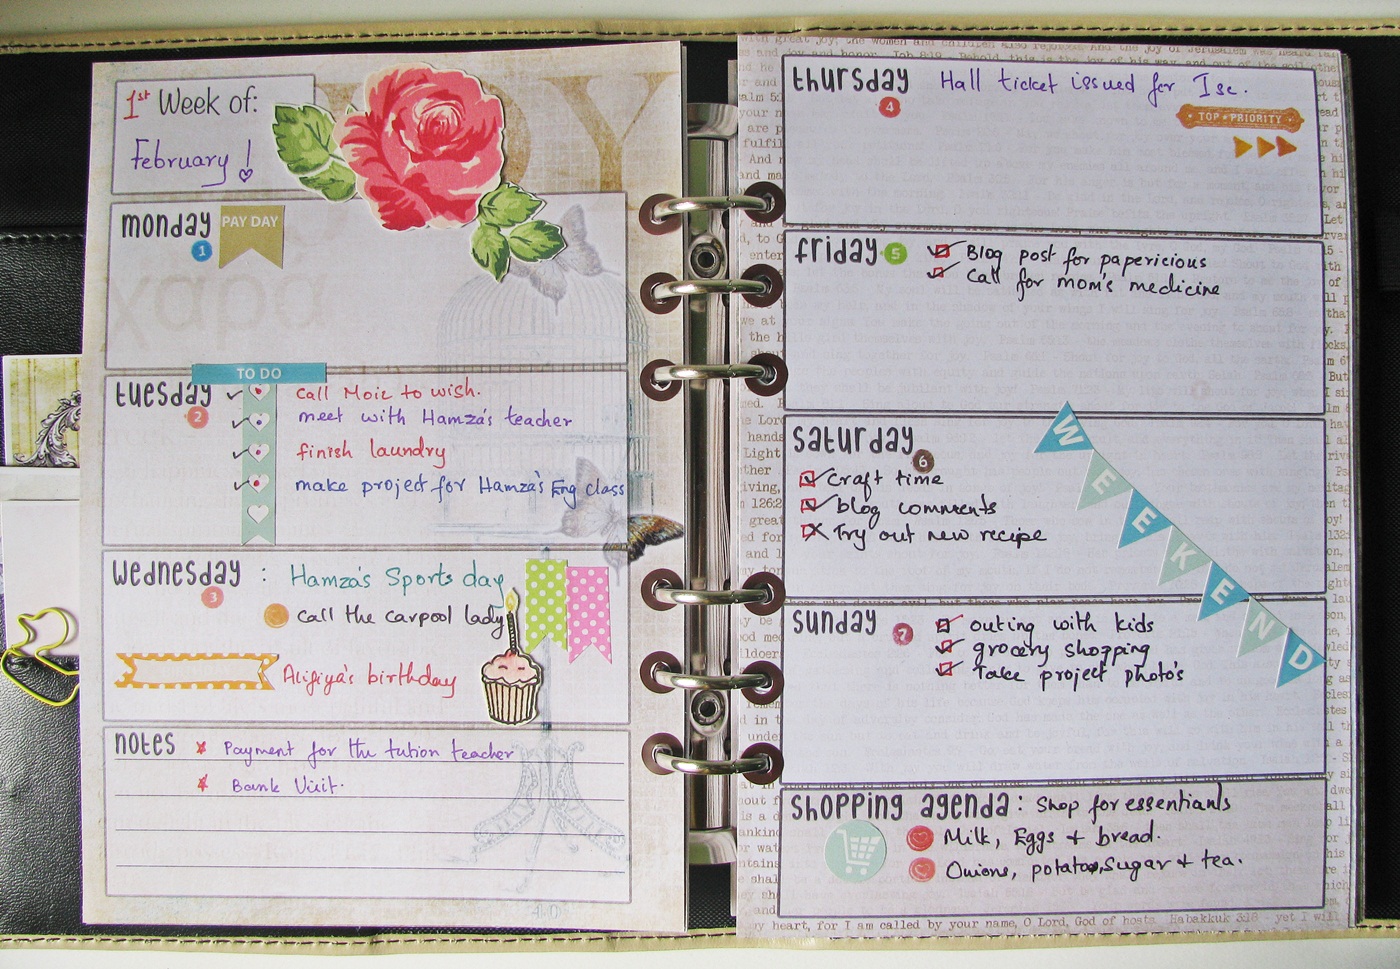
This is my first week spread for the month of February. Here I have used a couple of stickers, washi tapes and stamping to make my page more colorful.

As you can see, I have used the 'Pay Day' icon sticker for the first of the month when I supposedly get my salary :)...You can use this on any date on which your payday falls though. The blue 'To do' sticker along with the horizontal 'heart checklist' sticker is to note down the tasks for the given day or even the tasks you have to do in the particular week.

There are small 'Happy birthday' banner stickers included in the icon sheets to help you highlight the birthdays you want to remember of your family or friends.

The Weekend highlighter sticker.

The shopping cart icon sticker.

This is the second week of Feburary page and I have highlighted the Valentines' day with a quote taken from our If Only collection.

I have used the transparent stickers on the dotted washi to highlight the important task I had to do before V-day.

The Instagram icon.

The dinner icon and the 'To buy' tab.

And lastly, the blog challenge page and I have embellished it with a few die cuts from our Infinity collection and Golden Garden collection.
Hope you find this info useful for using the stickers in the Retro Chic Planner. If you have any questions regarding any of the icons stickers, do let me know in the comments and I will get back to you ASAP.
Thank you so much for joining me today and have a nice day everyone :)


wow...soo well explained post.
ReplyDeleteAwesome post Hussena! ^__^ I love how you explained the use of stickers and adore how you have decorated your journal! *Big Panda Hugs my friend* <3
ReplyDeleteSuch a awesome post Hussena,you rocked it.Thanks for sharing
ReplyDeleteWow, totally lovable!!! This retro chic planner is very very pretty!!
ReplyDelete