Happy my dear crafty friends and welcome to my second October
Papericious post.
Today I am going to share a full paper crafting tutorial for a book shaped handcrafted box and a gift card holder.
This project was made with the most delicious
Wedding kit and yes, this is a wedding trinkets box and a wedding gift card holder we are going to craft today.
So follow my easy instructions and you can make the very similar box and gift card holder in no time.
Step 1: Cut the thick chipboards to two pieces of 11 1/2*17 cm. and one piece to 3 cm*17 cm. You can use any chipboards, even to recycle some old boxes.
2. Cut the Wedding kit dark red cardstock to fit the chipboards and leave 1 cm. for the folds.The cardstock here is shown with the front side up.
3. Use double sided glue and cover the chipboards as shown.
4.Glue three pieces of cardstock on the bare chipboard's as shown using the very same double sided glue.
Add the same glue around all four sides of the dotted cardstock for the next step.
5. Use your scoring board or score by hand the glossy pearl cardstock from the wedding kit. You just need one 30*30 cm. cardstock and score it on 1 cm so you get 12 mountain scores. Cut the cardstock into two parts vertically. Cut each half into two pieces -one 11 cm long and one 16 1/2 cm. long.
6. Arrange one long and one short folded piece over the glue strip as shown. Arrange the second two pieces to get the full frame of folded cardstock. Add another layer of double sided glue over the folded frame.
7. Heat emboss the cover edges with gold embossing powder as shown.
You can use brand of gold ink and gold powder or just use clear embossing ink with gold powder.
8. Use stitched rectangle dies to make two die cuts for the front cover.
9. Glue the die cuts as shown over the front cover.
10. From this step on I wouldn't show each paper piece cutting, the general arrangement of the elements.
So here is the inside of the cover here. I die cut a dark red cardstock and layered with smaller patterned cardstock die cut. Two hand cut post cards were added over the inside cover. Then die cut two stitched circles and add the sentiment over it.
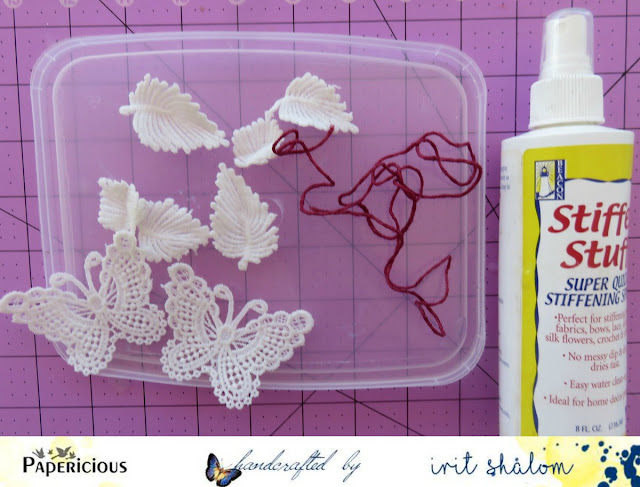
11.Use fabric stitffener over a few of lace cuts to make them " standing" after they are dry.
Make the same procedure with a long piece of red waxed twine. Let all pieces dry.
12. Die cut the stitched oval and add the lady's image inside the folded frame.
Cover the frame with deep red patterned cardstock as shown.
Add the hand cut word " Happiness" on the right low corner.
Tie the red and pink waxed twine around the cover.
13. This is how the finished front cover looks after I added a couple of die cut doilies using red cardstock and heat embossed a few more die cut doilies with the same gold embossing powder.
The doilies, fabric flowers, leaves, butterflies and twine were arranged over the cover and some sequins and pearl beads were added as shown.
Here is a close up of the main cluster over the front cover of the box.
And the upper embellished part is here:
14. Now lets make the gift card holder.
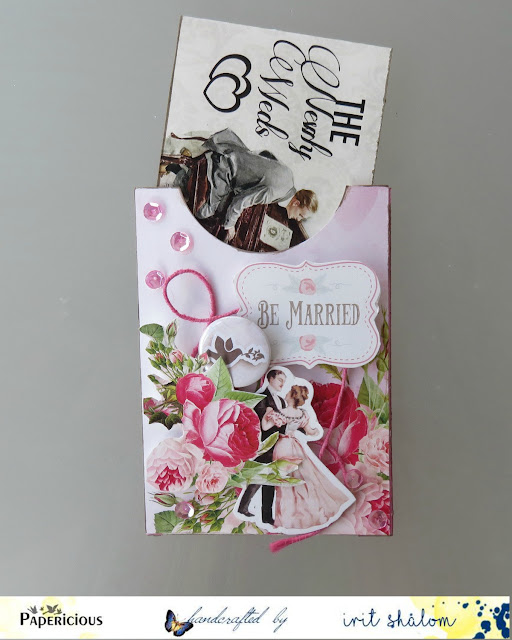
Make a small bag using patterned paper and cut the half circle on the top with punch.
Cut the gift card size strip using two connected paper images.
15. Embellish the bag with twine. hand cut paper, image and sentiment as shown.
16. Add photo corners to keep the gift card inside.
This is how it looks with a folded card holder inside the bag.
And this is how it looks with the gift card holder inside the box.
I hope you like my small tutorial and you can make the very similar project with our fantastic Wedding Kit !
Papericious Products Used:All products are from the Wedding kit
Paper Stack-The Wedding Kit
Fabric Flowers
Laces
Ribbon
Twine
Sequins
Pearls
Adhesive Flairs
All these products available at:
www.lulupu.com
www.thecraftshop.in
www.craftadda.com
www.imaginationsonline.com
Anantha Stationery
www.krafterscart.in
Nirmal Stationers, Delhi


2 comments: