Showing posts with label MDF desk organiser. Show all posts

Whimsical Desk Organiser

Hey lovely people, 
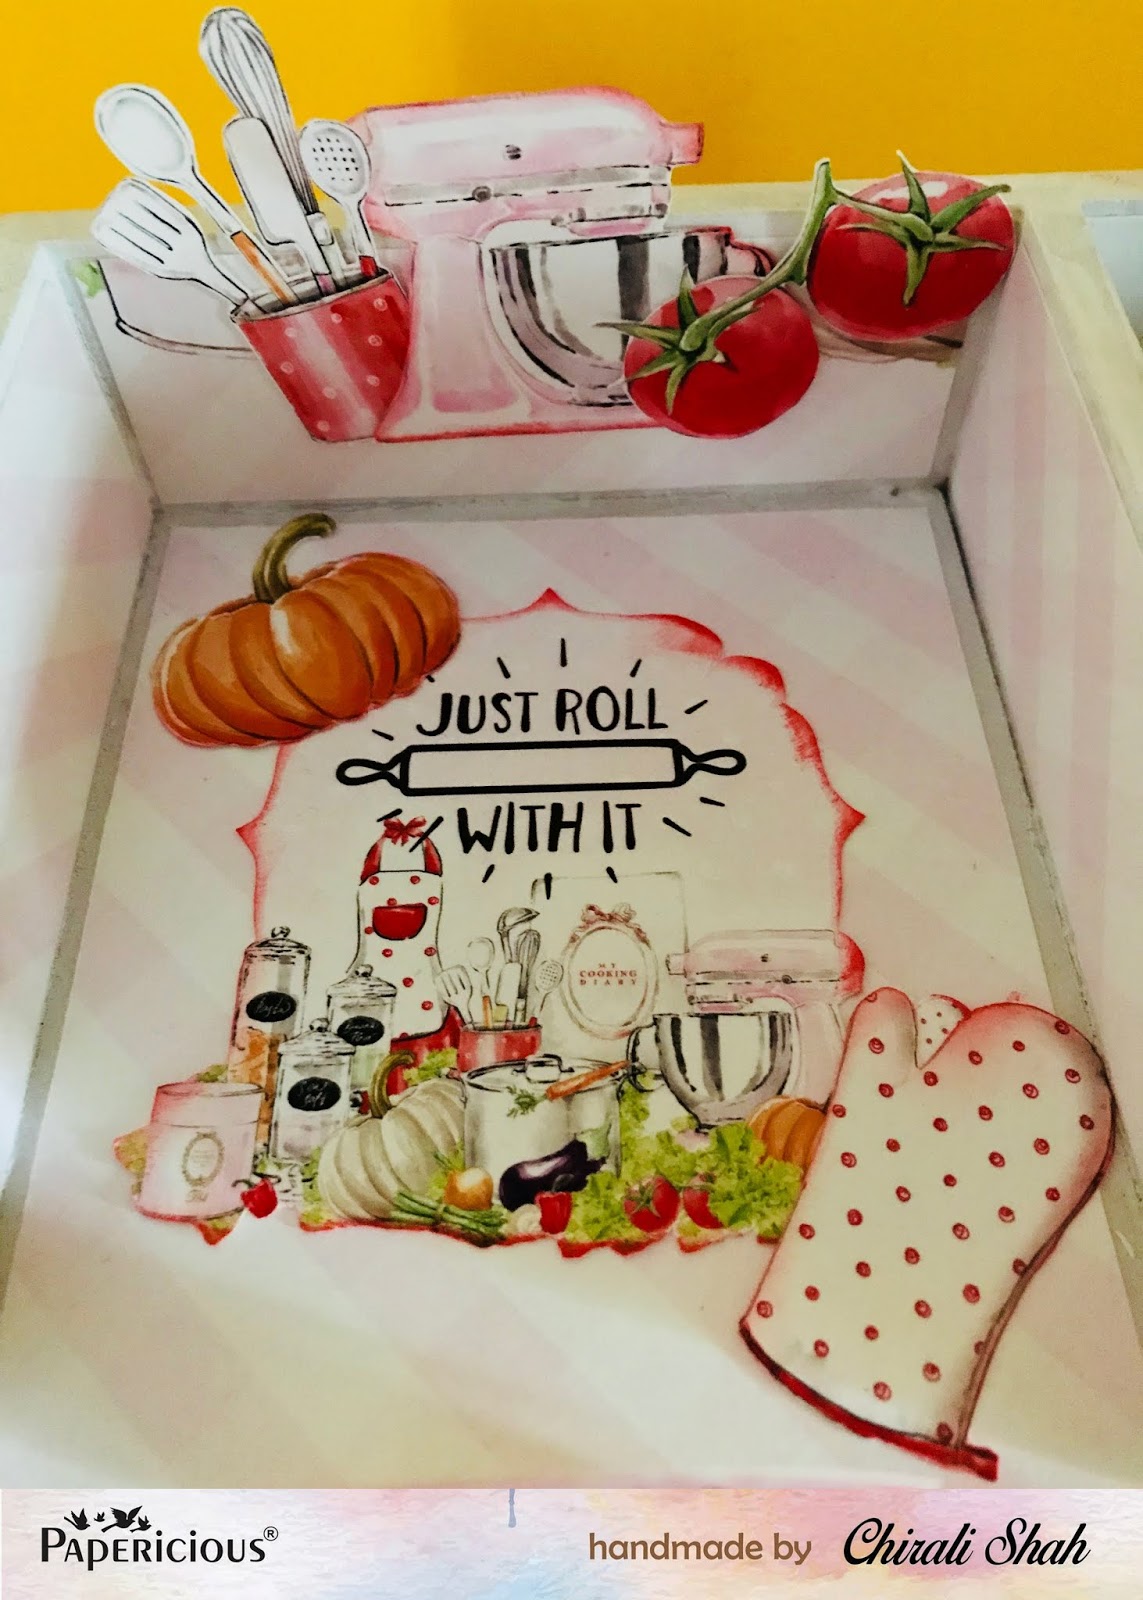
I have an easy tutorial today for you. I am working with Papericious mdf desk organiser and Whimsical paper pack.
  • Take a sandpaper and sand the edges to a smooth finish.
  • Brush away all the excess dust from the surface of the organiser.
  • I have used Cyber grape chalk paint to paint the inside of the desk organiser.
  • Next measure the sides of the organiser where you would want to place the pattern paper. Mark and cut the pattern paper to the measurements.
  • I have used Papericious Decoupage glue to adhere the pattern paper onto the mdf surface. I love this glue especially since the pattern paper is thick.Its perfect for adhering thick papers to mdf surfaces.
  • Use a squeeze/old credit card to smooth out the surface of all wrinkles and air bubbles trapped beneath the pattern paper. 
  • I have used Archival ink to define the edges. 
  • Seal your desk organiser with varnish.


Now to the part I love the most..Embellishing!! I have used images from the pattern paper and done some fussy cutting. Used foam tape to adhere it to the organiser surface.And not to forget the amazing and intricate designs from the Papericious White Chippis. I have used the Linear Florish here.


Hope you would love to try something like this for your desk.Mine would be holding my pens,planner, nuvo bottles...Do share with us what all your desk organiser holds.
Do join us for the ongoing challenge.


Supplies Used:


                                                     Cyber grape chalk paint


Desk Organiser with Kiss the Cook Paper Pack

Hello people!

Chirali here with the desk organizer prepared with Kiss the Cook paper pack of Papericious which can be very useful in day to day kitchen routine.

So here it is:


Some closeups:


I have painted all the corners of organizer with white chalk paint and then cut the papers of given sizes and done. It's that easy.

Papericious has a variety of desk organizers which makes one's life easier in a day to day life.

 I hope you liked it.

Thanks for stopping by.

Hugs,
Chirali

Products used:


Recipe and Ingredient Organiser

Hi friends,
I am sure you must have seen all the wonderful projects which have been created by the super talented Design Team using the new MDF organisers and today is my chance to share what I did with it. The organisers are so nicely planned that they can be used on a study table, Office table and even in the kitchen. I also like the size and quality which makes it top notch making it super durable for long run. Today I have created a simple Kitchen Organiser from the style DO103 and the adorable KISS THE COOK designer paper collection.


I covered the entire organiser with a slate/dark grey coloured card stock using strong couple sided tape. you can also paint the wood and that will look beautiful as well. I used a sharp pair of scissors and fussy cut a pattern with vegetables. Then I created a small box with the gray paper and added lots of small paper pieces which can be very handy to write the ingredients or a shopping list. At the back of the organiser there is a large slot where I added 20-25 white sheets where I can write my favourite recipes and measurements. I can simply pull the sheet out and recreate the dish of my choice.
I have left the left side of the organiser empty which can be used to store anything. The centre portion is good to store pens ,cooking thermometer and measuring spoons.
Here are some pictures of the project.


I hope you liked this post and will recreate it for yourself or as a gift for someone. Here are the things  you will need and are linked at www.papericious.com

Happy Crafting!

SUPPLIES


Projects with Papericious March release & Tutorial

Hello Lovely Friends!!!!
For today i have two lovely projects created using Papericious March release. One is MDF desk organizer and another one is a 3 D card with a detailed tutorial.
MDF desk organizer
Kiss the Cook pattern paper comes in two different sizes 12 x 12 and 6 x 6 inch with two sheets of images for fussy cutting. For altering the MDF desk organizer i first colored it with chalk paint dried lavender, pasted the fussy cut  images from the  pattern paper using decoupage glue and once dried properly applied crackle medium on the front and side panel. Using the chalk paint natural white dry brushed the inside part of the organizer. 


3D Card 
 Here is how i created the card
. Cut white texture cardstock to the size of 12 x 6 inch.
  Score at 2 inch, 2 inch, 4 inch, 2 inch, 2inch and fold.
 Cut white texture cardstock 6.5 inch x 6 inch.
 Score at 1 inch, 2 inch, 3.5 inch from the longer side and 1 inch on both the sides of shorter side.   Cut along the score line as shown and paste the sides creating  a box for the kitchen panel.

 Place it in the center part of the card base as shown and decorate it with pattern paper.
 Cut pattern paper 3 x 1-1/2 inch and place white card stock circle on top of it with 3d foam tape for creating gas top.
 Fussy cut out the images from the pattern paper and decorate the card as shown.


Hope you like my work for today.

Hugs
Pavitra

Supplies used 
Chalk paint - Natural white

Sharing two projects and Tutorial with Papericious March release 2018.

Hello friends!
Today I am sharing two projects ..one is Apron style recipe holder with Tutorial and second is mdf desk organiser...
This Apron style recipe holder on your table.. is a very versatile project and using this one template we can create either invitation card, or recipe holder on your table or an Apron shaped mini album with pockets to hold your recipes.


I got this idea from net but as there was an Apron shaped big die was used ..so I made a template similar to that die and here you can see in step by step instructions with pictures to make that template..so you can use it in your choice of project...Let me tell you in advance..Its a picture heavy post so..let's start with template part..for template you can take any cardstock..once you get the perfect template you can create with cardstock or chipboard according to your requirement.

Step:1-take 12"x12" cardstock from that cutout 71/8" x 12"...rest paper you keep to make pocket inserts.

 Step:2- on 71/8" side score at 1/2" from both sides..see picture.

Step:3- on 12" side score at 4"
 Step:4- cut both sides half-inch score lines till 4"..as in picture
 Step:5-now on 61/4" side mark according to picture..that is 11/2" both sides..and on long side at 31/4" both side
 Step:6-now join two side of each corners in curve shape to give Apron shape..
 Step:7-now cut to side corners and it will give an Apron shape
 Step:8- now stick glue on two 1/2" flaps and lift up n stick to form a pocket..which will hold a recipe insert.( Sorry forgot to take picture so had to do it again so it's in black CS)
 Step:9- after stick two 1/2 " sides it will form a pocket ..in which we will put an insert.
 Step :10- for insert take 41/2"x 6" and make a tab on 6" side using We r memory keepers 123 punch board.
Step:11-after joining two side flap n making insert in punch board..we can put insert in Apron pocket.


Here is the complete picture of my Apron style recipe holder card ...after finishing basic apron shape ..I have used Papericious new release paper kiss the cook  and white chippis to decorate it. I have used sentiments sheet from same paper pack n used MFT stamp image without Coloring.

Second project: Papericious MDF desk organiser


Here I have used Papericious new march release MDF desk organiser . First I have colored  with Papericious chalk color red after drying I have used kiss the cook pattern paper in few places.used sentiment sheet .on drawer front I have used metal charm n handle . Finally decorated using ribbon lace,pearls and MDF white chippis. I have stamp word wonderful on white chippis..   I have made post-it note (decorated with pattern paper, cutouts and white chippis).. to keep on front shelf of desk organiser. 

Supplies used: