Showing posts with label Fussy Cutting. Show all posts

Mixed Media Card ft. "Me Before You"


Hello Everyone!
Shakti this side from Shakti Art Creations. I am here once again with one more new project for you guys. This time I am here with an inspiration project for you. I tried to make an Mixed Media Card with the "Me Before You" Paper Pack. 
I have used other elements from the store as well for the card. Along with papers I used "Me Before You CCE"Blush - Papericious CCEIndie Chic - Papericious CCE, Sugar Plum SequinsAll Your - Papericious Collage Chippes

Let's have a quick look over it:


I also used some Mulberry Flowers, Mixed Media Stones from my stash. I hope you guys like it. 


List of Supplies Used:  


Do share your views!

Love Card ft. Billet Doux


Hello Everyone!
Nandini here. This time, I have designed a lovely Card with the newly launch Paper Pack Collection - Billet Doux, especially for Valentine's Day.
Procedure:
 Card size is 7" X 5". 
Adhere a red Patterned Paper for background, then add some tags from the same collection - Billet Doux
Colour the "Love 3D Shaker" with Golden Embossing Powder.
Fill some sequins or any elements to make it  a Shaker.
Fussy cut some images from the coordinating collection of Billet Doux: Cut and Create Embellishment Sheets.
To enhance its beauty, adhere some flowers by the side of  the Love Shaker.  
Arrange all the things in a beautiful composition.
Some more pictures:


Supplies Used:


3D Shaker Chippie - Light Bulb

Hope you all enjoyed it.
Thank you for stopping with us!

Luv,
Nandini Ramchandani

Bloom Chimes ft. 'Blooms & Berries' Tutorial Post


Hello Friends,
Season's Greetings!

This is Parita Galani from Mystic Hue.I am here today with a tutorial post of Bloom Chimes featuring Papericious Blooms & Berries Patterned Paper Pack Collection.

I have created a Hot Air Balloon for the top of the chimes and in the hanging have given the photo space and at the bottom I have attached fussy cut element from the same paper pack. This beautiful paper pack is so perfect to make beautiful gifts and decor for this season of merry and joy.

So presenting Bloom Chimes:


Here is the Step by Step Tutorial for making Bloom Chimes:-

Step 1 - I have taken a 3” by 5” piece and drawn the petal shape for the Hot Air Balloon.


Step 2 - Cut the first shape and than trace and make 6 more such petals. We will need 7 such petals to make Hot Air Balloons.


Step 3 - When petals are ready fold them into half such that design part is on the inside.


Step 4 - Now we will start sticking the petals one by one, keep petal adjacent on the plain part and stick one at a time.


Step 5 - When you are about to stick last petal insert a thread/rope of your choice, keep some over the top for hanging and approx 15” on the down to hang picture and embellishments.


Step 6 - After inserting the rope, stick the last petal from both the sides and our hot air balloon is ready.


Step 7 - Now cut out two pieces  3” by 5” paper from the paper pack and stick them back on back approximately 5” down from the Hot Air Balloon.


Step 8 - Lastly, I have stuck fussy cut roses from the paper pack at the end and it was approximately 5” down from the photo space.Cut off the excess thread and our Bloom Chimes is all set to be hanged with your favorite photos.


Material Used:

Papericious BLOOM & BERRIES 12" by 12" Patterned Paper Pack 


I hope you have enjoyed this tutorial and will make your very own Bloom chimes. Do let me know in the comments how do you like it.

Keep crafting! 
Best Regards, 
Parita Galani

Mini Memory Book By Swati


Happy Tuesday, all!
Swati here from Swati's Crafting World. Hope you're doing great. I'm back with an another inspirational post. I've a new project to share with you today featuring the beautiful 
"I LOVE YOU" Paper collection by Papericious. Please visit www.papericious.com 
to get this lovely paper collection.


MINI MEMORY BOOK


This flawless memory book consists 7 interactive pages having different sheets on both its sides. Each of these sheets is unique with exclusive features. It's spacious which lets all the memories dig in & can house 24 pictures/tags. I've decorated the pages with some of the fussy cut elements from the 
"I LOVE YOU" Paper Pack.

ISN'T THIS WONDERFUL? 


ON TO THE DETAILED PICTURES OF THE BOOK :


SUPPLIES USED TO  CREATE THIS CUTE MEMORY BOOK :


That's all for today. Hope y'all enjoyed it. Don't forget to update your love in the below comments section. Thanks for dropping by.

Until next time take care & Happy crafting!
X0X0,

Baby Record Book by Swati

Namaste!

Swati here from Swati's Crafting World, Guwahati, Assam. I'm back on the blog with an inspirational post. Today I'll be sharing a beautiful baby record album for a baby which I made using the Jack & Jill Paper Pack & making it was fun.

BABY RECORD BOOK :

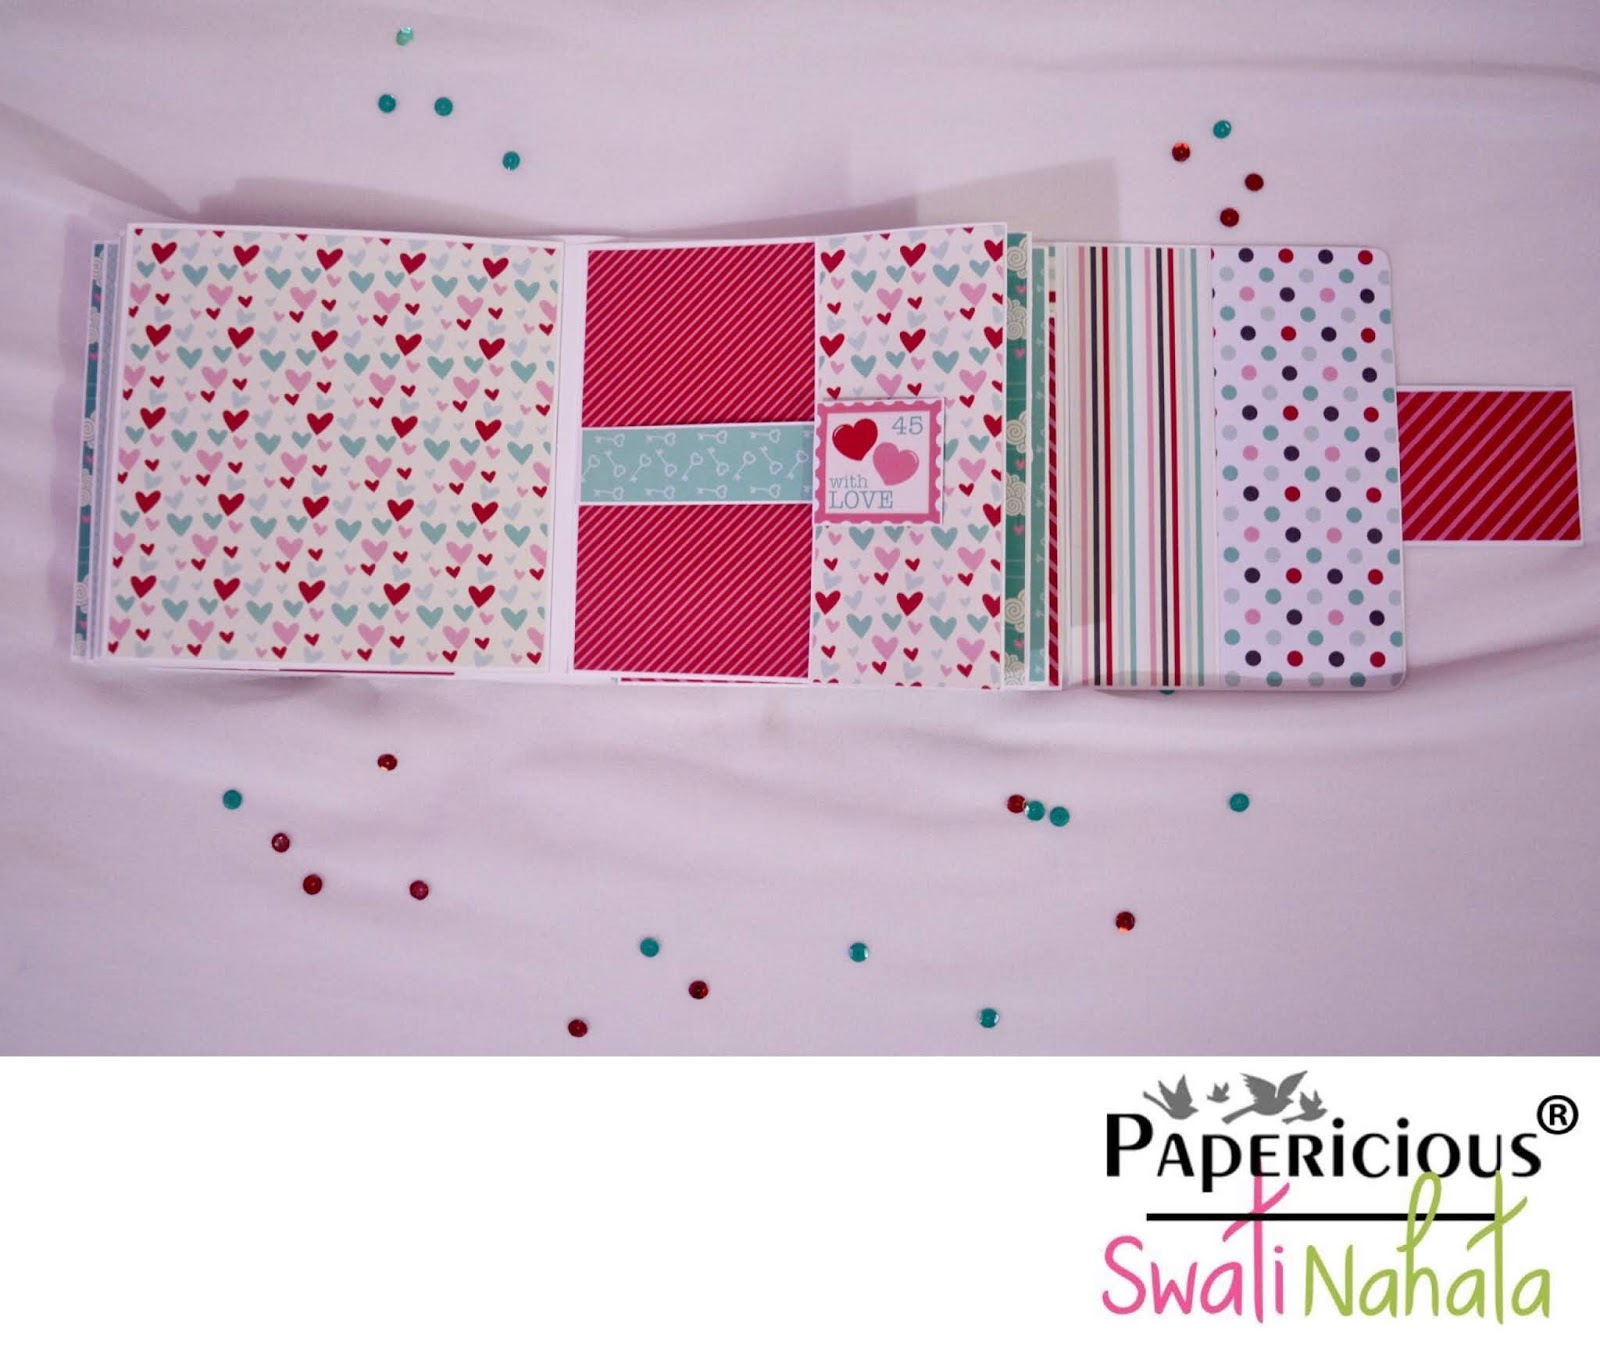
A beautiful record book to document Baby's memories. A beautiful memory keeper with a pop-up effect to add to the fun & beauty of the project. It captures every moment since the baby was born till his second birthday. I made this memory keeper for my cute little cousin brother.

ABOUT THE ALBUM :

Cover size : 6" X 6", the album pages : 5.5" X 5.5" & contains 10 interactive pages with pockets. There are a lot of pockets, tags, waterfalls, easel effect thing, photo frames, et cetra. All the 10 pages are different from one another & has a unique pop-up feature. The album & pages are decorated with baby embellishments, 3D shaker chippis, charms & trinkets; & I've also fussy cut some characters from the Jack & Jill paper pack.

RECORD TAGS :

I've added some tags to the album to give it a different look. I made this small tags by the scanning one of the paper from the Jack & Jill paper pack & printed it for recording the baby's weight, height, first time when he said Mumma, Dadda, his first outing, first vaccination, first tooth, first bath,
et cetra. You'll find the pictures of the same below.

ONTO THE PICTURES OF THE ALBUM :


Supplies used to make this Record Book :


That's all from me today, hope y'll enjoyed my post & do show some love if you like it. 
Thanks for stopping by & Happy Crafting! 

Lots of love,