Showing posts with label paper pack. Show all posts

Baby Girl Album featuring It's A Girl Paper Pack


Hiya Friends!
Tanvi here with an adorable Baby Album.
I have used the - IT'S A GIRL Patterned Paper pack for this album. This is an evergreen pack & my choice when it comes to making baby albums.

Adorned with super cute stickers & laser cuts, these albums make popular baby gifts and has photo mats for a few pictures.

Here I share the pages -

Here is the link to purchase this pack -

Lots of love until my next post,
Hugs,
Tanvi

Wiper Card using Hooked Paper Pack


Hello there & thank you so much for joining me today.
This is Tanvi & I share a fun  card tutorial. This one is called a WIPER CARD, with a hidden interactive element. While it may sound complicated, its really easy peasy & I am surprised I have never tried this in my many years of card making.
A Wiper Card is a pop-up card with a swinging tab that pops out when the ends are pulled. This tab can be used to hold a sentiment, a balloon, a flower, a quote anything. What did I use? Well.......Wait for the surprise 😍
Here are some close ups of the front -
To make this card I have used Black Cardstock  - 2 pieces measuring 4 1/4" x 8 1/2".
Score at 1 1/2" and 3". Create a valley fold on one score line and a mountain fold on the second, as shown below.  Repeat for the second piece of cardstock. These when glued will form the card base.
Next use 1 piece of cardstock -  1 1/2 x 3" for the "wiper". Mark at 1 1/2" on the long side.
  • Score from the top right corner to the 1 1/2" mark by placing the right hand corner in the 1" groove and line the left hand corner up with the 1" mark on the left hand side of the scoring board.
  • Add double sided tape on the scored triangle on the bottom of the strip ONLY.  If you place it over the entire bottom strip, the wiper won't work.
  • Take one of the card base pieces and lay it down with the score lines to the right. This will be your card front. Adhere the strip, between the two score lines as shown below. 
  • Now comes the fun element! Yes, instead of an embellishment I have glued a gift card to the tab! Isn't that awesome & sure to bring a smile to the recipient.
  • To assemble the card, add adhesive to the edges of both 4 1/4" sides of the cardstock piece. Place the second 4 1/4" x 8 1/2" piece of cardstock over the card front. This time make sure the score lines are on the left. This is how it looks after gluing both the piecesPull both the sides together & out pops the gift card - 
  • Here is a small video of the card - 

  • I loved playing with this fun fold and I am sure you will too if you decided to give it a go. Cheers!
  • Supplies used


January 2016 release

Hello and Namaste to all

My name is Aastha Jain, and today I am going to bring you the most exciting, the most awaited, the most creative launch of the year. Its time to reveal..the launch of PLANNERS.

I have two full usage PLANNER KITS, one in a funky style and colorful and one in VINTAGE. Not enough? Yes, to your expectations, we have a VALENTINES paper pack too this time.


Lets get into some details:
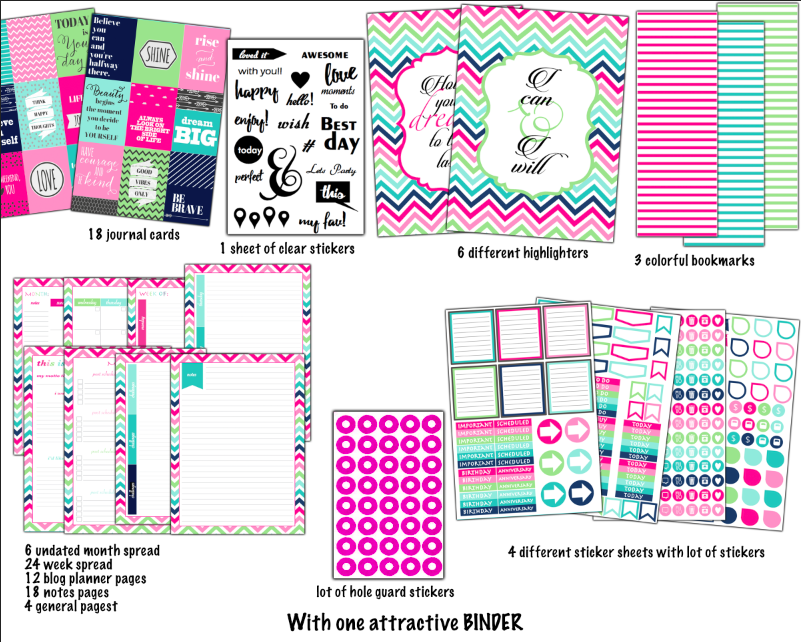
First kit: PLAN IN STYLE: COLOR SPLASH

The complete kit includes:


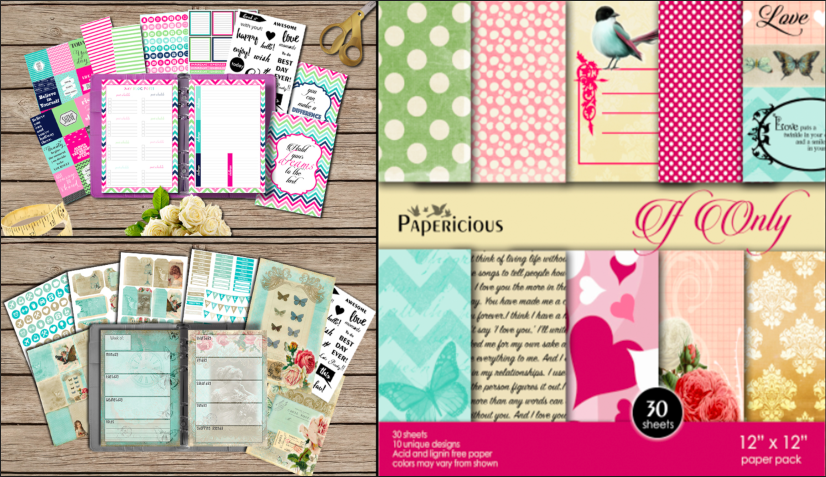
And for the first time in the history of planners: planner in a VINTAGE look

PLAN IN STYLE: RETRO CHIC


The kit includes:


And here comes the beautiful paper pack


Some of the pages inside:


All the material will be available in your favorite craft shops by the end of this month. Here is the list of our official distributors, where you will find this whole stuff:
www.thecraftshop.in , www.anandhastationery.blogspot.in, www.diecutsandmore.com, www.imaginationsonline.com, www.craftadda.com, www.artsomecraft.com, www.krafterscart.com, Nirmal Stationers(Store in Old Delhi)

Many more pictures and videos will be coming soon on our blog so stay tuned with us. 
Don't forget to leave your valuable feedback here so that we could come to know that you knocked in here.

Cheers--