Showing posts with label Ephemera. Show all posts

Wanderlust Journal


Dear friends,
This is Parul here. As we have stepped into a new year, I wish you all a very very Happy New Year. May this year bring you tons of happiness.
Today I am here with yet another inspiration post. Recently, Papericious launched this beautiful Blank Journal which is like an empty canvas for you to fill with your imagination. After wondering for quite a long I decided to convert it into a travel journal which I named "Wanderlust".

And here it is:
As soon as I saw this Globe Chippis from Papericious, I fell for it. It has got two globes and both of them are absolutely gorgeous. I painted the floral one with white paint and kept aside. 
I took out the word wanderlust from Wanderlust Chippis and coloured this as well in white.
To keep the overall theme floral I chose this beautiful floral Decoupage Paper Ephemera and pasted it on the cover of the journal with the help of Decoupage Glue. This paper has got a really beautiful border which I cut and pasted on the lower half of the cover. 
Next, I pasted the Globe and Wanderlust on the cover and fill the centre of the globe with rose gold glitter. It added a bling to this embellishment.
And that's all. This journal looks so pretty in person. And here is a close-up for you to have a look on :)

Hope you like it. Please let me know in comments. 

Love,
Parul

Supplies Used:

September Challenge - Make a Dimensional Project

Hello Crafty people, 

This is Nikkita Sethi from Kolkata,India sharing my first DT post for the new term 2018-2019 .
I am super thrilled and extremely blessed that I am selected by Papericious. 
Crafting is my passion and I love to learn and explore new forms everyday. 
Today we are back again with a new challenge for month of September starting from today till next month 9th October.

September Challenge - Make a dimensional project (Example - Make dimensional 3D cards, Explosion Boxes, any 3D Altered Art, Mixed Media, 3D items or anything 3D using Papericious products).

Please note - The main focus should be on Papericious products and do mention the products. 


Challenge Rules:
1. You can create any project - Altered items, 3D projects, Home Decor, Cards, Layouts, Mini Albums, Scrapbooks, etc.
2. Remember that you need to use Papericious Products as your main focus to qualifying for the win.
3. The last date of submission of your projects is 9th October, 2018 at 11:55 pm IST.
4. Please go through the general guidelines HERE before you link up your projects. Any project not following the rules will be disqualified and it will not be eligible for the prizes.

Prizes: 
Now onto the exciting part, the prizes! Papericious will be giving away TWO prizes every month:

  • The DT will be selecting a Merit Winner at the end of every challenge who will stand a chance to win a gift voucher worth INR 500 from the Papericious Store.

  • We will also be having a Random Winner from all the entries who enter their projects every month to win a Papericious 6"x6" Pattern Paper Pad.

Everyone gets an equal chance here, so whether you are a novice or an experienced crafter, all are welcome to play along with our challenges.


Challenge Inspiration:

Here is my creation as inspiration for the challenge. I have altered a frame and used lot of Papericious products like White Heavy Gesso, Texture paste, Chippies, Mom to Be Embellishment sheet, Acrylic color , Clear Glitter powder, Brick stencil from my stash , Glossy Accents and Embossing powder.


Now the gorgeous box by Erum! 
This is how Erum has described her take on the challenge inspiration:
"For my chocolate box, I used Papericious Monochrome Paper Pack. I wanted crisp lines so I cut out several panels, tags, and tidbits of various sizes and arranged them in a way that is pleasing to one's eye. I also added pops of reds here and there for interest."


I hope you are inspired and will be playing along our challenge us this month.
Happy crafting!

 Love,
Nikkita


Envelope Punch Board Gift Box Tutorial

Hello friends,
 This is Nupur here from Nupur Creatives & I am sharing a tutorial for a gift box today made using Envelope Punch Board.

20161118_153732

We need 2 pieces of 7" x 7" cardstock. Align all 4 sides of the cardsock at 3 1/2" mark, punch & score. Repeat this with both the pieces.
20161117_210500

Now score all 4 sides of both the pieces at 3/8".
20161117_210940

Cut off the corner squares as shown ( I later cut the corners in a straight line so the edges were 45 degrees to the score line). 
20161117_211217
For the top portion of the box cut off both flaps from one of the sides as shown. This will be the opening of the box.
20161117_211624


Apply tacky tape on the flaps of the bottom piece leaving 2 flaps on one of the triangle pieces. This will be the opening of the box.
20161117_214518

Carefully align and adhere the top & bottom pieces. The picture below shows how it will look like after the box is assembled.
20161117_215213
Make a hole in the top & bottom opening pieces & thread the ribbon through & tie a bow to close the box. Decorate the box with pattern papers & embellishments of your choice.
20161117_220524
Here are few more pix of the decorated gift box... Side view
20161118_153742
& top view...
20161118_153804
Hope you like it...
Thank you for visiting today :)
nupur
Materials Used:
Ephemera Paper Pack

Shabby Layout by Mallika

Hello Friends,
I hope you all having great day. 
I have recently made a layout for my parents anniversary album. 
I have used ephemera collection.


This collection had everything - the tags , beautiful cuts outs for sticker. 
Papericous products used:
Ephemera Premium paper pack


You can find the information about all our retailers all over India and abroad HERE.
Hugs
Mallika 

Papericious Monthly Challenge Announcement | Anything Goes

Hello everyone!
This is Hussena and I'm so excited to be hosting the first ever challenge on the Papericious blog. From this month onwards, we'll be hosting a new challenge beginning on the 10th of every month and we have some exciting prizes to give away! :)


For our very first challenge, we have gone with everyone's favorite theme which is - Anything Goes, so share your cards, 3D projects, altered items, layouts etc using this theme, but don't forget that you NEED to use atleast ONE Papericious product in your project -
It can be our line of pattern papers, circular collage sheets, die-cuts, adhesive flairs- anything! (Please note - Papericious Craft Sheet & Papericious Blending Tools DO NOT come under this category)


{Papericious Challenge #1 Guidelines}
  • You can create any project - Cards, Layouts, Albums, Altered items, 3D projects, Home Decor etc.
  • The theme for this month is - Anything Goes so everything fits the bill!
  • The last date for submission of your projects is 10th May, 2016 at 11:59pm IST.
  • Please go through the General Guidelines HERE before you link up your project. Any project not following the rules, will be disqualified and it will not be eligible for the prizes.

Now, what's a challenge without prizes, right?! Papericious will be giving away TWO prizes every month -

  • The DT will be selecting a Merit Winner at the end of every challenge who will stand a chance to win a gift voucher worth INR 500 from the Papericious store.
  • We will be also be having a Random Winner from all the entries who enter their projects every month to win a Papericious 6 X 6" Pattern Paper Pad. 
Everyone's got a equal chance here so whether you are a novice or an experienced crafter, all are welcome to play along our challenges :)


Now onto some wonderful inspiration from the Design Team. First up is this gorgeous card from Halak Shah.


Here's how she made this card :
1. Took the wooden plank design pattern paper from the Naturals
collection, distressed it and adhered to cardstock.
2. Fussy-cut flowers, leaves and a butterfly from the Papericious
Ephemera Paper collection sheets, positioned them onto the wooden
plank design paper and adhered.
3. Stamped sentiment using archival black ink.
4. Adhered pale pink and white pearls to project.
5. Lastly, attached two bronze colored brads to the bottom left hand side of the project and added a coat of glossy accents to the butterfly.

And that's how it was done.

Next up, is a layered card made by me. I have used pattern papers from the March 2016 release- Papericious Ephemera Collection. The butterflies are fussy cut from the same paper collection, while the flowers are handmade :)


Hope you're inspired to play along our challenge. We would love to see your entries using Papericious products!


A Masculine Layout Tutorial

Hello, good morning! ^__^

I'm Halak and today I'll be taking you through a masculine layout tutorial.

Making masculine projects is just so damn hard, right?!

Glitter or no glitter, sequins or no sequins.... what about flowers! Yikes! So many options and before you know it, boom, it's become a feminine project.

The Papericious Naturals collection is your answer to making stunning masculine and neutral themed projects!

So, let's get crafting!

Steps :

First I selected the pattern paper sheet I wanted to work with. I selected the light denim pattern design and stenciled the sentiment onto it.

Tip : There is an awesome collection of different textural denim patterns  in the Naturals collection that are great not only for Masculine themed projects but also look stunning with the Retro Chic style of papercrafting.

Once the sentiment was stenciled, I took some distress inks in the same color family as the pattern paper and stenciled in some designs.

Also added some washi tape bits.

Tip : Using stencils is a great way to add dimension and texture to your project without increasing it's weight. So if you are sending happy mail out to friends and family in different parts of the world, befriend the stencils and pattern papers. They will give you some stunning results in unison!

Took a darker denim sheet from the Naturals collection and hand-tore a strip from it.

Positioned the strip roughly where I wanted and added some more stenciling and washi tape.

Finally, added some sequins and a circle medallion that I hand-cut from Papericious Often collection.

I made a bunch of these medallions from the paper sheets and it was really simple :
Cut out the medallions, adhered a sticker to some and left some as-is.
Gave it a coat of glossy accents and sprinkled glitter over it.

Papericious papers play really nicely with each other and thus, a fusion of papers from different Papericious collections also looks great!

Have a look at the bunch of some more medallions I made :

Sparkly! ^__^

Bonus Project

Oh yeah! I have a bonus project tutorial for you!

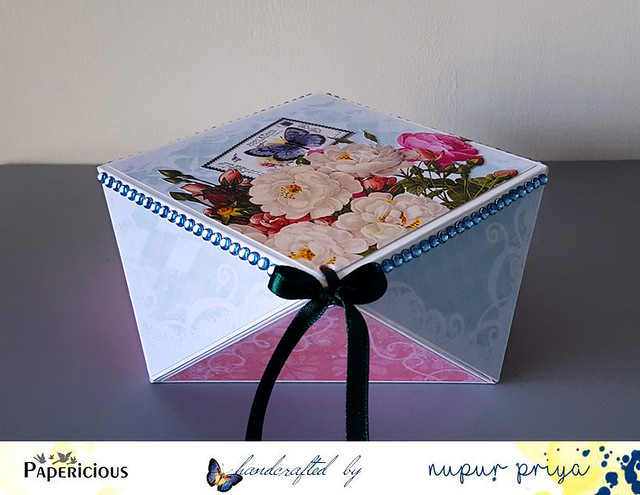
A beautiful neutral birthday card thats super easy to make!

Pretty eh? Simple too! Let me show you how :

First I took this gorgeous wood plank style pattern paper from Papericious Naturals collection and stenciled + roughly stamped a script design stamp to select areas.

I took these 4 die-cuts from the Papericious Ephemera collection.

Hand-tore two pieces of pattern paper from Ephemera collection and stamped the Happy Birthday sentiment onto one piece (left the second piece as-is) and adhered both the pieces to paper.

Positioned the Ephemera die-cut embellishments roughly where I wanted them placed.

Tip : Always position your pieces before you glue / tape them down, because sometimes what's in your mind, might not necessarily look great in actuality! To be on a safer side, I photograph the placement I like and then move the pieces and work by looking at the photograph for adhering the elements to project.

Finally adhered the pieces and added some pink colored sequins.

Matted it onto white cardstock and... done!

That's that dear friends! I hope you enjoyed reading and thank you so much for stopping by! *Hugs*


Posted via Blogaway