December Challenge - Anything Goes with 3 or more Patterned Papers
A big warm welcome Papericious friends. We hope this post finds you happy and well.
For the month of December, the beautiful Priya Chajjed and myself (Tina Ollett) are hosting the Papericious Challenge. Both Priya and myself are very new Design Team members, but we are very excited to be hosting this challenge. Being one of the busiest months of the year, we understand how little time one gets to oneself, so our aim is to inspire you to join in the fun and do something a little creative for yourselves. This month the challenge of "Anything goes with 3 or more Patterned Papers" is a great challenge we think. You can do anything absolutely anything at all using just 3 patterned papers!!!! Firstly we will run through the rules.........................
December Challenge- "Anything Goes with 3 or more Patterned Papers"
Please note - The main focus should be on Papericious products and do mention the products.
Challenge Rules:
1. You can create any project - Altered Items, 3D projects, Home Decor, Cards, Layouts, Mini Albums, Scrapbooks, etc.
2. Remember that you need to use Papericious Products as your main focus to qualifying for the win.
3. The last date of submission of your projects is 9th January, 2019 at 11:55pm IST.
4. Please go through the general guidelines HERE before you link up your projects. Any project not following the rules will be disqualified and it will not be eligible for the prize.
Prizes:
Now onto the exciting part, the prizes! Papericious will be giving away TWO prizes every month:
The DT will be selecting a Merit Winner at the end of every challenge who will stand a chance to win a gift voucher worth INR 500 from the Papericious Store.
We will also be having a Random Winner from all the entries who enter their projects every month to win a Papericious 6"x 6" Pattern Paper Pad.
Everyone gets an equal chance here, so whether you are a novice or an experienced crafter, all are welcome to play along with our challenges.
So with all the rules in mind and the Challenge set I got to thinking about all that is going on around me in my household at present. It is a little crazy to say the least. All my teenagers are so busy and they keep me on my toes. And with Christmas only 15 days away and so much Design Team work to get through I wanted to create something just for me. Something very pretty but just for me.
So I have used 3 or more of the Decopague Papers. I have to tell you I have never done decoupage in my life, so the way I decided to use these papers is just like I would normally use any of my scrapbooking papers. I absolutely adore the colours of these papers and I just went with the colours from the papers and built the cover of my Papericious Journal book.
I am very happy with how it turned out. I hope you like it too.
"Gabrielle" - Journal Book Cover
My first thing that I did was to prime my book cover. This journal book cover and insert pages are divinely thick and do not warp with any amount of media let me tell you. I used the Green Decoupage Pattern sheet first and then layered the half of the butterfly Decoupage sheet over the top. Once done I started layering Crackle Paste over the top to create another layer.
I then went to work on fussy cutting elements from the remaining sheets whilst the Crackle Paste dried.
I looooove vintage and this is where I went with the cover. Evergreen Bough, Walnut Stain and Ground Espresso Distress Inks were a perfect match for the colours in the decoupage papers.
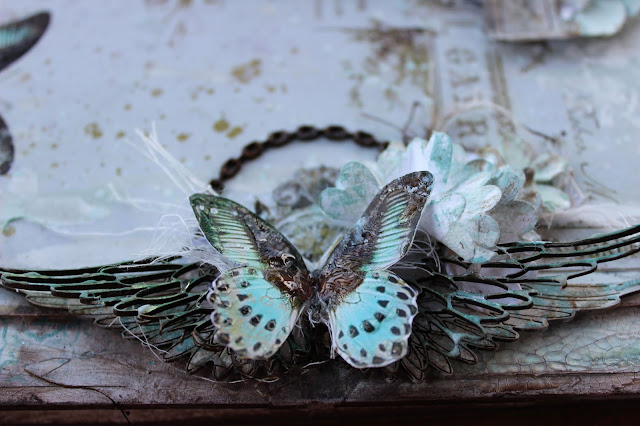
Once my layers of papers and fussy cut elements were adhered I went to work on colouring the chipboard collage wings. This is an insanely gorgeous piece of chipboard. I decided to make many layers with this cluster at the edge of the book. I have added in the cutout section of the label from the Gabrielle "Fly Away" paper and then added the first piece of chipboard which was dressed in white gesso and inked with Walnut Stain and Evergreen Bough. I then layered some muslin and then the skeleton wings which was inked in Evergreen Bough and covered with Clear Crackle. I then added on top of this a cutout butterfly. It was dressed in Clear Crackle and dry brushed with a little gesso.
You can see below the outcome of the clear crackle and the layers.
Above here you can see the outcome of the crackle, inks and layers of gesso with flowers added in. The papers really leant themselves to this journal cover. Looking at the papers there are so many elements to choose from.
My flower clusters were arranged around the cutout pieces and coloured with a little of the Evergreen Bough Distress Ink mixed down with a little white gesso and water. I have also added in some charms from my stash. They were cut up and layered around the butterfly at the top left.
"Wings" Chipboard Collage
"Fly Away" Decoupage Papers
I hope you enjoyed my little piece of challenge inspiration. Now Priya would like to share with you her gorgeous piece of inspiration.
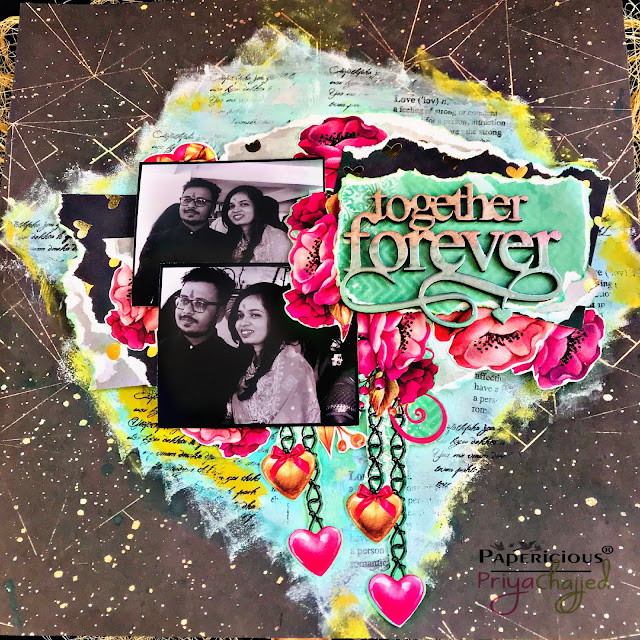
TOGETHER FOREVER
Today I have a layout to share that I made with two different collections by
Papericious
Christmas is around the corner and here I got the most
beautiful gift " The Man of My Life "
And this time, I have created a layout for myself using my own Engagement
pictures and I am super happy with the results!
I love the bright fun colours of Papericious Blush Collection, and the amazing Floral Element Sheets that I love so
much.
I have used the Femina Collection papers as my base and also layered up papers from same collection. This paper pack has amazing gold
foil sheets which are fun to play with..
All the floral fussy cuts are from Papericious Blush Collection!
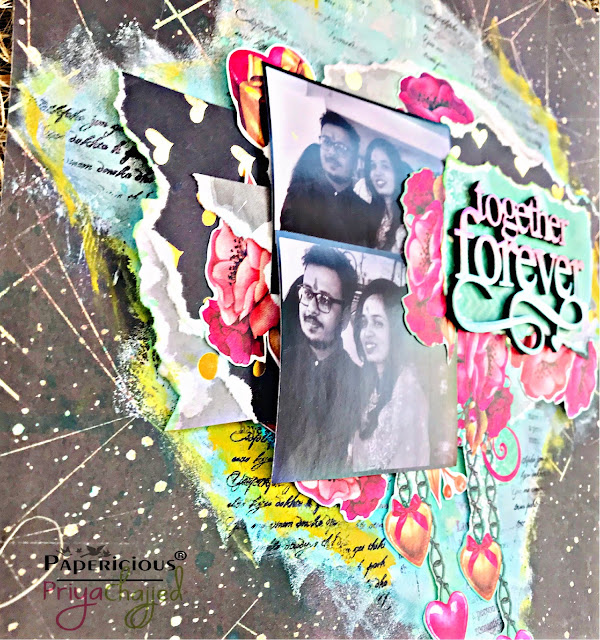
Few Close Ups:
I have used some sprays to colour my background and then I added little
random stamping using Script Stamps with Distress ink to add more dimension on
my layout!
Here I heat
embossed my chipboard using two Lindy's Embossing Powder to give a double shaded
look to my sentiment.. And I just loved the outcome.
Well, that's all from me today!
Thanks for stopping by!
I hope you have a great day!
XOXO


Different pattern papers should be from different paper pack or we can use different pattern papers from same pack.
ReplyDeleteYou can use from same paper pack..it’s just you need to add 3 or more pattern papers in your project!!
DeleteThank you
DeleteGreat fun Idea and beautiful showcasing!
ReplyDeleteBoth the DT inspirations are beautiful. Loved the arrangement of flowers and butterflies in the first one and bright and cheerful layout in second project. Love the double color embossing.
ReplyDeleteAmazing everything
ReplyDeleteWow....great challenge and lively DT's project
ReplyDeleteHugs
Rituparna
Great inspiration..love the both soft and bright colors...
ReplyDeleteAwesome..lovely and a great inspiration..:)
ReplyDeleteHreGr inspiration from the DTs, must adore the commendable work. Love the layering and butterflies are the highlight here. The double tone embossing stole my heart.
ReplyDeleteBoth the projects are so good
ReplyDeleteGreat idea and it is so fun😊
ReplyDeleteSuch a fun idea, and lovely projects by the DTS
ReplyDeleteThanks for sharing
Such a lovely projects ❤😘 by DTs.. Love d color combination n layering. .
ReplyDeleteSuch a lovely💕😍n great inspirated projects by DTs. .love d color combination n layering of d pattern papers. Lots of Thnx .
ReplyDeleteKindly consider my entry for current challenge as inlinkz closed before time.
ReplyDeletehttp://handcrafted-expressionsbykriti.blogspot.com/2019/01/namaste-friends-kriti-this-side.html?m=1
Of course lovely <3
DeleteBoth DT member are Excellent...
ReplyDeleteThey used Papercious Products are also Awesome❤
wowwww!!
ReplyDeletelovely theme!!!
DT projects are awesome