Showing posts with label shadow box frame. Show all posts

Memories Photo Frame ft. 'The Flickers'


Memories Photo Frame ft. The Flickers


Hello everyone! This is Parita Galani from Mystic Hue. I am super excited to be part of this creative design team for the very first time. I am here today with my very first blog post. I have curated Shadow Box Frame with very beautiful - The Flickers Patterned Paper Collection. I have made a simple frame using just the papers from The Flickers. I have fussy cut the roses for the border and have popped up the photo space for better effects.

Here it is:


Supplies Used: 

The Flickers 12" X 12" Patterned Paper Pack


That's all for today. Stay tuned for some amazing creations with the design team.

Keep crafting!
Regards,
Parita Galani

Love Shadow Box Frame - Tutorial

Hello people.

Chirali this side with a different use of Papericious shadow box, that too with a pictorial. It's a photo heavy post so sit back, relax and enjoy.

Here is the final outcome of the frame:


Let's start with the tutorial:


I took one shadow box frame, four small steel wire ropes and a lid of a bottle along with the hand drill machine. I made a hole in the center of lid.


Then made a whole in the frame.


Then I took a thread and wrapped it, leaving some portion on both sides plain, around the four steel ropes with the glue.


One side of the wires were arranged in the lid as shown in the picture and other side was fit in the frame as shown in below picture.


Then I took a stripe of a thick millboard of 1x12 inches with a fold at 6 inches and another cutout of 3x7.5 inches and made a triangle by cutting two sides to the one side at 3.75 inches.


Glued with the glue gun.


Then glued the hut kinda thing on the top of the frame with glue gun.


Then I painted whole thing with Pearl Pink chalk paint, leaving the portions blank which are going to be covered by paper. I have used Love Actually paper pack.

So we are ready with base. Now decorate it as you like. :)

So mine is here:


Some closeups: 


A 3D star chipboard of Papericious, painted with pearl pink chalk paint and gave it a coat of frosting powder with the use of soft gloss gel.


The star is a hanging one and behind that, there is a cute heart smiley from the paper pack.


I used a brick stencil and a soft gloss gel to get a brick effect and then sprinkled frosting powder. Photo does not give a proper justice but it looks beautiful in person.


And the back side!!

Isn't it a perfect home decor piece? Grab your frames and make your homes beautiful with them.. :)

So that is it for the day. I hope you liked it.

Thanks for stopping by. 

Hugs,
Chirali. :)

Supplies used:


Desk Organizer from waste - Tutorial

Hello people.

Chirali this side and I have a very easy project which you can make in no time with Papericious products. It is a Desk Organizer made from wastage lying since long time and using a shadow box and Gilded Onyx paper pack of Papericious.

Here we start:


I had many tape rings of different sizes and two chocolate tins. I organised them as shown in the picture by gluing the same.


Then I painted each one's edges and entire inside part with black gesso (except tins as they had a nice golden colour)


Then I took a stripe a little smaller then it's height. Length was measured by wrapping it.

I did the same to all the stands and glued them with tacky tape.


This is how they look after completion.


I added paper to the shadow box too and organised the stands in it.

We are almost done. Time to decorate it.


So I am done. 


Lids of those chocolate tins were added in the bottom of the small two stands to make everything stand in it.


I added golden flowers and leaves and lace, keeping it simple.

That glittery sentiment back was made by adding glitter to decoupage glued glass surface and then took it off once dry. One must try it if glitter is love.

So that's it for the day. It is super easy and super quick to make.

Thanks for stopping by.

Hugs,
Chirali. :)

Supplies used:


Shadow Box Photo Frame - Gilded Onyx

Hello people.

Chirali this side after a bit of a long time with the different way to use shadow box frames which are recently launched by Papericious. The best thing in this is you can design it the way you want and that too easily.

So here it is:


This is a shadow box of 8x10 inches size. I covered borders with the papers of Gilded Onyx paper pack. It's just so beautiful that I am in love with it.. I made 2 boxes of 3x3 inches, 1 box of 3x4 inches, 1 box for 3x5 inches and 1 for 5x7 inches with different combination of papers.  These are just normal boxes as we make in routine. I then arranged them as I wanted. You can do any size and any kind of arrangements. That's it. Now decorate it the way you want.


First box has a small kitty glass jar filled with shaker elements of Papericious. They have a beautiful and wide range in that. I have put a small glass filled with glitter and a peal.


Second has a photo mat and a 3D chippie of Papericious coloured in black with gesso and layered with Frosting Powder.


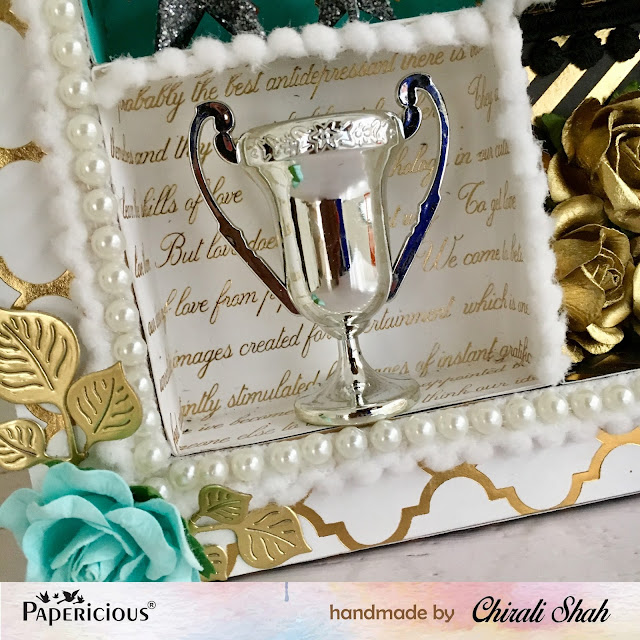
Third box has a trophy.


Forth box has a photo mat with glittery golden flowers.


And the fifth and the main box has a photomat with a hanging cage, a beautiful golden lace, a royal key and horse merry-go-round.


So now I hope you got the theme. I have summed up a success theme with trophy and glowing stars and a cup for celebration, with lots and lots of gold.

I hope you enjoyed it.

Thanks for stopping by.

Hugs,
Chirali. :)