Hello friends!
This is
Parita Galani, here today sharing with you few festive crafts with
Papericious' recently released gorgeous
Foiled Essential Papers. I am absolutely in love with papers, with its variety of colors with different foiled patterns, they are perfect for absolutely any project.
As Diwali is round the corner I have made some variety of mini projects which is perfect for this beautiful festive season.
Project 1
I have created below an entire project using just 2 sheets of 12" by 12" of Papericious
Fun Fiesta 12" X 12" Foiled Paper Pack. It includes Mini Treat Box, Scalloped Envelope, 2 Gift Cards/Coin Gifting Envelopes and 2 Gift Tags. I so love the combination of hot pink with lime green along with foiled patterns. It's so very festive!
Project 2
I have created Money Envelopes using the
Ethnica 12" X 12" Foiled Paper Pack, which are perfect for gifting in upcoming festive as well as wedding season. The bright shades of red, orange, and blue are just so fantastic!
Lets have a look at my project:

Supplies Used:
I hope you guys liked my projects and will create such festive projects of your own using this beautiful collection.
Keep crafting!
Best regards,
Parita K Galani

Hello friends!
This is
Parita Galani, here today with tutorial post featuring Papericious' recently released
Rosabelle Designer Paper Collection. This paper pack with its dark hues, bold motifs, and vintage embellishment is perfect for all for vintage and romantic paper projects.
I have created a layout which looks more beautiful because of lovely color palette of this paper pack.

Step by Step Tutorial:
Step 1 - Take a beautiful paper from Papericious Rosabelle as a base paper for the layout.
Step 2 - I used 3 randomly hand cut strips from the Rosabelle Paper Pack and dabbed some dry Black Chalk Paint for a vintage effect.
Step 3 - I have taken 2 beautiful frames from Papericious Chipboards Collection and painted them with Black and Wine Chalk Paint.
Step 4 - I used several beautiful embellishments from the Rosabelle Paper Pack and its coordinating DCE Sheets. And that's about it. I had a striking layout ready in a few minutes. I also added some flowers at the end.
Supplies Used:
Thank you!
Best regards,
Parita K Galani
Hello friends!
Greetings for the day!
This is
Parita Galani, here today with tutorial post featuring Papericious gorgeous new release
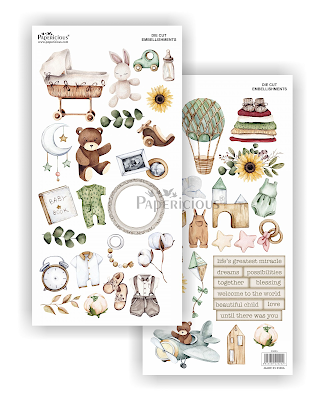
Peek a boo- Designer paper collection in beautiful earthy shades of green, brown and grey.
I absolutely love this fresh color palette of this paper pack which gives new perspective and color scheme for baby projects. Its perfect to create any baby themed projects, possibilities are endless.
I have created a vintage style layout with 3d elements which can be framed used as photo frame too, a beautiful combination of
Papericious peek a boo paper and elements from its matching die cut sheet, along with pearls, glitter and flowers.
Lets have a look at my project- Vintage Baby Boy LayoutStep by Step tutorial
Step 1- I have taken a patterned paper from Papericious Peek a boo paper collection, I have taken 3 circles sized 4",3" and 2.5" and have distressed it from the edges and 4 random strips of paper, I hand tear it to give a vintage effect.
Step 2- I arranged circle and strips with the help of double sided foam tape to give it 3d look.
Step 3- I did some dry brushing with green and beige color around the paper arrangement that we did in Step 2.
Step 4- I added various embellishments from Papericious Peek a boo Die cut motif sheet and also added pearls at random places with the help of an adhesive.
Step 5- I added clear crystals along with Papericious frosting powder and some flowers too and we are done with this pretty vintage layout.
Supplies used:
I hope you guys liked my tutorial and will create some fun projects of your own. We would love to see your projects using Papericious products so dont forget to tag us!
Stay In & Take Care!
Best regards,
Parita K Galani
Hello friends!
This is
Parita Galani, Hope all of you are doing well! Today I am here to share an tutorial project using Papericious newly launched
Moma In Making designer paper pack.
This paper pack is perfect to create all beautiful pregnancy related projects like scrapbook, cards envelopes, baby shower invitation and related gifts, possibilities are endless. I have made an explosion box with 3D elements in the center, this will form a perfect gift for baby shower and with little modification you can convert into beautiful baby shower invitation too.
Pink or Blue Explosion Box
Step by step tutorial
Step 1: I have taken 12" by 12" kraft paper and scored at 4" and 8" on both sides, and cut it on all 4 sides alternatively as shown below.
Step 2: I have taken 9 various patterned paper from Papericious Moma In Making paper pack sized 3.75" and pasted it using tacky tape also do same for the back side as it will form outer layer of the box.
Step 3- Make triangle with paper strips by simply folding and sticking it and than stick Papericious Moma In Making die cut embellishment on it as shown and than stick it step wise to create a 3D effect.
Step 4- I have made 2 pockets from 5" by 3" paper scoring 0.5" on 3 sides and stick on 2 sides as shown below. As inserts I have made one card 3" by 2.5" and 2 single inserts sized 2.5" by 3".
Step 5- I have taken 3" circle from Papericious Moma In Making patterned pack, pasted it as shown below.
Step 6- I have taken 6" by 6" kraft paper and scored it at 1" on all 4 sides make cut on 4 sides as we did for box and than pasted patterned paper sized 3.75" on top of the and 0.75" for all 4 sides.
Step 7: Now lets embellish the inside card and outer box step by step with Papericious Moma In Making laser theme chip board and Die cut embellishment, Mothers day DCE and some from element sheet from the paper pack and we are done.
I hope you all liked my project and you will create some beautiful projects of your own and don't forget to tag us!
Stay in & Stay safe!
Best Regards,
Parita K Galani