Showing posts with label love shadow box frame. Show all posts

Shadow Box ft. Me Before You | Tutorial


Hello dear friends!
 Wishing you all a very happy & prosperous New Year. 
Nandini here with a Tutorial Post of a Shadow Box featuring "Me Before You" .This time Papericious has come up with a wonderful paper pack "Me Before You" especially for the season of love. This is the perfect paper pack to create different projects for this season of love. It has variety of floral and couple images which is the perfect solution for the making of  Valentines' projects. 


Here is the procedure:
Step 1I started by selecting two paper sheets from the collection Me Before You. Cut the sheets accordingly to the size of the Shadow Box and paste it properly.
Step 2 Cover the edges of the Shadow Box with Papericious Modelling Paste. Create textures while covering the edges.
Step 3Create some design on the background by using stencil and modelling paste.
Step 4Put some mini and micro stones on the wet modelling paste so that it'll be settled with the paste.
Step 5Colour the MDF Embellishments and Grey Chippies first with Papericious Gesso and then White Chalk Paint. Apply some Frosting Powder on it and let it be completely dry.  After it dries, put some Sequins in it to make a perfect Shaker. 
Step 6Then adhere some different small boxes in it and start decorating it with the Cut and Create Embellishments from the "Me Before You" Cut and Create Embellishment Sheet.
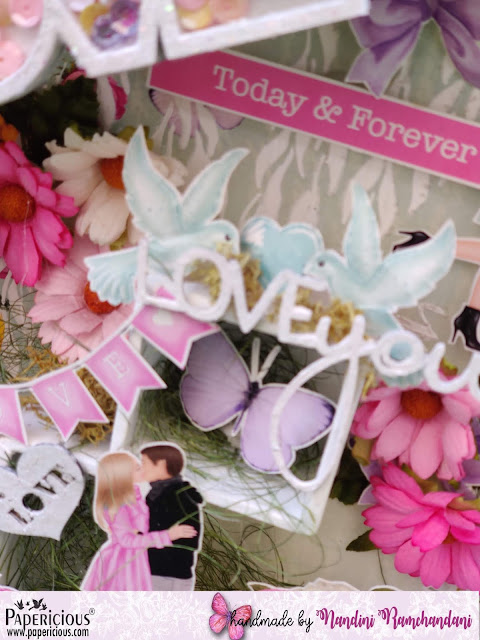
Step 7Paste all the fussy cut elements and embellishments to make it look beautiful. To enhance its beauty, decorate it with some flowers. 

Some more detailed pictures:


Supplies Used:
Papericious "Me Before You" Patterned Paper Pack
Cut and Create Embellishment Sheet - "Me Before You"

I hope you all have enjoyed this tutorial. 
Thank you for stopping with us!

Luv & Hugs,
Nandini Ramchandani

Love Shadow Box Frame - Tutorial

Hello people.

Chirali this side with a different use of Papericious shadow box, that too with a pictorial. It's a photo heavy post so sit back, relax and enjoy.

Here is the final outcome of the frame:


Let's start with the tutorial:


I took one shadow box frame, four small steel wire ropes and a lid of a bottle along with the hand drill machine. I made a hole in the center of lid.


Then made a whole in the frame.


Then I took a thread and wrapped it, leaving some portion on both sides plain, around the four steel ropes with the glue.


One side of the wires were arranged in the lid as shown in the picture and other side was fit in the frame as shown in below picture.


Then I took a stripe of a thick millboard of 1x12 inches with a fold at 6 inches and another cutout of 3x7.5 inches and made a triangle by cutting two sides to the one side at 3.75 inches.


Glued with the glue gun.


Then glued the hut kinda thing on the top of the frame with glue gun.


Then I painted whole thing with Pearl Pink chalk paint, leaving the portions blank which are going to be covered by paper. I have used Love Actually paper pack.

So we are ready with base. Now decorate it as you like. :)

So mine is here:


Some closeups: 


A 3D star chipboard of Papericious, painted with pearl pink chalk paint and gave it a coat of frosting powder with the use of soft gloss gel.


The star is a hanging one and behind that, there is a cute heart smiley from the paper pack.


I used a brick stencil and a soft gloss gel to get a brick effect and then sprinkled frosting powder. Photo does not give a proper justice but it looks beautiful in person.


And the back side!!

Isn't it a perfect home decor piece? Grab your frames and make your homes beautiful with them.. :)

So that is it for the day. I hope you liked it.

Thanks for stopping by. 

Hugs,
Chirali. :)

Supplies used: