Shadow Box Album by Swati


Happy Thursday, all!

Swati here from Swati's Crafting World. I'm sure y'all must have checked the latest release by Papericious by now. Today I've bounced back with yet another inspiration post. In my today's project I've made a Shadow Box Album with waterfall effect, & have used recently launched
 'HOOKED' Papers from Papericious. 

The album looks so pretty in person. And here's the close-up picture.


So now onto today's creation :

Planning to get a gift for someone, who is really special? The Shadow Box album is a perfect & an ideal gift. I'm here today to show that Shadow Boxes are super fun & easy!
 By breaking it down to clean & simple design, I hope it makes Shadow Boxes more approachable.

The size of the album is 6 by 6 inches & have decorated it with some couple paper die cut, mulberry rose & leaves, embellishments & tiles, cutouts from the HOOKED paper pack, & covered them with RAJNI CHAWLA'S - CRYSTAL CLEAR to give it a lustrous look. On the left side, I've added a waterfall thing which can house 8 tags/pictures & on the right side is the shadow box. The size of the Shadow Box is 5.5 by 5.5 inches & have decorated it with some fussy cuts & small tags
 from the HOOKED paper pack. The Shadow Box can hold 1 tag/pictures.

Detailed Pictures :


Supplies used to create this beautiful piece are :


Well that's all from me today. Thank you so much for dropping by. I hope I've inspired you. Don't forget to update your love in below comment section.

Until next time, take care & keep crafting.
LOVE,
SWATI NAHATA

Tutorial : You and Me Card


Hello friends!
Parul this side! I hope you are really enjoying all inspiration posts on the blog. Today I am here with a card using Hooked Paper Pack from Papericious. It's a lovely set of pattern papers with a very pretty colour palette.
And what I loved most is the sentiment sheet it comes with. There are 24 sentiments (all so beautifully done) so you can make as many cards without even need of printing or stamping a message.
Steps :
1. To make this card I started with a top fold card base in ivory colour . The size of card front is 4" x 5.5"
2. Next I took two pattern papers in contrasting prints and cut them 3.75" X 4" and 3.75" X 2".  
3. I adhered these pattern papers on the card base and to cover the joint I cut a stripe from other patterned paper on with word love is written repeatedly.
4. Next, I cut a heart out of the same patterned paper and also cut the sentiment out of the sentiments sheet. I glued both hearts at an angle and adhered them to card base using foam tape to add some dimension.


I really loved how this turned out. What do you think? Let me know in comments section :)

Thank you for stopping by!
Love, 
Parul

Supplies Used:

Gatefold Scrapbook using I Love You Paper Pack


Hello Everyone!

Neha here welcomes you all on the Papericious blog today with a new project. This time I have created a Gatefold Scrapbook. I will be showing you step by step tutorial to make this scrapbook. Let's move on...

Step by Step Tutorial:

1. Cut the chipboards in following sizes.
     1 piece - 6.5" x 8", 2 pieces - 1.5" x 8", 2 pieces - 3.25" x 8"

2. Cover it with a White Cardstock as shown in the picture.

3. Base of the scrapbook is ready.

4. Now let's move on to inner pages. Cut 8 pieces of 3.25" x 4.75" of cardstock and score at 0.5" on 4.75" side. Paste them on left side of the scrapbook as shown in the picture.

4. Now take 2 pieces of cardstock of size 4.25" x 5", 4.25" x 3.5" and score at 4.25" on both the cardstocks and create a pocket and adhere them on right side of scrapbook as shown in the picture.

5. Take 8" x 8" cardstock and score at 0.5" and 1.5" and adhere it to the middle of the scrapbook as shown in the picture. Ignore the measurements shown in the below picture.

6. Cut 6.5" x 8" cardstock and score at 0.5" and 1" on 6.5" side. Adhere it as shown in the picture.

7. Now to create waterfall cut 7 pieces of 5" x 6.5" and score 0.5" on 5" side and paste it on the scrapbook.

8. Tadaa! Your base for the scrapbook is ready. Now it's time to decorate it with your favorite "I Love You" Paper Pack from Papericious. 
Have a complete look:


SUPPLIES USED:


Hope you enjoyed my tutorial. Thank you for stopping by.
Hugs,
Neha

Papericious January Challenge Winners


Hi there, everyone!
The time has come! I know you have been eagerly waiting to find out the winners of the January Challenge "Scrap Your Scraps".
Without further ado here are the Top 3 in no particular order:


And the WINNER is:
.
.
.
What a gorgeous creation Shweta! You blew away our designers! We loved your project as well as the description of the process. Congratulations!

Shweta, please send us an email at - papericious@gmail.com with the subject line "January Challenge Winner " to claim your prize. You can grab your Winner's badge from HERE and flaunt it on your blog.

Top 3 Winners, please grab your Top 3 badge from HERE and flaunt it on your blog!

Our February Challenge is live, you should definitely check it out! Would love to see your entries there.


Thank you
Happy Crafting!

3D Shadow Box Frame w/ Envelope


Hello Papericious fans!
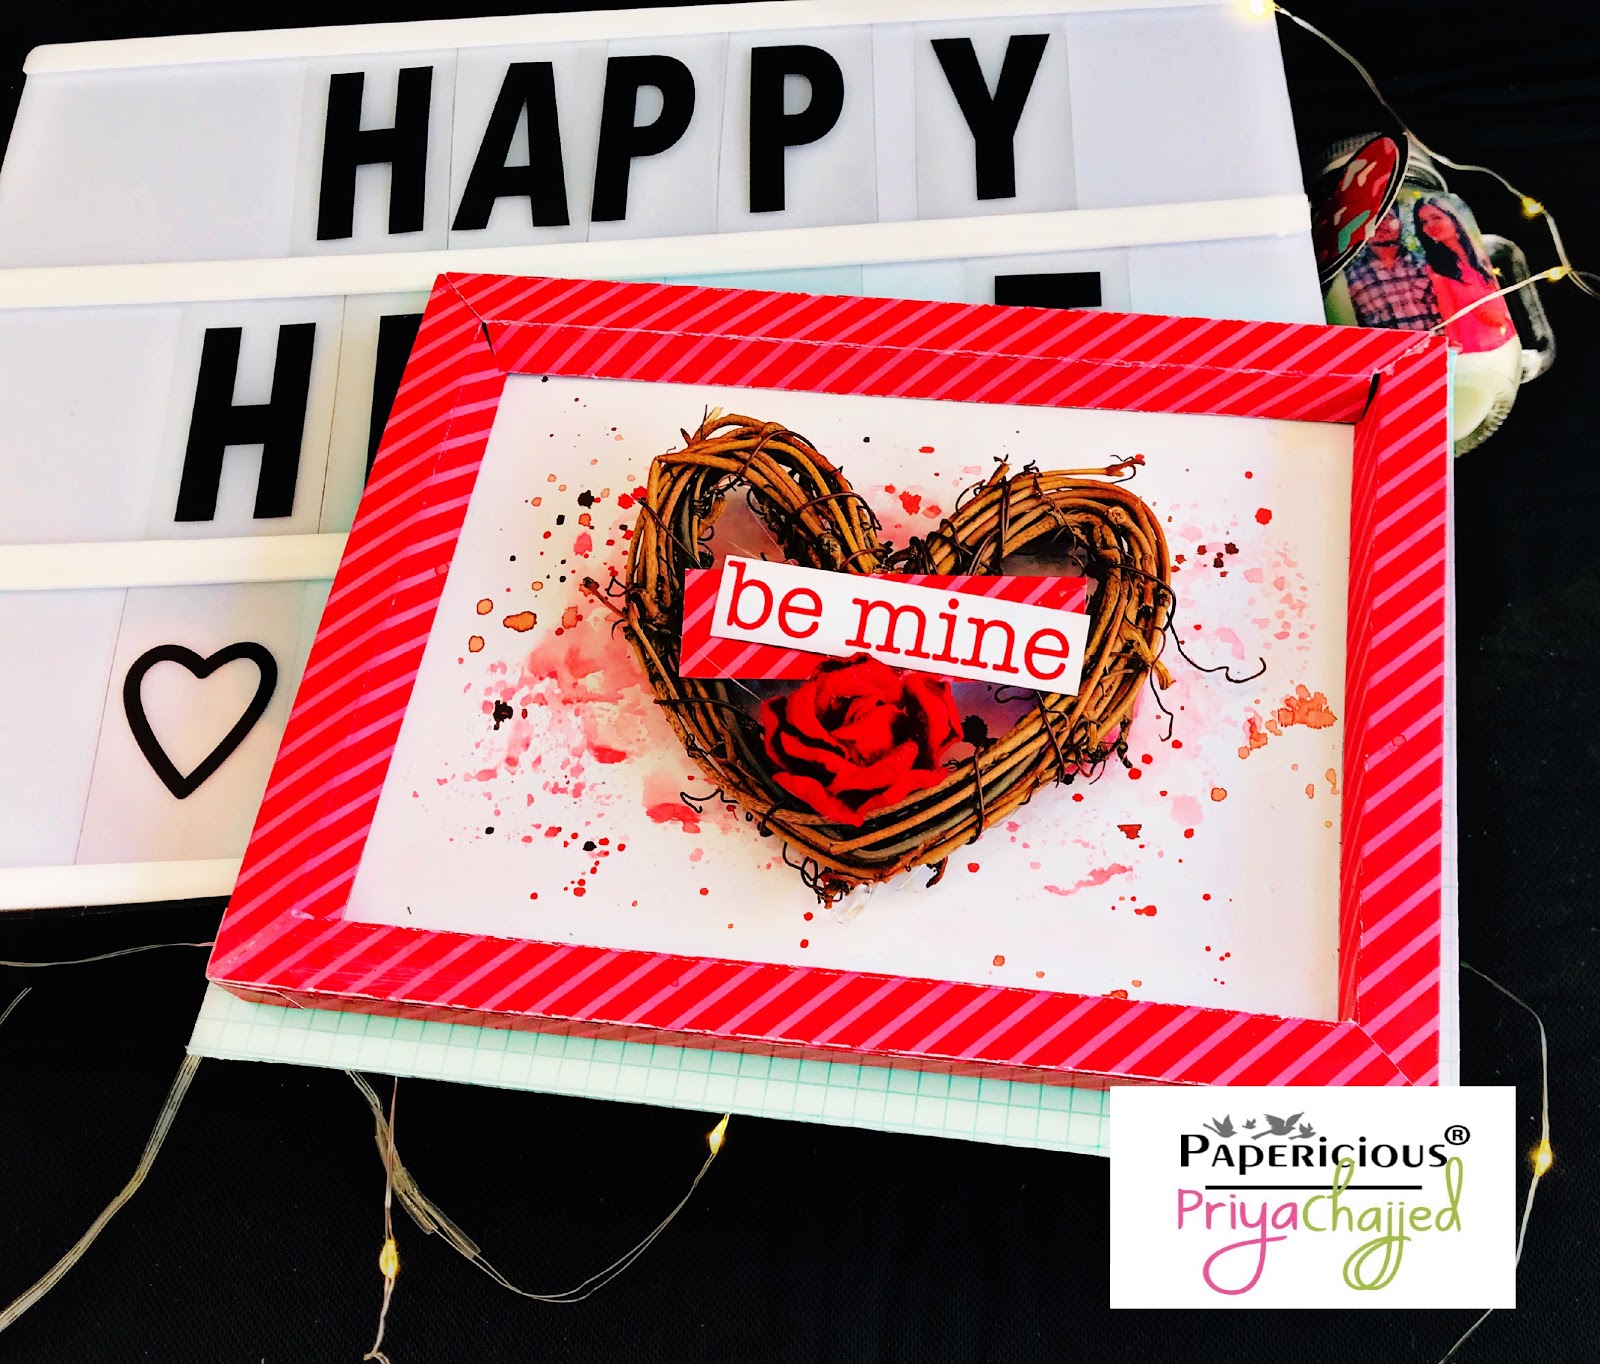
Priya here again. Today I'm going to be showing you how to make your own custom Shadow Box Frame with an Envelope.

Here is step by step tutorial:

To create a Shadow Box, you need a sheet of Cardstock or Pattern Paper  measuring 12'' X 10'' and you have to score all the 4 sides each times at 1/2 inch.
Make extra 1/2 inch on short side of paper but only to the second scoreline. Now you have to trim all the marked areas off. And after that you fold all the score-lines and use glue or red tape to stick them and your shadow box is ready!

Now on to the envelope:

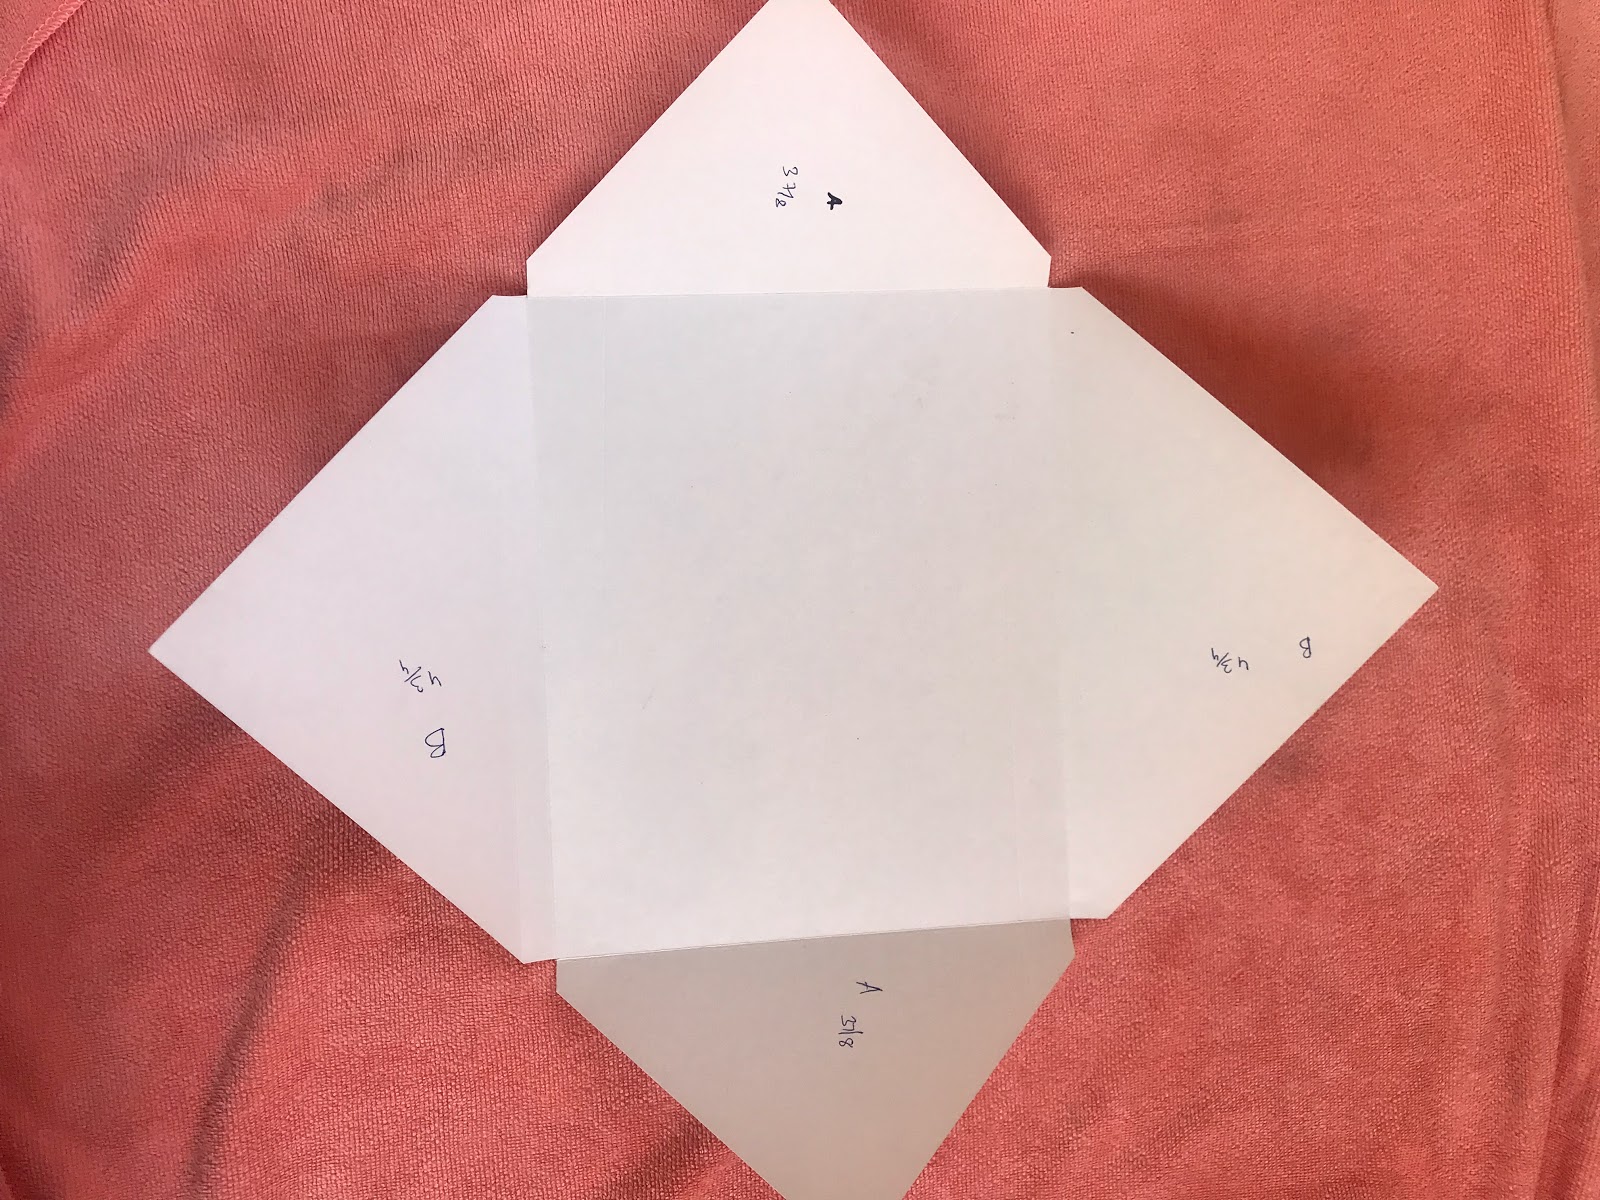
You need a sheet of Pattern Paper measuring 12'' X 12'' and score the A side at 3 7/8'' and B side at 4 3/4''. Glue the 3 sides and your envelope base is ready!

Now you can can decorate them as you wish!!
For my project I have used amazing paper collection by Papericious "I LOVE YOU''

And they are just perfect for any love project!
Here is glimpse of my project:


That's all from me today!
I hope you all are inspired to make your own shadow box envelopes!
If you have any query, please get in touch in comments below. I'd love to hear from you.
Love

List of Supplies:

Love is in the Air featuring HOOKED Paper Pack


Hello everyone! 
This is Nikkita, wishing you all a very HAPPY VALENTINE'S DAY. Today I am back with a quick tutorial and a gorgeous LOVE banner using the gorgeous HOOKED paper pack the new release from Papericious. 

TUTORIAL ON LOVE BANNER 

1. Take four pieces of White Cardstock measuring 8 inches X 6 inches. From the 6 inches side mark a mid-point and from 8 inches side cut a diagonal line going till the mid point on 6 inch side. This will give the base triangle banner.

2. Now, take 7.5 inches by 5.5 inches Black Cardstock and cut into 4 pieces and follow the above instructions, this will be the matting layer for the banner.

3. Take pattern paper as desired - 4 pieces measuring 7 inches X 5 inches and follow the same instructions as above to make triangle banner. 

4. Adhere all three layers together then with a Crop A Dile punch out in two corners of the banner pieces to attach Jute Cord to hang the banner.

Layer them all together and add embellishments, flowers, bows etc as desired. 
LOVE Banner


SUPPLIES USED
Hooked Paper Pack Designer Edition

Bubbles Chippie
Jute Cord
 Hope you like the tutorial and do try this out and share with us.
DO leave some love.
Happy Crafting
Love,
NIKKI