Showing posts with label shadow box. Show all posts

Little Dreamer - Shadow Box ft. Dream Big


Hi everyone!
Design team member, Shweta here today to share my new project with you all. 
My project today is a layout featuring the 'Dream Big ' Paper Pack. I have also used the co-ordinating Cut and Create Embellishments and Chipboards. This paper pack has a lot of beautiful and bright elements and is perfect for all your baby and kid related projects.
Have a look.

For this, I made an 8 X 8 inches shadow box from White Cardstock, lots of tutorials are available on YouTube for the same. I chose a dark shade pattern paper for the inside of my shadow box and used a lighter shade on the borders. Then, using some pattern papers, Vellum Cardstock, fussy cut outs from the papers and the co-ordinating CCE, and the chipboards I formed a pleasing composition around a fussy cut notecard from the paper pack. You could also use a picture here. As usual, I created a very layered composition for that extra depth and interest. Here are some close-ups.


Papericious Supplies Used:


I would love to know how you liked the shadow box. Until next time!

March Challenge Winner - Birthday Wishes with a Twist!


Hello Friends
Greetings for the day!
This is Parita Galani from Mystic Hue. Today I am here to announce the Winner for the very special March Challenge - Birthday Wishes with a Twist

This challenge was very special as we at Papericous completed 5 glorious years, So I would like to thank each and every participant for participating in this and celebrating with us.
So here's presenting the Winner:
.
.
.


Congratulations Vani! 
We loved how perfectly and creatively  you have used 5 different Papericious products, to create this fantastic Shadow Box.

Vani, please mail us at - hussenacal@gmail.com with the subject line "March Challenge Winner" to claim your gift voucher. You can grab your winner's badge from HERE and flaunt it on your blog.

Also April Challenge - Colour It Up! is live on our blog and we cant wait to see all of yours colourful creations.
Keep Crafting!

Best Regards,
Parita K Galani

Life is an Adventure!!

Hi lovely people, 
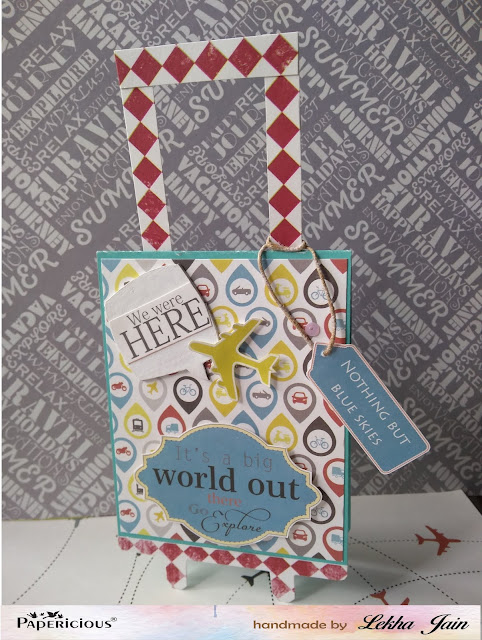
Today I will be sharing with you a pretty suitcase shaped card along with a shadow box I designed for a couple who loves to travel. 
I have used the Papericious Let's Go paper pack .
I love this pack as it has a perfect blend of colors and prints for all your travel related projects. 
So sit back and enjoy ...
First is the suitcase shaped card.

 
Next I made the shadow box. The walls of the shadow box are covered with the red diamond print from the Let's Go paper pack.
 
 Here I have taken glass domes and stuck them on little fussy cut images from one of the patterns. 
 This pack has some lovely quotes and here I have fussy cut this one and covered it with mod podge dimensional to give a glass look. 
 Here is the complete look of the shadow box. 
Hope you like all the little elements put together and get inspired to create one for you. And do checkout our ongoing challenge, you still have time to share creations with us.
Keep Crafting
Lekha

Supplies used:


Desk Organizer from waste - Tutorial

Hello people.

Chirali this side and I have a very easy project which you can make in no time with Papericious products. It is a Desk Organizer made from wastage lying since long time and using a shadow box and Gilded Onyx paper pack of Papericious.

Here we start:


I had many tape rings of different sizes and two chocolate tins. I organised them as shown in the picture by gluing the same.


Then I painted each one's edges and entire inside part with black gesso (except tins as they had a nice golden colour)


Then I took a stripe a little smaller then it's height. Length was measured by wrapping it.

I did the same to all the stands and glued them with tacky tape.


This is how they look after completion.


I added paper to the shadow box too and organised the stands in it.

We are almost done. Time to decorate it.


So I am done. 


Lids of those chocolate tins were added in the bottom of the small two stands to make everything stand in it.


I added golden flowers and leaves and lace, keeping it simple.

That glittery sentiment back was made by adding glitter to decoupage glued glass surface and then took it off once dry. One must try it if glitter is love.

So that's it for the day. It is super easy and super quick to make.

Thanks for stopping by.

Hugs,
Chirali. :)

Supplies used:


Shadow Box Photo Frame - Gilded Onyx

Hello people.

Chirali this side after a bit of a long time with the different way to use shadow box frames which are recently launched by Papericious. The best thing in this is you can design it the way you want and that too easily.

So here it is:


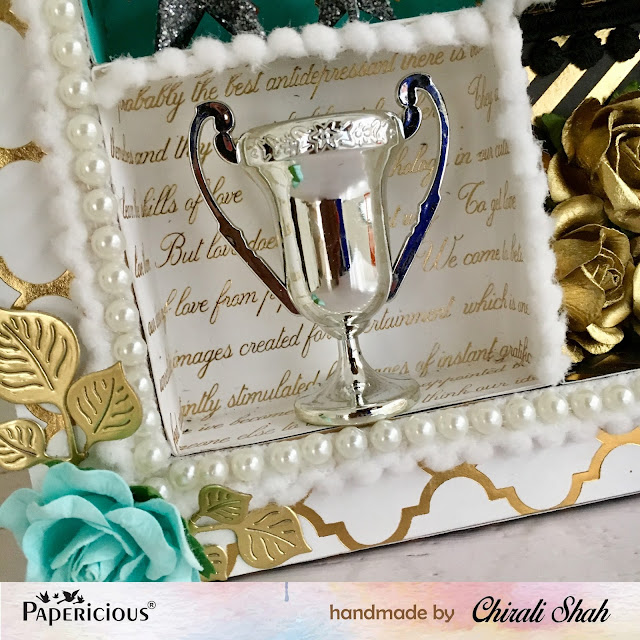
This is a shadow box of 8x10 inches size. I covered borders with the papers of Gilded Onyx paper pack. It's just so beautiful that I am in love with it.. I made 2 boxes of 3x3 inches, 1 box of 3x4 inches, 1 box for 3x5 inches and 1 for 5x7 inches with different combination of papers.  These are just normal boxes as we make in routine. I then arranged them as I wanted. You can do any size and any kind of arrangements. That's it. Now decorate it the way you want.


First box has a small kitty glass jar filled with shaker elements of Papericious. They have a beautiful and wide range in that. I have put a small glass filled with glitter and a peal.


Second has a photo mat and a 3D chippie of Papericious coloured in black with gesso and layered with Frosting Powder.


Third box has a trophy.


Forth box has a photo mat with glittery golden flowers.


And the fifth and the main box has a photomat with a hanging cage, a beautiful golden lace, a royal key and horse merry-go-round.


So now I hope you got the theme. I have summed up a success theme with trophy and glowing stars and a cup for celebration, with lots and lots of gold.

I hope you enjoyed it.

Thanks for stopping by.

Hugs,
Chirali. :)

Papericious January 2018 Release - part2

Hello and Namastey

I, Aastha Jain, welcome all dear readers to our blog. I am excited to bring you new launch of the year, a very new product from our side actually.
Though this has been not a true new concept but has been in demand from ages. And we are pretty excited to launch such a high quality and great variety in this product line.

Presenting WOODEN SHADOW FRAMES IN ALMOST 5 DIFFERENT SIZES. Made from high quality Mdf wood. Packed from shrink wrap with love.

SIZE: 8X10; MRP - 250/-


SIZE: 8X8; MRP- 210/-


SIZE: 6X10; MRP - 210/-


SIZE:6X8; MRP 190/-


SIZE: 10X10; MRP- 280/-


We will soon start the inspirations for the frames. Stay tuned to check the projects on our blog. The material will reach the stores by next Monday. You can pre book the frames.
We have something more to share and launch so keep an eye on our blog for tomorrow.
-- Happy Crafting--