
Shadow Box ft. Me Before You | Tutorial

Hello dear friends!
Wishing you all a very happy & prosperous New Year.
Nandini here with a Tutorial Post of a Shadow Box featuring "Me Before You" .This time Papericious has come up with a wonderful paper pack "Me Before You" especially for the season of love. This is the perfect paper pack to create different projects for this season of love. It has variety of floral and couple images which is the perfect solution for the making of Valentines' projects.
Here is the procedure:
Step 1 - I started by selecting two paper sheets from the collection Me Before You. Cut the sheets accordingly to the size of the Shadow Box and paste it properly.

Step 2 - Cover the edges of the Shadow Box with Papericious Modelling Paste. Create textures while covering the edges.

Step 3 - Create some design on the background by using stencil and modelling paste.

Step 4 - Put some mini and micro stones on the wet modelling paste so that it'll be settled with the paste.


Step 5 - Colour the MDF Embellishments and Grey Chippies first with Papericious Gesso and then White Chalk Paint. Apply some Frosting Powder on it and let it be completely dry. After it dries, put some Sequins in it to make a perfect Shaker.

Step 6 - Then adhere some different small boxes in it and start decorating it with the Cut and Create Embellishments from the "Me Before You" Cut and Create Embellishment Sheet.


Step 7 - Paste all the fussy cut elements and embellishments to make it look beautiful. To enhance its beauty, decorate it with some flowers.

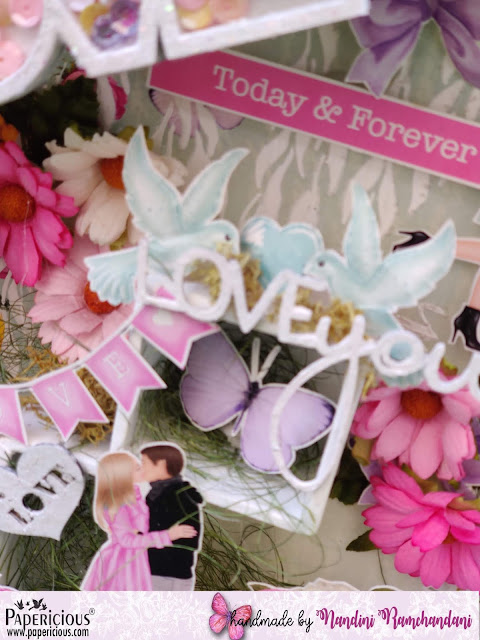
Some more detailed pictures:


Supplies Used:
Papericious "Me Before You" Patterned Paper Pack

Cut and Create Embellishment Sheet - "Me Before You"


I hope you all have enjoyed this tutorial.
Thank you for stopping with us!
Luv & Hugs,
Nandini Ramchandani


Beautiful shadow box👌❤
ReplyDeleteHugs
Rituparna
thanks dear Rituparna..m glad you like it!
DeleteAwesome
ReplyDeleteThanks dear Sonika ...m glad you like it!
Delete