Showing posts with label Papericious Love Actually. Show all posts

Mixed media tags using Love Actually


Namaste Everyone!!

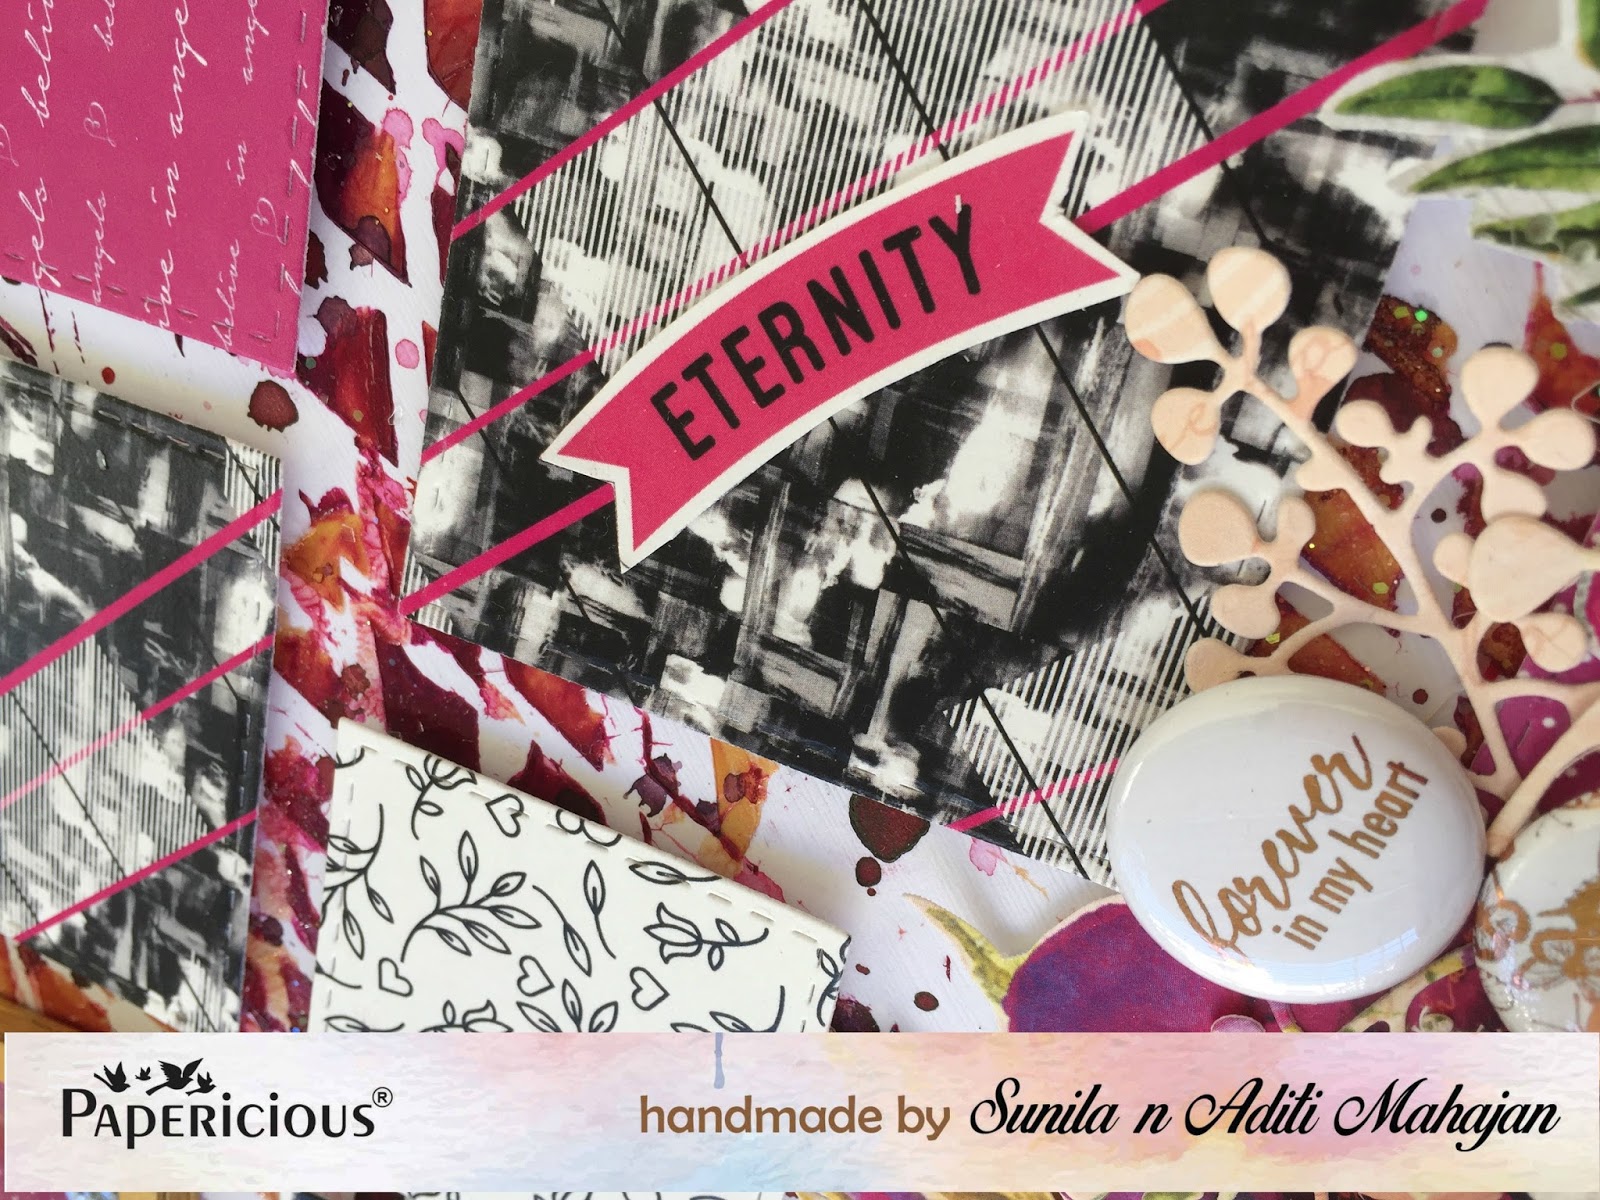
I am Kriti here today....with a beautiful and easy to make project....

Have a look....


I had made these tags using Papericious Love Actually paper pack and Papericious Monochrome paper pack.

I have a quick tutorial too for these tags...

Firstly take a black card stock of size 3" x 6". Then cover it with a piece of pattern paper from the pack(I have distressed the edges to give some interest) then take another piece of card stock, contrast in color, adhere above it with a foam tape...


Then take a Papericious 3D Ornament chippi ( Papericious has variety of chippies to choose from), and colour it with black acrylic paint.
Next embellish it with some flowers, sisal, gauge, jute chord and some die-cuts. to highlight the edges splatter some shaker beads with the help of Papericious Shaker Beads.

Here is the first tag...


This is the next tag....


I hope you like this project...
Thanks for stopping by...
Hugs
Kriti Mishra


Supplies used:

Love Actually - Papericious Designer Edition

Monochrome - Papericious Designer Edition

Papericious Art Mediums - Soft Gloss Gel

Yellow - Papericious Shaker Beads

Ornament - Papericious 3D Creature Chippis

CAS Layout with Love Actually Paper Pack


Hello friends!
Erum here today with a CAS layout using Love Actually paper pack and 3D Shaker Chipboard element.
I started by cutting a couple of pieces from papers that go together.
This includes the tag and banners as well. Then I added some pink and grey watercolour to my background.

I visualized how I wanted my layout and moved around the pieces till I was happy with the look.
At this point I took out chippies to see what would work with my layout and loved the look of Bubbles Pattern Chippies. I also added some Shaker Beads in Pink here and there.

Next I cut out the heart from the paper with all the little tid bits for us to use. This heart says "adore". I popped it over some stamped florals and added glossy accent to it.
Next I added the letters "YOU" to form the sentence "adore you" and added glossy accent to these as well.
After I was done arranging all the elements, I stamped a couple of florals in plain black ink on white cardstock. I fussy cut these out and popped them on opposite ends.
This hot pink chipboard  piece is a "waste" out of the Bubble Pattern Chipboard. I covered it with gesso then inked it up with distress stain.
That is all from my side today!
I hope you liked my project. In case you are wondering why the photo space is blank, this is a gift for someone. I will add a photo later on.
Thank you for stopping by.


Love Actually Mixed Media Layout

Hello friends,
Sunila and Aditi here from Dots to Lines and today we're back with a fun mixed media layout to inspire you all! We've been playing with the new release love Actually Paper Pack, Mini shakers and the shaker beads and we cannot tell you how much fun it has been.

So here's a look at the layout.


For this layout, we've used the Papericious Textured White Cardstock. We used a square die and cut out squares of various patterns and sizes. We then painted the mini shakers with gold acrylic paint, for the background inside, stuck the same pattern papers. We added a mix of sequins and shaker beads and got our mini shakers ready. On the white cardstock, we added some texture with a stencil and gel medium mixed with metallic paints. We then sprinkled crystal clear powder onto it. We then added some splatter using sprays. We then arranged our squares as diamonds and stuck them with foam tape. On a few of them, we added some sentiments fussy cut from the paper pack. We also fussy cut some flowers from the pattern papers and die cut some ferns. Our focal element is the mini heart shaker, so we layered gauge, fussy cut, die cut elements, and two badges. We added some sequins with gel medium randomly. We completed the layout using the title on the cover page of the pack placed in the similar diamond manner like our other papers.

Here are some close-ups:


Supplies used:


Hope you're inspired:)! Happy Crafting! 


Cute Cards using Mini Shaker Elements

Hi friends,
Happy Valentine's day!
I hope you all are having a great time and are all set to celebrate valentine's day with your loved ones. 
I have created some simple but unique cards for you all which can surprise the recipient and make him/her have a huge smile.
So without further delay lets see how the cards for today are made.

 Step 1: I separated all the layers of the mini shaker elements so as to paint them neatly. I love the fact that these individual layers can also be used for projects in many different ways.

Step 2: I painted the Mini shakers with Papericious Chalk paint the finish is super opaque and flawless. I allowed them to dry completely.


Step 3: Next I took the coloured Papericious Chalk paints and mixed White Chalk paint to create an ombre effect on the shaker base.


 Step 4: Once the paints were super dry I selected the gorgeous shaker beads in coordinating colours. Just added some and then placed the acetate sheet and locked it with the top most layer using a strong adhesive.

Step 5: I allowed it to dry and then used some cute sentiments on top.


To finish the cards I used the beautiful patterns and some cute critters. For the Yellow card I used a flower cluster from the paper pad and that made it look so elegant. I love the way the beads shake and move inside the shaker ,it becomes impossible to keep the card away . I love playing with it and I am sure not only the little ones but elders will also love to get a card like that...

Here are few Cards I created using these adorable mini shaker elements.


I hope you liked this post and will want to recreate it. Here is the list of supplies which will be needed and you can buy them at www.papericious.com

Happy crafting!


SUPPLIES

Mini Shaker Elements - Heart , Hexagon