Showing posts with label Papericious 3D Chipboards. Show all posts

Shadow Box ft. Me Before You | Tutorial


Hello dear friends!
 Wishing you all a very happy & prosperous New Year. 
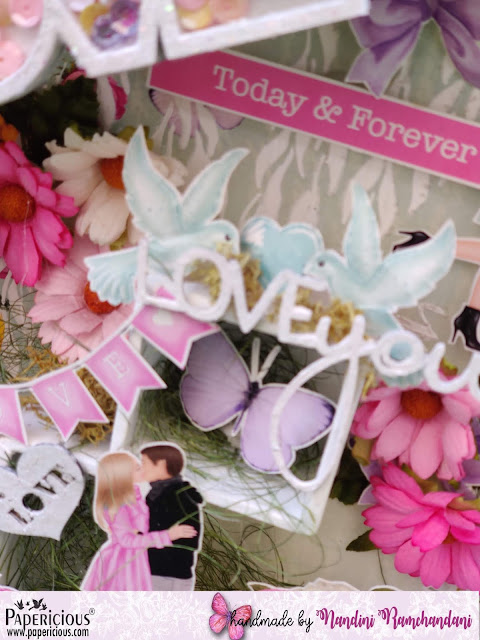
Nandini here with a Tutorial Post of a Shadow Box featuring "Me Before You" .This time Papericious has come up with a wonderful paper pack "Me Before You" especially for the season of love. This is the perfect paper pack to create different projects for this season of love. It has variety of floral and couple images which is the perfect solution for the making of  Valentines' projects. 


Here is the procedure:
Step 1I started by selecting two paper sheets from the collection Me Before You. Cut the sheets accordingly to the size of the Shadow Box and paste it properly.
Step 2 Cover the edges of the Shadow Box with Papericious Modelling Paste. Create textures while covering the edges.
Step 3Create some design on the background by using stencil and modelling paste.
Step 4Put some mini and micro stones on the wet modelling paste so that it'll be settled with the paste.
Step 5Colour the MDF Embellishments and Grey Chippies first with Papericious Gesso and then White Chalk Paint. Apply some Frosting Powder on it and let it be completely dry.  After it dries, put some Sequins in it to make a perfect Shaker. 
Step 6Then adhere some different small boxes in it and start decorating it with the Cut and Create Embellishments from the "Me Before You" Cut and Create Embellishment Sheet.
Step 7Paste all the fussy cut elements and embellishments to make it look beautiful. To enhance its beauty, decorate it with some flowers. 

Some more detailed pictures:


Supplies Used:
Papericious "Me Before You" Patterned Paper Pack
Cut and Create Embellishment Sheet - "Me Before You"

I hope you all have enjoyed this tutorial. 
Thank you for stopping with us!

Luv & Hugs,
Nandini Ramchandani

Papericious August Challenge - Bingo!

Hello all,
Priya here! I hope summer is treating you well. This time Pavitra and I are hosting our brand new challenge for the month of August! 
Crafty Bingo Challenge : 
For this month, we want all of you to play crafty bingo with us. You can select any line (horizontally, vertically and diagonally) from the below grid and must make a project using all the products of the line you will select. You can use other products as well in addition to the products of the selected lines. More the merrier!
Challenge Rules :
1. You must use any one line (horizontally, vertically or diagonally). 
2. You must clearly mention in your post which line did you choose
3. You can create any project - Altered items, 3D projects, Home decor, Cards, Layouts, Mini albums, Scrapbooks, etc.
4. Remember that you need to use Papericious Products as your main focus to qualifying for the win.
5. The last date of submission of your projects is 9th Sepetember 2018 at 11:55 pm IST.
6. Please go through the general guidelines HERE before you link up your projects. Any project not following the rules will be disqualified and it will not be eligible for the prizes. 
Prizes : 
Now onto the exciting part, the prizes! Papericious will be giving away TWO prizes every month. 
The DT will be selecting a Merit Winner at the end of every challenge who will stand a chance to win a gift voucher worth INR 500 from the Papericious Store. 
We will also be having a Random Winner from all the entries who enter their projects every month to win a Papericious 6"x6" Pattern Paper Pad.
Everyone gets an equal chance here, so whether you are a novice or an experienced crafter, all are welcome to play along with our challenges.
Challenge Inspirations :
First up is gorgeous card by Pavitra! She has used last column from the bingo card.
This is how Pavitra has described her take on the challenge inspiration :
"I created a card for the newly weds using the bingo for this month. The elements i picked up for my project are - Vellum cardstock, embossing powder and 3D shaker chippies. For creating my background here i used vellum cardstock and stamp it randomly using various stamps with colorbox inks and heat emboss it with papericious embossing powder for a glossy finish. Used heart shaped 3D chippies for the focal point and adorn the cards with flowers."

Isn't it stunning? On to my card :
I have used top row (Chippies, Sprays and Vellum) to make my card. I have also used Monochrome paper pack for the base. On Vellum, I first ink blended distress oxide inks and embossed the colored vellum cardstock with 3D embossing folder. See how gorgeous those crisp embossed lines look! I have also used dream catcher chippie and colored it with Papericious Radiant Orchid Spritz spray paint.
 Here is a close up of the colored chippie. The spray mist has shimmer in it which looks gorgeous!
I hope you liked the inspirations and will be playing the challenge with us this month.
Happy crafting!
Priya 

Elegant You! Mini waterfall album

Hello! Friends
Today's post is an inspirational one and I have made a mini waterfall album...size 7"x8.5". I wanted to make a simple,sweet  and without any chunky emblishment or mulberry flowers ..to fit more n more 4"x6" photos.so here it is
To decorate front of my album I have used Papericious Monochrome papers,few scraps from guilded onxy, mdf mini shakers.. which I have colored with Papericious black chalk paints.inside I have used sentiment stamp ,microbeads and crystal clear glitter.
Here I have used Prima doll ( Aurora) ,but these monochrome papers are so pretty that you can use any prima doll and it will go with that..
For doll part..first I have stamp with versafine black ink on watercolor paper..then each dress folds I have stamped on different pattern papers.. fussy cut and coloured with distress inks. Then glued to it's place..to give dimensions in few places I have used foam dots...Dress part in few places highlighted with glossy accent n crystal clear glitter. Face, hand and hair part colored with zig water Colors.. Finally decorated using chippies,metal charms,buttons,glass dome emblishment and sentiments from Tim haltz sentiment sheet.

Inside one side I have waterfall which can  hold 16 photos and other side I have cascading waterfall style which can fit 21 photos in 4"x6" size. Inside I wanted to keep simple so used only ribbon ,pearls and sentiment.
Video details here:

Supplies used:


Other supplies from my stash
Thank you for stopping by..
Love n Hugs
Daksha

Mixed media tags using Love Actually


Namaste Everyone!!

I am Kriti here today....with a beautiful and easy to make project....

Have a look....


I had made these tags using Papericious Love Actually paper pack and Papericious Monochrome paper pack.

I have a quick tutorial too for these tags...

Firstly take a black card stock of size 3" x 6". Then cover it with a piece of pattern paper from the pack(I have distressed the edges to give some interest) then take another piece of card stock, contrast in color, adhere above it with a foam tape...


Then take a Papericious 3D Ornament chippi ( Papericious has variety of chippies to choose from), and colour it with black acrylic paint.
Next embellish it with some flowers, sisal, gauge, jute chord and some die-cuts. to highlight the edges splatter some shaker beads with the help of Papericious Shaker Beads.

Here is the first tag...


This is the next tag....


I hope you like this project...
Thanks for stopping by...
Hugs
Kriti Mishra


Supplies used:

Love Actually - Papericious Designer Edition

Monochrome - Papericious Designer Edition

Papericious Art Mediums - Soft Gloss Gel

Yellow - Papericious Shaker Beads

Ornament - Papericious 3D Creature Chippis