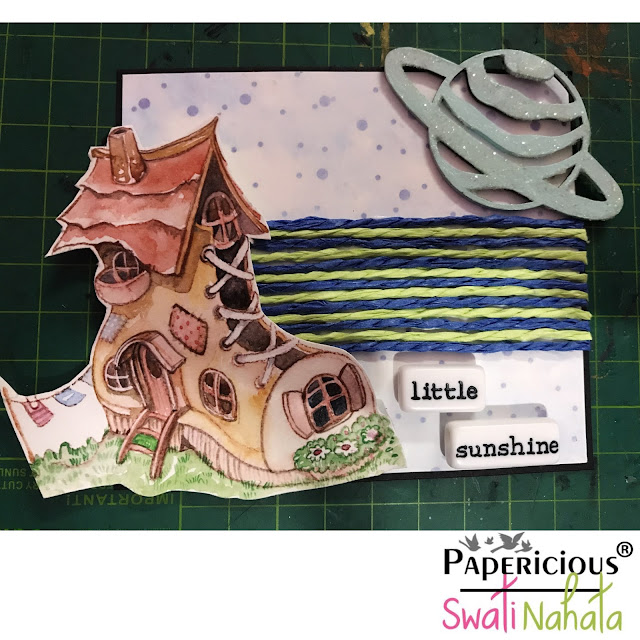
Folio Card with Tutorial by Swati

11:00 am swati nahata 0 Comments


Good Morning Crafty Souls!

Swati this side from Swati’s Crafting World, Guwahati saying Heya to everyone. I am very excited to share my first tutorial post for the new term 2018-19. 

Today I’ve a cute project with detailed instruction to share which I made using one of the cutest-EST paper packs from Papericious which is newly released – Jack & Jill & newly launched Space Chippies

Jack & Jill is the paper pack specially made for kids so i chose Space Chippies which would go with the pack and which are loved by the kids.

CARD LAYOUT
Folio Card – It’s a beautiful concept of card that has a lot of space to fit your beautiful memories.


STEP BY STEP TUTORIAL :
Cover size of the card is : 8” by 8”.
I started by cutting four pieces cardtock of 250 gsm . 
1. 8” by 8” - 1piece.
2. 5” by 8” – 1 piece.
( Score at 0.5” & 1” from 5” side.)
3. 7” by 8” – 1 piece.
( Score at 0.5” from 7” side.)
4. 8.5” by 8” – 1 piece.
( Score at 0.5 inches from 8.5” side)

After scoring the cardstocks as mentioned above, now add the cardstocks to the base ( 8” by 8” ).
5” by 7” on the lest side.
7” by 8” on the right side.
8.5” by 8” on the top.


Now cut 14 pieces of cardstock of size – 3.5” by 5” 
Score at 0.5” from 5” sided. After scoring you’ll get perfect rectangle of size 3.5” by 4.5”
First add pattern paper to cardstock. 8.5” by 8” & then paste the 14 pieces on cardstock. 7 pieces on the top from right to left & rest 7 pieces on the bottom from left to right. You’ll get a perfect waterfall, now add flap of size – 1” by 6” to close the waterfall as shown in the picture below & also add magnets.


Now add pattern papers to the rest of the flaps & it’s ready. I’ve painted the chippies from Duck Egg Chalk Paint & covered them using Papericious Crystal Clear for giving it a shiny look.

For decorating the card I’ve used the newly launched Space Chippies, fussy cutting of some characters from the paper pack itself & added pockets & some tags which gives it a flawless appearance.


The card is ready, now on the cover to give it a lustrous look, add a small piece of cardstock of size 3.5” by 4” & decorate it with chippies & Fussy cut elements. Add this piece of cardstock on the cover which helps it to close the album.

And the layout is ready :


SUPPLIES USED :


Don't forget to participate in the Papericious October Challenge : Make It Festive

That’s it from me today. Hope you like it & will definitely try this. 
Thank You for joining me here.
Happy Crafting!
Love,

0 comments:

GIFT BOXES TUTORIAL by NIKKITA SETHI

1:04 pm Nikkita 0 Comments


Hello everyone! This is NIKKITA and I am back with a new post for PAPERICIOUS blog.

For today's post I wanted to make something fun and quick and yet pretty, so I made some cute boxes which are perfect to be used in this festive season, you can use these cute boxes for gifting perfumes, chocolates, tea-light candles or anything as you like it.

Today I am using the latest release Fleur Fun paper pack and some gorgeous Chippis and Chalk Paints.
GIFT BOX


Here I am with the step by step instructions :
STEP 1
For the base, take a piece of 7 inches by 12 inches cardstock and score on the long side at 3", 6", 9" then turn the cardstock and on 7 inches side & score at 6" as shown in the picture above.

STEP 2
Take a piece of 1 inch by 6 inch cardstock and score at 1/2" to make hinge for the base.
STEP 3 
Make a slit on the 1 inch width base and score and tape the 1 inch hinge as shown above.

STEP 4
For the lid of the box, take 5.25 X 5.25 inch cardstock and score at 1 inch on all four sides. Score and trim the 1 inch cubes as shown and then tape the corners.

STEP 5
The box is ready and now its time to decorate the box. 

Used the Fleur Fun paper pack and the gorgeous Scalable Chippi and the Butterfly Chippi. I have used Chalk Paints - Pearl Pink and Bracket Green.


For this box the length is 4.5 inches and is made with same measurements as above. You can customize the length and breadth as per your choice its easy to make and quick.


Papericious Chalk Paints - Pearl Pink & Bracket Green 

Hope you enjoy making these cute fun boxes.
Do leave some love.

Happy Crafting,
LOVE,
NIKKI

0 comments:

Dreamy Shadow Box -Tutorial

2:58 pm Neha Goyal 1 Comments

Hello Everyone!

Hope you all had a great weekend! I was too busy with the Diwali (festival of lights in India) cleaning.

Today I will be sharing with you a tutorial post using Papericious's newly launched paper pack - Jack and Jill. I have created a shadow box. Lets have a look!


Through this shadow box I tried to depict a scene in the form of dream. Two astronauts male and female floating in universe between stars, rocket, spaceship and showing their love. Isn't it cool?

I also have a step by step instructions on how to make it.

Firstly I applied White Gesso all over the Papericious MDF Shadow Box and let it dry for 10-15 minutes.

Secondly, I painted the shadow box with Papericious Duck Egg Chalk Paint and cut the papers from Jack and Jill according to the measurements of shadow box.

Thirdly, I heat embossed all the Space Chipboards from Papericious.

Now comes the assembling part, I pasted all the papers from Jack and Jill. Hand cut some clouds and adhered them to the shadow box. Using acetate stripes, I adhered rocket, space ship and planet and stick the astronauts with a fussy cut bow on one of the astronaut.

Lastly added some fussy cut elements from the same paper pack. Tadaa! Dreamy Shadow box is ready.


PRODUCTS USED :


http://www.papericious.com/duck-egg-papericious-chalk-paint

Don't forget to participate in our current challenge - "Make it Festive" to stand a chance to win your favourite Papericious Products.


That is all for today!
Lots of Love and Happy Crafting!
Neha

1 comments: