Showing posts with label Fussy Cutting Elements. Show all posts

Square Circular Pop Up Card ft. Tranquil

Hello friends,
This is Puja and Sneha from KalakritiWe are here today with a new project featuring the New Release from Papericious. They have released two new paper packs last week, one with gorgeous florals called "Tranquil" and the other one with super cute critters called "Woodland Walk". Check out the full release on the blog.

We used the Tranquil Patterned Paper Pack to make a Square Circular Pop Up Card which can also hold photos and quotes. The paper pack also has Element Sheets which we have fussy cut to decorate the Card.

Let's have a look at few pictures of this Pop Up Card:

I hope you liked our project and are inspired to make something with this amazing collection. Have a great day!

With Love
Puja and Sneha
Kalakriti

'Make it, Sign it, Send it' - Sliding Flip Page Card


Good Morning, Crafty Minds!

Hello, this is Swati from Swati's Crafting World. I hope y'all are having some fun time with your family & friends. Today I'll be sharing a detailed pictorial of a pretty Sliding Flip Page Card which I made using the - Papericious BLOOMS & BERRIES Papers, Papericious DCE - Capture The Moment & Papericious CCE - Blooms & Berries. This card wasn't planned & kind of evolved from my Waterfall Card.


MAKE IT, SIGN IT, SEND IT - SLIDING FLIP PAGE CARD

A sliding card is another fun alternative to the ordinary fold. To look at, it looks like an ordinary fold card but the clever mechanism allows the top flip to stand up. As an added bonus, the card lies flat. This is a show stopper card yet very easy to make. It would be great as a gift tag, stuck on a gift bag or box or even used on a page in a mini album.

Follow along with these simple pictorials on how to make a sliding flip page cards with just a couple of score lines & folds.
P.S - All the measurements are in inches

STEP 1: 1 piece of 10 x 7, score along the 10 side at 5, & fold it.

STEP 2: I've layered the top of the page with red card & pattern paper. Red colored card is 4.3/4 x 6.3/4 & patterned layer is 4.1/2 x 6.1/2.

STEP 3: For the mechanism, I used a piece of 2.1/2 x 8.1/4 black card. Score along the 8.1/4 side at 4.1/2 & 5.
STEP 4: 2 pieces of 3.3/8 x 3.3/8 for the flip pages. 3 pieces of purple colored card & 3 pieces of pattern paper. Purple colored cardstock is 3.1/8 x 3.1/8 & patterned layer is 2.3/4 x 2.3/4. Paste the flip pages as shown in the pictures below to the mechanism piece.
STEP 5: 1 piece of black card to wrap around the mechanism. Add glue & paste it in the center.

STEP 6: Ribbons, Embellishments, fussy cuts to decorate the mechanism. I've fussy cut few embellishments from BLOOMS & BERRIES - CCE.
STEP 7: You can decorate the inside of the card, the way you want. I've decorated it with some colored card, pattern paper & embellishments.

ON-TO THE PICTURES & VIDEO:


SUPPLIES USED:


That's all for today. Thank You so much for dropping by. Hope you like it & will definitely try this. I would love to see your gorgeous creation. Your likes, comments, creation from my tutorials, & shares motivates me to prepare more craft ideas & tutorials for you.

Until next time, Take Care & Keep Crafting!
LOVE,

Message Box ft. Billet Doux


Hello friends,
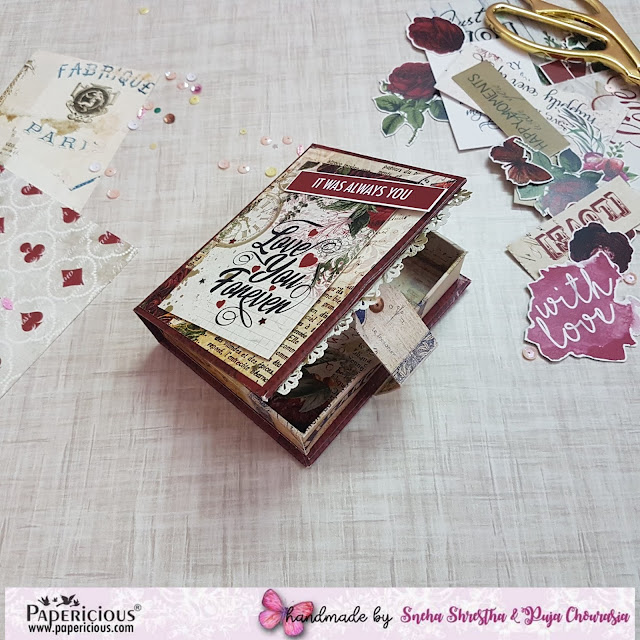
This is Puja and Sneha from Kalakriti. Welcome to another Blog Post at Papericious. We have created this Message Box using "Billet Doux" Paper Pack from Papericious. The Paper Pack is just amazing starting from quality, patterns and designs of the papers. We have also used Billet Doux - Cut and Create Embellishment Sheets, and Chipboard

This base of the Message Box was made using Chipboard. Then it was covered with Billet Doux Papers. Messages from the Paperpack and fussy cut elements from Billet Doux-Cut and Create Embellishment Sheets used to decorate the Message Box.

Have a look at the Message Box created by us:

Supplies Used:


Hope you will like the project.

Have a great day
Lots of Love,
Kalakriti

Endless Love Envelope ft. Me Before You


Hello Friends,
Greetings for the day!
This is Parita Galani from Mystic Hue. I am here today with the tutorial post with Papericious new release Me Before You - Designer Edition Paper Pack.
Who says cash envelopes can only be used to give cash, lets get creative by creating this simply beautiful, easy and compact gift for your loved ones this Valentine!
I have created an envelope which can hold a letter and and Mini Accordion Card which can hold 6 photos and you can also put in their favorite chocolate bar. For the top of  the envelope I have used 3D Shaker Chippies, fussy cut elements and have also given a photo space.

So here, it is:
Endless Love Envelope


So now lets go through step by step tutorial for Endless Love Envelope:
Step 1: I have taken a Papericious newly launched Die Cut Envelopes in the shade - Metallic Silver. I choose this beautiful butterfly sheet from Papericious Me Before You to form as base for the top of the envelope.

Step 2: I took 4" by 3.5" cutout from the same paper pack for creating a photo space. This paper pack also contains one beautiful sheet with different sized borders. So I took a thin border cutout from the sheet and covered the paper on all four sides giving it a frame look.

Step 3 - I took LOVE 3D Shaker Chippie painted it, stuck the layers filled it with sequins and completed it. Along with it i took some fussy cut elements to embellish the top of the envelope. Firstly I glued the photo space slightly slant on one corner and than Chippie of the downside exactly besides photo space. lastly I glued all fussy cut elements giving it a charming look.

Step 4: I took a normal card-base sized 4" by 10". I scored it at 2.5", 5" and 7.5" to make it into accordion card, which will hold photos. Cut 7 pieces of designed paper from the paper pack to stick on the card base.

Step 5: I took same base paper as I used in top so to make whole thing look alike. I used 2 different paper for inside. Floral printed ones for first opening which will hold 2 photos and Mint ones for the last and final opening which will hold 4 photos. For the folds, first fold extreme two folds on the inside and than fold them again so you will have booklet like accordion card. On the top of the card, I have stuck painted chippie.


Step 6: I took a generic letter writing paper and fold it into 3 parts so as it fits into the envelope. I took a strip of 10" by 1.5" from the same butterfly paper and folded it above the envelope and embellished it will fussy cut element.