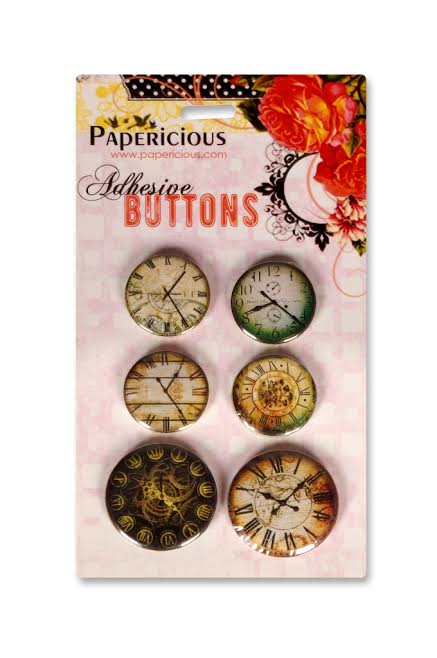
Introducing- Papericious Adhesive Buttons

Hello, everyone!
This is Hussena here and I'm very excited to introduce the new Adhesive Buttons from Papericious. These buttons/flairs have adhesive foam behind and come in TWO sizes of 1 inch and 1.5 inch. They have a very well finished plastic coating on the top and add such beautiful dimension to your projects.

So, here's a look at the gorgeous buttons being released. :)


Here's a look at two of the designs that I got to work with. 
You might have seen these designs before, as they were introduced in our Circular Collage Sheets which come with Adhesive backed Dome Stickers. These buttons differ from those Collage epoxy stickers in the sense that this has more dimension compared to them and when I tried using both on my projects, I definitely felt that these flairs/buttons gave more dimensional look and ofcourse, the designs are gorgeous!!

So, here's a look at what I created using these buttons. I have two projects to share today. The first one is an altered hoop and the second one is a Mixed media tag!
For this hoop, I have used the Pattern Papers from the Papericious Grey Bloom collection and the Wooden Collection. The pink flowers and the leaves are fussy cut from the Grey Bloom collection paper and mounted on square foams for dimension. As you can see, I have used these buttons for the centre of my bow as well as a part of my sentiment.  These make very pretty centres and look great on cards, layouts and mixed media projects!


Here are few of the close ups!


Moving on to my Mixed Media tag :

 I first created a burlap flower using the Tim Holtz Tattered florals die and layered it with some tulle and fabric cotton laces and finished it off with our Adhesive button. Isn't it gorgeous??
I have created the background of the the tag using embossing paste and a stencil with Distress Stain Sprays.


  Hope I was able to inspire you a little on the different ways you can use our Adhesive Buttons. For more ideas on how to use these buttons, I would urge you to check out our design team samples coming up soon.

Thank you for your time and have a nice day everyone! Please do not forget to leave your comments/suggestions. I love to get feedback from you :)

Thanksgiving Day-Papericious Orange Fall

Hi Friends

Its time of the year where you meet all your relatives, friends and well wishers and exchange gifts. Be it Diwali in India or Thanksgiving in the US, the season of exchanging gifts and saying thanks to all your loved ones for being in your life, is here.

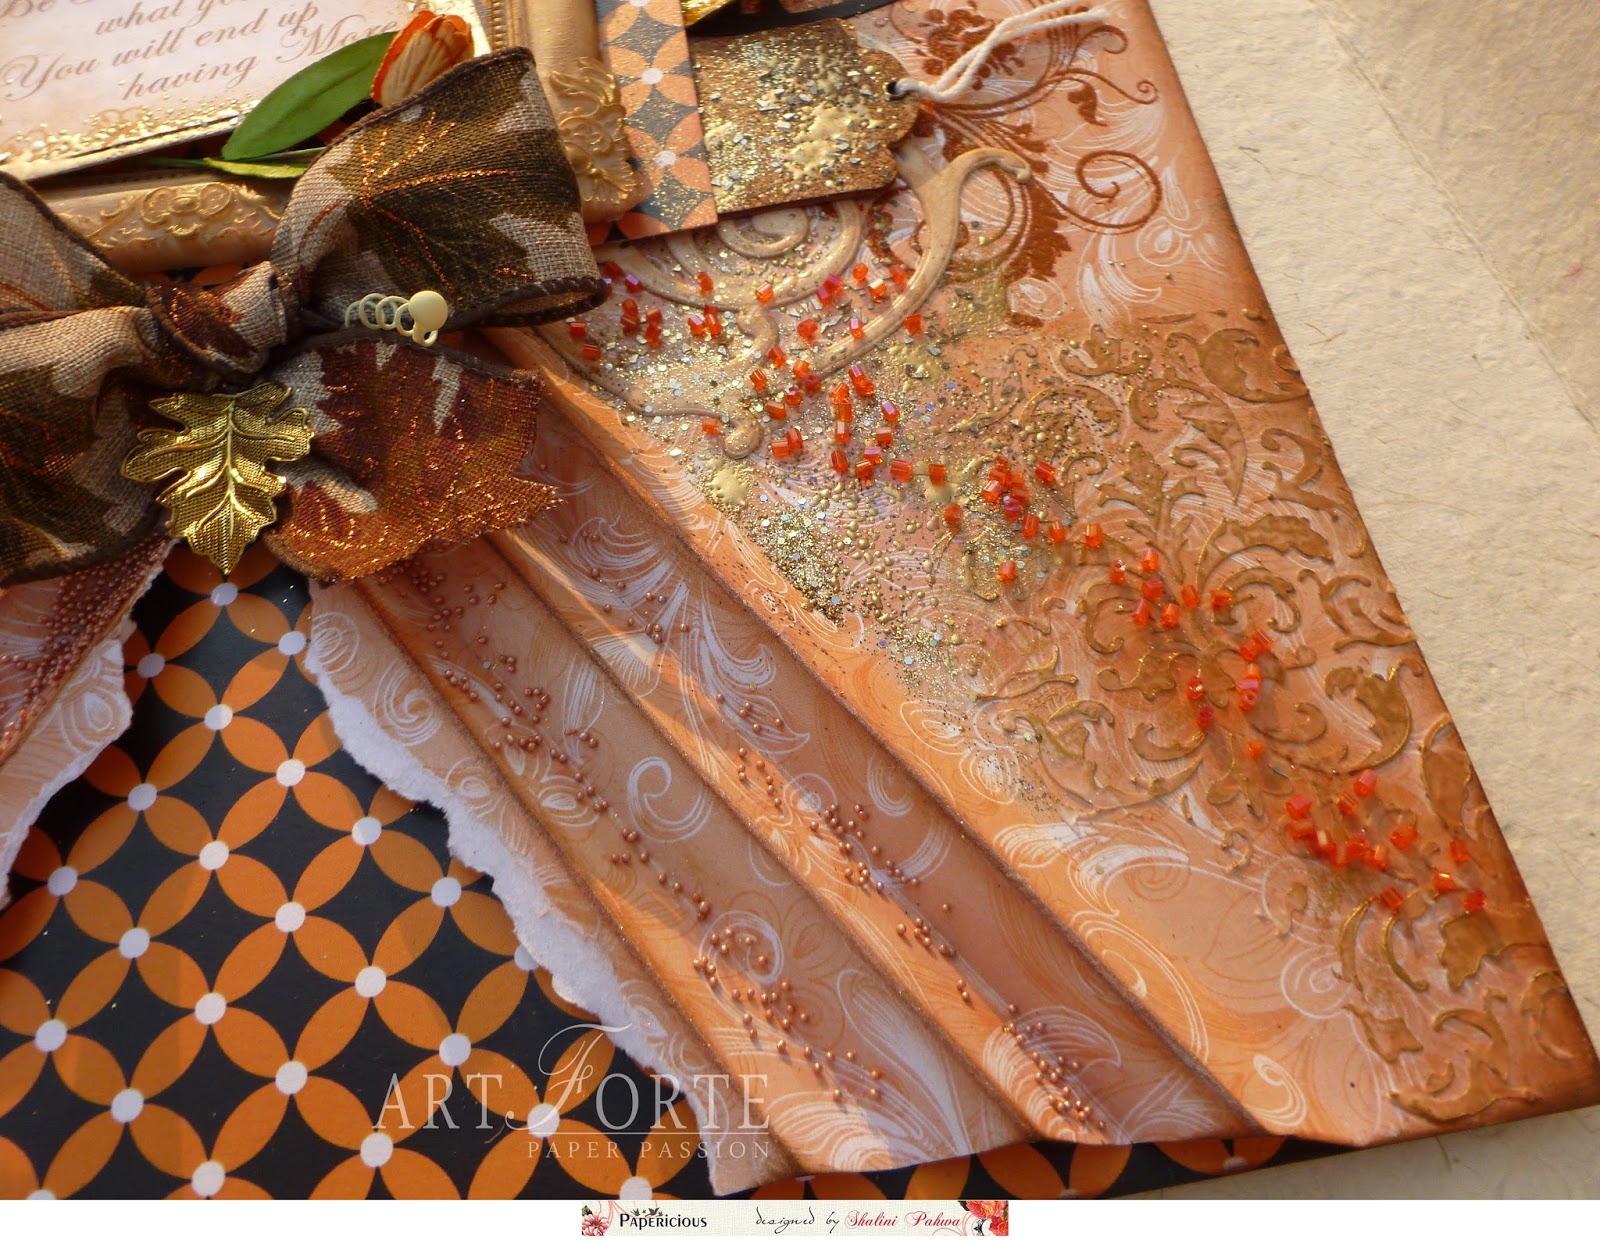
Inspired by this lovely custom and  the New Pattern Paper-“Orange Fall” by Papericious, I am presenting here a Mixed Media layout for such an occasion. Made from acid free paper and using the paper stack “Orange Fall ” by Papericious, this layout also uses various innovative techniques of paper crafting like torn-effect, swirl die cuts, stamping with heat embossing, modeling paste with inka gold and distress inks, leaf stamping with distress ink and glossy accents and diamond dust and encrusted heat embossing, fall ribbon, tags.


These techniques and the lovely pattern paper have combined to give a unique pristine look to this layout – which can be a perfect gift to anyone to say thanks for being in our life .


I hope you all will like my work and would love to hear some comments

Have A Nice Day!!!

Love and Regards
Shalini Pahwa


Paper bags with Papericious - Orange Fall, Happy Halloween!

Hello & Good Morning!

I'm Halak and I'll be taking you through a really cool tutorial today.

How to make paper bags without any fancy tools and equipments!

I have used the AWESOME sheets from Papericious - Orange Fall paper stack.

It's Halloween time folks, and even though it is not exactly celebrated in India, I thought it'd be fun to make small paper bags and fill them with treats, Halloween style!

Let's get cracking then!

These are the beautiful 12" by 12" sheets from Orange Fall paper stack that I used. (Soooo pretty....)

I'll explain the process by showing you what I did with one sheet of paper. I made all the bags in this exact same way.

So, I took one sheet and turned it over and drew a line at 14.5 cms.
(If you get confused, see the cutting mat, each square of the cutting mat equals 1 centimeter.)

I haven't cut the sheet yet, the photo is cropped to show you the line that has been drawn a tad better.

After this, I scored the line using a scoring tool and folded the sheet.

Then I measured 1 centimeter (cm) from the right hand side edge and scored that too.

You can see the 1 cm scored edge in the picture below.

After that I applied glue on the edge and pasted it.

At this stage, this is what my project looks like :

After this, I scored 2 cm on the right and the left hand side of the project.

Here's the picture :

The key to getting a perfect bag is to score correctly.

After scoring, remember we had a 1 cm edge on the right hand side that we glued down?

Well we do the same and create a 1 cm edge at the bottom of the bag, because without it, the stuff we put in the bag will fall right out!

So I created a 1 cm edge at the bottom which looks like this :

After this I applied some glue on this edge and sealed it up too, just like how I did the first edge.

Then, just like how I scored the right and left hand side, I scored the top and bottom of the bag using the same measurement of 2 cm.

After scoring, it's time to shape the bag.

Have you noticed in paper bags how the edges of the bag's base are neatly foldable making the paper bags easily stackable?

We have to do the exact same thing and that will lead us to this :

They kinda look like kitten ears, don't they? Lol... Stay with me guys, we're almost there!

Glue down those triangles (kitten ears) and fold the scoring that we did on the top of the bag and push it inside the bag.

If you want, you can make a bag without scoring at the top, just score on right hand side, the left and bottom.

The reason why I  scored at the top is to give the bag a uniform neat look. (Yeah, I'm kinda weird that way!)

Ta Dah! Check these out! (You can see here the scoring on top that I pushed inside the bag for that neater look!)

Once the bags were ready I punched holes in the bags and set black and white eyelets.

It's time to decorate!!! ^__^

Yup, I did a Halloween themed look complete with ghosts, skeletons, sticker sentiments and a whole lotta sequins!

You can use strings to make your bag a cool little carry bag or you can affix a ribbon through the holes and tie them up into a neat little bow to make it a cute treat bag!

You can make bigger bags using two sheets of Papericious 12" by 12" instead of using a single sheet per bag like I did.

I had a blast making these bags which I filled with candy (and also ate a whole lot of candy in the process!) ^__^

Till next time folks! Have a lovely day!


Posted via Blogaway

Gift Envelope and a Trinket box with the newly launched paper packs

Hello Everyone,

I'm Manu here and I'm sure you must have had a look of how gorgeous the new release from Papericous is, and also the awesome projects made by the DT members using the 'My Golden Garden' and 'The Vintage Attire' collections. The Vintage Attire premium stack is perfect for a blend of mixed media and the My Golden Garden is a paradise for flower lovers like me.

I have made two projects to be showcased using the lovely new collection, and both are perfect for gifting! The first project is a Gift Envelope which will make a nice option to gift out Shagans and the other is a Trinket box which is something very pretty and perfect to keep small keepsakes or even it can be loaded to gift out chocolates or anything fancy !

Lets check out the first project.


I totally love the idea of gifting out the shagan's in pretty handmade envelopes and add a personal touch to your gifting( and I prefer giving out cash since the recipient can then get anything of choice)


I have used papers from both stacks of the new release and it's really very difficult to pick up which one is the best of both!! They both are totally yummy!!!


Here's a closeup of the envelopes.

Couple of them together.

Here's the Trinket box made from the 'My Golden Garden' collection. The calm and gorgeous flowers in this collection is something to die for!


Well, running the scissors thru these papers were seriously involved a lot of efforts!

This trinket box is perhaps the more gorgeous one I have made till date!


Another view of the trinklet box!!


I hope you all liked my creations as much as I loved making them.
Do let me know your feedback and the september release is definitely a must have in your collection. I'm surely gonna go ahead and get me a few packs!!!

Lets wait for the next months release which will soon be revealed and I'm sure that the new one will rock too!!!


Happy Crafting!
Manu

3D House with album - Home decor piece with My Golden Garden


Hello  Crafty Peeps,
It's me NIKKI and I am super thrilled and excited to share my super adorable 3d House which is a Home Decor piece and bonus is it comes with a mini album inside and ample space for chocolates or any other gifts.
Its completely made from scratch and very sturdy as its made from thick high quality chipboard and not to forget the gorgeous and stunning MY GOLDEN GARDEN paper-pack and coordinating embellishment sheets from PAPERICIOUS.
When I had these beautiful papers in my hand I was drooling.


 So, Finally sharing my most cherished project made from scratch and lots of love - My 3d house with album,


 Its much more than just a house its a 3d house which is my most loved project and I hope you all will love it too the way I do.

Hope you like my project, do let me know your views and don't forget to leave lots of love.

Happy Crafting
LOVE
NIKKI


My Golden Garden with butterflies!

Hello hello!

Once again, it's me Halak and Iet me warn you.... I definitely will be breaking some of your notions and ideas today pertaining to crafting.

Crafting is for experts.
Nope, not at all, it is for everybody, is easily accessible and a stress buster.

It takes up a lot of time!
Hell no! ^__^ Stay with me and I will prove you wrong!

Materials are always expensive.
Nope... you don't need to spend a bomb for quality products.
(The Papericious embellishment sheet that I used today, barely costs Rs. 120/-.)

I will take you through two projects...
A fun take on a traditional Christmas decoration - The Wreath
And,
A Bonus Project, classic Halak style!

So what are we waiting for... let's get to it.

The Wreath has cool step by step photos and I will be giving written step by step instructions for both projects. (Bonus project is pretty self-explanatory so just one picture there!)

The Wreath - (Project #1)

You know, this pretty wreath base is made out of recycled material. An old packing cardboard box that I had.
(Create Art + Save the environment, is that awesome or what!)

I cut up a part of the box and drew a 5.5" circle on it and cut it out. (Using a rounder from an old geometry box)

I drew another circle using the same point as center within the bigger circle. This circle was 3.5".

Then, I cut this smaller circle too which created this ring. (Reminds me of a donut, so let's just call it that!)

Here's the picture.

So with the base for my Wreath ready, I began gathering the pretty decorations that'd go on top of this.

1. The embellishments I fussy-cut from the beautiful Papericious embellishment sheet - My Golden Garden.
(It's a pack of 2 sheets having the same design and is absolutely GORGEOUS!)
IT IS JAM PACKED with loads of designs so all you gotta do is fussy-cut them.

Here are my beautiful embellishments all ready to be adhered onto the project.

Look at them... soooo very pretty!

2. After this is done, all you need are a couple of flowers in different sizes and some sequins.
(Those teeny tiny butterflies that you see are punched out using Papericious Vintage Attire paper stack!)

I love the whole white Christmas, golden glow theme so I used golden sequins, but hey, you can pick whatever color you like!

Here are the additional embellishments.

So now we are all set...

What to do now?
Just layer the pretty Papericious embellishments and the additional assortments in a way and pattern you fancy.

It could be so much fun sitting to craft this with your kid and letting them pick and arrange stuff! ^__^

Here you can see I layered the Papericious embellishments and the flowers first.

Once I was pleased with the arrangement, I glued it down (using fevicol) and finished it off with some sequins.

And there you have it! One easy peasy project that looks pretty, is cost effective and takes barely 25 mins to make!

(As an afterthought, I also added some flowersoft in the inner circle edge of the wreath, {see first pic} but you could also use glitter or flocking powder... or, just leave it as-is like how you see in this last picture!)

Tips : I made this small Wreath for my cupboard but you can make a bigger one for your room door or make tiny ones and adhere them to cardstock to make beautiful Christmas greetings too! ^__^
Also, because it has an unconventional design, you can keep this all year around and not just during Christmas!

Now, when I finished this project, I had some Papericious embellishments remaining.
(I punched out some more butterflies from the GORGEOUS Vintage Attire paper stack, took some pink rhinestones, inked up a stamp and got to my second project!)

Project #2

Ta-dah!

^__^ Simple little card just created to brighten your day and inspire you.

Here's how I made this :

1. Stamped Sentiment

2. Placed butterflies (punched out from Papericious Vintage Attire Paper Stack)
(Yes, don't give me that look. I am smitten by this paper stack..
Absolutely LOVE it!)

3. Placed my remaining embellishments from Golden Garden embellishment sheet.

4. Glittered up the word "Be" and the two big blue butterflies in white glitter and added the remaining golden sequins + 2 pink rhinestones.

5. The border at the bottom you see is a 1" tacky tape covered with golden glitter! (Yes, it is that easy!)

Total time taken for Project #2 = 12 minutes.

So you see, it's not as tough as it seems. Dream, imagine, create, recycle and have a lot of fun!

Till next time! *Hugs*


Posted via Blogaway

"Dream" Mixed Media canvas !!

Hello friends,
                    This is Hussena here and today I am sharing a Mixed Media Canvas I have made using our this month's release - "The Vintage Attire" and "The Golden Garden" collections. The Vintage Attire premium collection has some really beautiful prints, perfect for creating any backgrounds and all the Mixed Media fans would love the designs in this pack. I have used the Vintage Attire to create the base of my canvas design by doing paper tearing and layering these papers using Gel Medium, then I gessoed over it. Here's a look at it :


 Close up of the flowers paper pieced from The Golden Garden collection and the background paper using The Vintage Attire!

The word 'Dream' has been cut from the Circular Collage Sheet- Be You.

I've also used the leaves from the co-ordinating Embellishment sheet from the Golden Garden collection. This canvas also has some handmade flowers, chipboards, and textures using modelling paste, glass glitter and paints.

I hope you like my first attempt at a canvas using our Papericious new collections. Both of them are really gorgeous and I had lot of fun creating the canvas using these papers!!

Have a nice day everyone!