VINTAGE CADDY with TUTORIAL

Hello crafty people
I am super excited to share my creation using the amazing collection launched this month.
Today I am sharing a step by step tutorial on Vintage Caddy , used the amazing THE VINTAGE ATTIRE premium collection .
This is a great collection for all vintage lovers the papers are amazing and acid free I am totally loving it , it was a difficult task to cute these beautiful papers.

Now the tutorial,
Supplies required :
#heavy weight cardstock
#scoreboard
#trimmer
#scissors
#distress ink and tool
#tacky tape
#embellishments

STEP 1
Take cardstock and cut 3 piece 4 7/8" * 4 7/8" and score at 1" around all four sides , this will be the base.

STEP 2
For Wrap - 3 piece ( 8 1/2 * 3 , score on long side at 1-4-5-8) 


STEP  3 A
For outer cover,
3.1*9.75 (score at 3.1-6.2-9.3) attach and make outer cover.

STEP 3 B
For base , make slit on scored lines and tape .

STEP 4
Distress the edges.


STEP 5
 Attach the bases together using tacky tape and decorate using pattern paper and embellishments.


I made 3 layers but you can go up to 12 or as many as you want. Its super cute for gifting chocolates or keeping beads and twines,  a cute decor piece.
I loved creating these will create few more for gifting.
Hope you like the tutorial, do let me know your reviews and queries.

Do leave some love

Happy Crafting
LOVE
NIKKI


Gift Card Envelope with Tutorial-My Golden Garden


Dear Friends

The festive season is also a season of gifts. Gifting is a blessing for giver and receiver both. Many times in-spite of our best efforts, we are unable to invest time to select a gift for our loved ones. The best option is to give a Gift Card… But let your gift card speak about your personality – about your love and respect for the person to whom you are giving it to. Presenting a gift card envelope that would make the receiver just say WOW..!!!

Made from acid free paper using the newest pattern paper stack of Papericious,  “My Golden Garden” and the embellishment set of " My Golden Garden" the envelope is covered with lovely paper flowers(fussy cutting from the embellishment set-they are super gorgeous), sealed with a band which highlights the essence of your relation – fresh and gorgeous. You open the card to find the Gift Card, flanked by notes to your loved one making the card a cherished possession. It also has two pockets which open up to show photos that are close to your heart and the relation you share with the person to whom this card is presented.


Now The Tutorial Part:
Things required: Card-stock, trimmer, scoring board, papericious blending tool, distress ink, scissor(for fussing cutting),papericious embellishments set-my golden garden and papericious pattern paper-my golden garden.

So lets start:
Take a card-stock measuring H: 7.25", W: 11.50"
Scoring at 4.5", 4.75", 9.25", 9.5 and distress the edges and at some edges i have used inka gold also


 For Inside Pocket which measures W: 4.5", H: 8.25, scoring at .5", 7.75"(at the longer side of the card-stock) make two pockets. Photo matt size is 4.125", H: 7

once you cut the cardstock, and paste the pattern paper and you can see the slits which i had done at one of the pocket, at the gap of 1.5" and then paste the pattern paper at the back of this pocket applying glue on the edges only so that u can insert the gift card and tags and then paste this pocket at the base of the cardstock on the left side.


Outer Jacket measures: H: 2", W:10.5", scoring at 4.625", 5", 9.625", 10" and then decorate it .
I have used inka gold on the edges and on the fussy cut edges used the gold embossing powder.


In fact it is much more than a card. It’s a piece of your emotion, presented with love to someone you care for. Let this card speak about you, your elegance and your grandeur.
Let this card make your bond even stronger.

I hope you all will enjoy the tutorial and give your feedback ...

Have A Nice Day and Happy Festivities


A Card, with a twist!

Hello and Good Morning! ^__^

I'm Halak and I'll be taking you through one really fun project AND a bonus project with step by step instructions!

Papericious has come up with two beautiful premium paper stacks Vintage Attire and My Golden Garden along with matching embellishment packs to co-ordinate with both the packs, sold separately.

For my project this is the GORGEOUS sheet that I used from Vintage Attire. (I'll have to admit here that I sobbed while cutting paper from this stack... it is my favorite out of all the Papericious stacks and I just wanted to hoard it till the end of time!)


Hmm... I know what you are thinking... It looks like a normal card.... what's the twist?!

BOOM! Check it out! (And you thought it's all rainbows and butterflies!)


The front tag is held by a brad that swivels to reveal a hidden space behind it with an additional message.

Ha ha.. so you see, sometimes a funny card is all you need to cheer someone up!

Let's get to the steps!

1. On white cardstock base I covered half side with yellow distress ink and the other half with Papericious Paper.
Tip : To make this card, get a good quality thick cardstock for base as it helps hold the layers of paper together better and avoids warping.

2. Added a bit of red ink with a water brush and some texture using stencils with brown and black distress inks.
(Not only does Papericious paper take inks really well, but it is also, Acid and Lignin free!)

3. Stamped a goofy looking dazed birdie and colored him up and adhered to project.
Tip : I used red, yellow and green for my project, so I colored the bird using the same color combo to make the card one cohesive piece.


Birdie, stamped and ready to color!

4. After this I fussy-cut some embellishments from Vintage Attire and My Golden Garden.
(These are AWESOME, they match and compliment the paper stacks beautifully and stamping on the labels to make your custom die-cuts is a breeze!)


Here are the embellies.... oh-soooo-pretty!

The sentiment I used is : "You're Super Old."

So, I stamped "You're Super" on the label and "Old." went on top of the birdie in the hidden space.

5. Adhered the embellishments onto the tag using fevicol and added a tiny black brad to affix the tag onto the project.


And that's it! Easy peasy!

Of course I used the Papericious Ink Blending Tool for all the stenciling and color blending that I did on the card. It's really awesome, available in circle / rectangle shape and if you haven't got it yet, well, what are you waiting for?! ^__^

BONUS project!

The embellishment sheets were so awesome and for the first time in my life, I didn't struggle with fussy cutting so I went ahead and made another project!


Here it is!

A thank you card.

I love stamping... and if it were up to me, I'd stamp even the walls of my house... but you know... sometimes we have such time constraints that getting out all craft supplies and making a card is practically impossible!

What to do?
Fear not! Papericious to the rescue!

What I have done is cut up the beautiful flowers and label from Vintage Attire, stamped sentiment on label, added a piece of pattern paper (from the lovely My Golden Garden paper stack), added a couple of sequins and sprinkled some glitter on red tacky tape on top left of the card to add a bit of sparkle!

That's it! Super easy and takes just 15 mins to make!

So... I guess that's it for today... till next time folks!
Hope you enjoyed reading it and that it inspired you to create something new!

*Big Panda Hugs*


Posted via Blogaway

'Celebrate'- Mixed Media Card & Tutorial

Hello crafty friends!
This is Hussena here with my first post for the Papericious blog. This month Papericious has come up with 2 Premium Paper packs and Embellishment sheets with some really amazing and gorgeous designs. Our DT member, Shalini has already shared a beautiful project using 'The Vintage Attire' collection and I am focusing more on the 'My Golden Garden Collection'. It's a perfect shabby-chic collection and you will love these papers and their designs once you have them in your hand. So here's a look at what I've created! 


I have created a shabby, mixed media card and I'm sharing a tutorial on how I created the card base and the floral embellishment. These papers have some really beautiful flower images and also neutral designs like dots, hearts and my very favorite, chevrons and it's quite easy to paper piece the images to create any project.

Here are few steps on how I went about it :

Step 1- I have paper pieced few of the flowers and the leaves from the My Golden Garden pack.

Step 2- After paper piecing the images, I have distressed the edges lightly using Scattered Straw and Vintage photo Distress inks. here, I would like to add that I have recently been using the Papericious Blending Tool and it's been a dream to work with it. It's very light weight and it's velcro has a very strong adhesive backing and so it holds the foam very well as compared to the branded one I have been using plus it is flat on the edge and so it's very easy to distress tiny areas using the edge of this tool.

 Step 3- I have taken the card base panel from one of the dots design pattern paper from this pack and applied a single coat of Gesso on it to prepare my surface so that it will take the colours well.

Step 4- After applying Gesso, I distressed the edges of the paper using a pair of scissors. Also did some paper tearing on the top and the bottom of my card panel.

Step 5 - Using Scattered Straw Distress ink, lightly ink the distressed edges. This will give a finished look to your card panel.

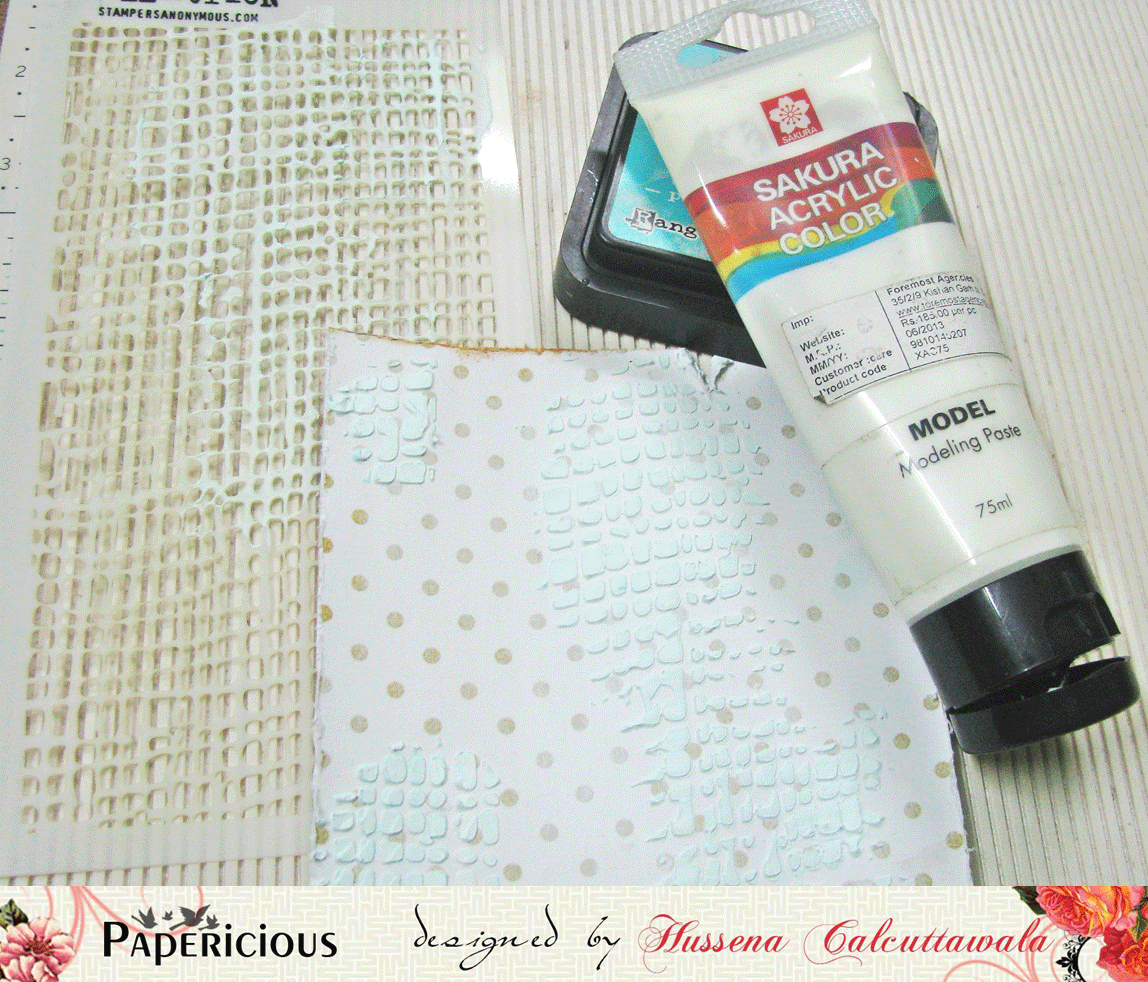
Step 6 -Using Modelling paste and a stencil, I have created some texture on the paper to add a nice, embossed look.

Then, I added some black paint splatters using a paint brush and finally I assembled all the embellishments on my card.

I have used the 3D Dome sticker, and the Circular Collage Sheet - Blue Dreams (1 Inch circle) to create a gorgeous epoxy sticker. I have layered the epoxy sticker on the 1.5 Inch- Vintage Time Circular Collage Sheet. Here's a look at what I have created :

After I finished my card, I went ahead and created a mixed media tag too using The Vintage Attire- Labels embellishment sheet and My Golden Garden paper collection. 


Hope you like my projects..Would love to hear your views on it. :)
Have a nice day everyone!

A Sling Bag of Memoirs

Dear friends
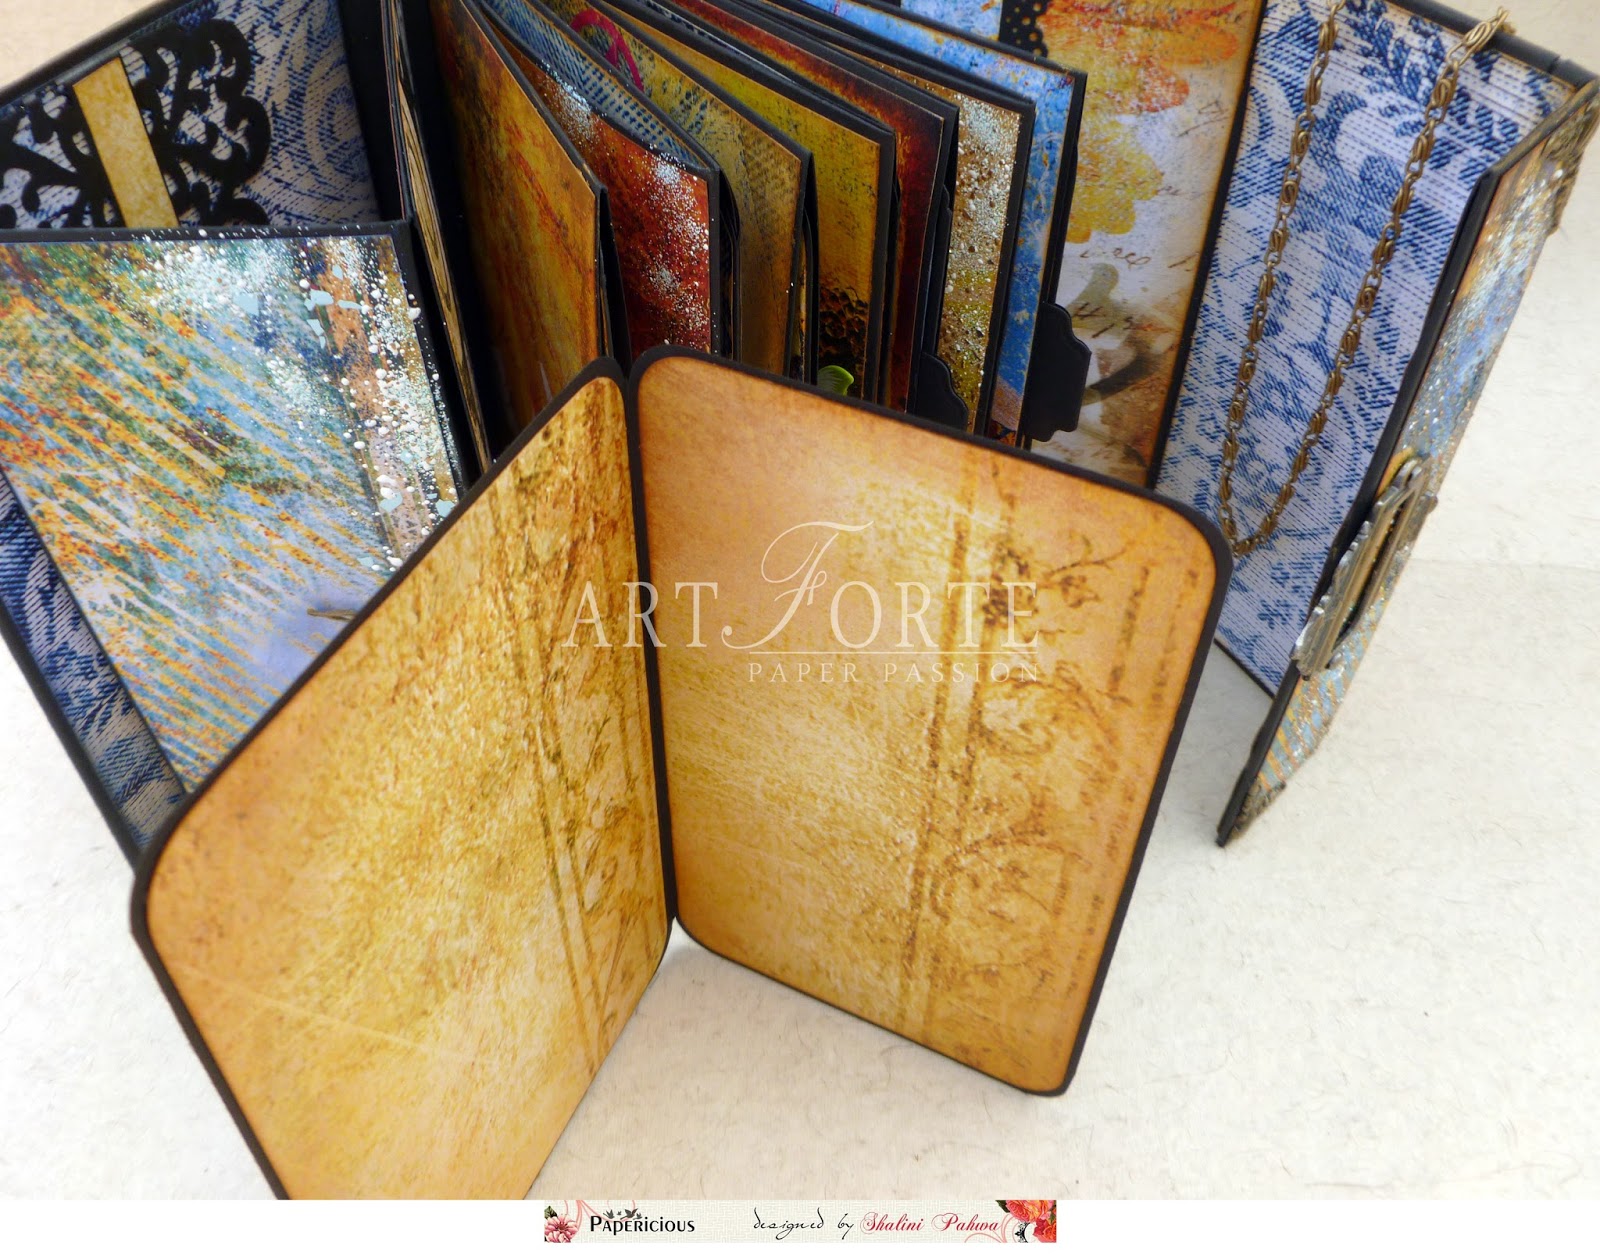
Today I proudly present to you a unique product which I have called "A Sling Bag of Memoirs"
Made in the shape of a Sling Bagg, the outer part of this lovely album is made using newest collection of pattern papers from Papericious. This stack of pattern papers called "The Vintage Attire" has some unique colors and designs which gave me an idea of this pretty product. Made from acid free paper the colors of this stack just blew me off. It oozed a deluge of imagination in me and this product just came flowing out.
Besides the lovely pattern paper from Papericious I have also decorated it exquisite charms like metallic sling attached with metallic fairy  metallic-look corners and used encrusted jewel kit.
Inside the bag is hidden a mini album made using The Vintage Attire stack paper decorated with Papericious embellishment set, distress ink,embossing powder and elements, Tim Holtz Ring Fasteners...
The album, enough to hold 40-45 choicest photos and your notes and tags. Now carry your cherished memories with you with this fascinating sling bag...


I hope you all would love my creation and would love to hear some words from you...
Enjoy your Day !!!