A Tag Flipbook ft. Blooms & Berries and Die Cut Embellishments


Hello everyone!
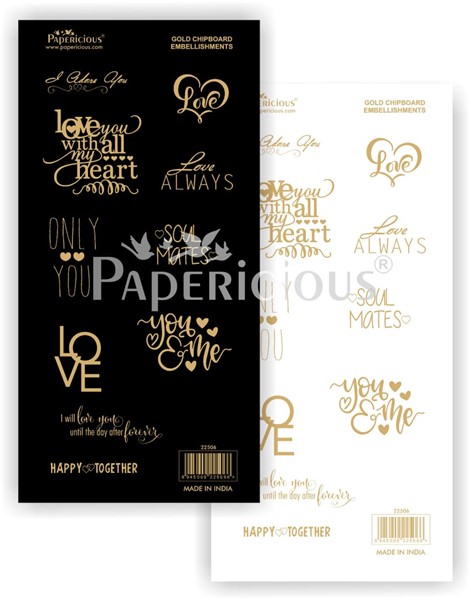
This is DT member, Shweta, here with a new project inspiration for you all. I have created a Tag Flip Book featuring the new Die Cut Embellishments and the Blooms & Berries Collection. The Die Cut Embellishments are beautiful gold foiled embellishments on both black and white backgrounds that add a nice touch to your projects.

This Tag Flipbook has 5 tags measuring 6"x 4" which all have a pocket in them to add pictures and write messages. This was an easy and quick make and I have a pictorial to share with you all.

Let's begin with the process. 

First, create tags by cutting 5 pieces of White Cardstock measuring 6"x 4". Keep them aside.

To create pockets, take 5 pieces of White Cardstock measuring 6.5"x 5" and score at 0.5" on the 6.5" side and 0.5" and 4.5" on the 5" side and fold. 

Adhere these pockets to the tags using double tape. 
Paste pattern papers of your choice on the tags, I used the Blooms & Berries Paper Pack. Punch holes on the tags. Also, I rounded the corners for that extra effect.

Then, I used Blooms & Berries - Cut and Create Embellishments, Die Cuts, Flowers, It's a Girl Sequins, and other accessories and formed clusters on the tags. The sentiments from the Capture The Moment - Die Cut Embellishments completed the look. I then passed all the tags through a scrapbooking ring and decorated it with some lace. And we're done.


How did you like this flip book? Do let me know. 

Supplies Used:

Picture of Its a Girl Sequins - Papericious Sequins Mix

Love,
Shweta

Handcrafted Purse ft. "The Flickers" Patterned Paper Pack


Hello Friends,
This is Puja and Sneha from Kalakriti. Today we are happy to share with you blog post of "Handcrafted Purse" using "The Flickers" Patterned Paper Pack.

We took the rose pattern paper from The Flickers Patterned Paper Pack, then folded scored the part of the papers which is to be folded to make the purse. The scored part is folded to make the purse.
Have a look at the project:


Supplies Used:

Hope you all liked the project 
Thanks and Regards!
Love,
Kalakriti

Spring Envelope Folio Card ft. 'Blooms and Berries'


Hello friends
Happy Spring!

This is Parita Galani from Mystic Hue. Spring is almost here with its beautiful blossoms. So I am here with my inspiration project for this beautiful season of spring with the perfect paper pack which goes with the season - Blooms and Berries Paper Pack by Papericious. 

I have made Spring Envelope Folio Card. Let me take you through quick steps on how to make your very own envelope folio card.
Firstly, I have taken 11" by 11" paper from the Blooms and Berries Paper Pack, with the help of the Envelope Score Board, I have scored it at 4" and 4.5" on all the four sides. This paper has very good thickness quality so I have worked directly on it for layers without using any other base paper.

So once I folded all the scored sides I took various patterned paper from the Blooms and Berries Pack to create layers for my folio card on the plain side of the paper. I stuck different papers on the flaps as well as in the middle.

I layered all the flaps with various fussy cut elements from Cut and Create Embellishment Sheets. For the middle area of the envelope, I made an Accordion Card, embellished it with Patterned Paper, various Die Cut Embellishments and also gave few pockets.

 I decorated the front of the envelope scrapbook with a simple photo space and Die Cut Embellishments.
Lastly, I decorated the outer flaps with various fussy cut elements from Cut and Create Embellishment Sheets and Die Cut Embellishment Sheets. I have used magnets on the upper and lower outer flaps to give it a neat closure.
So lets have a look at Spring Envelope Folio Card:

Scrapbook Layout ft. Blooms N Berries


Hello friends!

This is Priti here, and as you all know by now that I love 12x12 scrapbooking and creating layouts. I was waiting to create a page with this gorgeous "Blooms N Berries" collection as it has such beautiful flowers and colours. So I finally made a 12"x12" scrapbook layout with a picture of my lovely daughters and combined this collection with the foiled Die Cut Embellishments from Papericious.

I was attracted to this background paper which has beautiful bunch of flowers and grapes and this helped me to come up with this design. I have done a lot of paper layering here using scraps of pattern papers behind my photo. The edges of all the papers have been distressed using a scissor and I also added a doily in between the layers.

The embellishing part was super easy as I had these floral clusters and a wreath fussy cut from the Cut & Create Embellishment Sheets and the Foiled Die Cuts in white and black. I added the embellishments following a diagonal path and also did some stamping around them. The background paper already had these beautiful gold dots and hence there was no need for any mist or splatters.

Here are some close-ups:


Supplies Used:


I had a great time creating this page and I hope you enjoyed reading through this post. Please let us know if you liked this 12"x12" scrapbook layout. We are always eager to hear from you :)

Hugs,
Priti