Accordion Recipe Book - Pictorial


Hello people.

Chirali this side with a brand new tutorial post of Accordion Recipe Book using Papericious' latest released paper pack 'Kiss the Cook'.

Here is the outer look:


Let's start with the tutorial:


Take 5 pieces of papers measuring 18"x6 1/8" scoring them at 4 5/8", 4 1/8", 4 5/8", 4 1/8" and 0.5 inches.


Attach all the pages at 0.5" scored portion. (By misake, I wrote 6" instead of 6 1/8")


Once it's done, accordion will be very wide.


To handle them, pack each part with magnets as shown above.


Once you are done with one side, it will still be open from other side.


So attach magnets on other sides too.


And it will close completely.


Take two cardboard pieces of 7"x10" and one piece of 1"x10". It's a binder of accordion thing.


This is exactly same as a very common album binding technique so I am not going in detail with it.


There are two sides of accordion, one has 4 5/8" and another has 6" written on it. To hold the whole accordion, I have attached whole thing with 4 magnets.


On reverse side also, attach magnets after co-ordinating with already attached magnets.


You can see magnets on both sides.


Attached accordion!


Add flaps on both sides. Total 19 sides are there.

Now the base is ready. Start decorating it.


This paper pack has such an amazing elements to make any kind of kitchen related stuff.


Inside!


Write a name on that tag, open it, attach a photo on one side and recipe on the other and you can store 19 recipes. If want only recipes, you can attach 38 recipes. Additionally you can add on the left page too which has some paper in a pocket.


Other side of accordion.


You can detach whole accordion thing too. Isn't it amazing?


Back side!


Some more pictures!


Without any single decoration element, you can make a whole thing with this gorgeous paper pack.

I hope you liked this photo heavy tutorial.

Thanks for stopping by!

Hugs,
Chirali. :)

Supplies used:


Inserts for mini album - using Ethereal Paper Pad

Hello My dear friends
For the month of April Papericicious comes up with gorgeous release and one of them is Ethereal Pattern paper, the colors and prints are just fantastic. For today's project i created three inserts for Mini album/scrapbook. 
Have a look!!!!
Insert - 1
For the first insert  i created a pocket for picture in the front with a pull out picture and quote space.
Adorn it with fussy cut images from the the same pattern pack.

 
Insert - 2 
For the insert second i created a shaker element in the front  along with a space for pictures inside.


 Insert - 3
For the third insert i used a lovely image from the paper pack and mat it with orange color cardstock. It opens up two ways and have ample space for picture.


 I hope you liked my work for today.
Happy Crafting 

Hugs
Pavitra

Supplies Used


Papericious March 2018 Release | Part 2


Hello everybody!
This is Aastha, and I welcome you again for Part 2 of our New Release.

Today, I am feeling very happy introducing a new range of designs in our chipboard collection, called White Chippis These are ivory colour, soft and intricate designs of chipboards. They are 1.2 mm thick, and can be colored by almost every medium. You can use them in any way you want, you can use them as is, or colour them using different Art mediums, spray on them, ink them, or heat emboss them. The possibilities are endless! These are introduced to give you ease of use in your projects. This time's collection has some very royal frames,  intricate doily sets, beautiful cages, and some forever used sentiments.


So, without further ado, let's get straight to the release! We are introducing them in 10 versatile designs, and hope you will like them. :)


White Chippis


White Chippis - Bird Cage (MRP: Rs 100/-)


 White Chippis - Cloudy Days (MRP: Rs 100/-)
                                     

White Chippis - Fancy Fence (MRP: Rs 100/-)


 White Chippis - Tags (MRP: Rs 100/-)


White Chippis - Illusory (MRP: Rs 100/-)
                                               

 White Chippis - Lovely (MRP: Rs 80/-)

White Chippis - Circle Flourish (MRP: Rs 80/-)

White Chippis - Linear Flourish (MRP: Rs 80/-)

White Chippis - Mermaid Flower (MRP: Rs 80/-)

White Chippis - Swirly Mozzo (MRP: Rs 80/-)

White Chippis - Hollow Swirls (MRP: Rs 80/-)
I hope you like what we have for you! Do let us know if you liked the designs.  And if you have any suggestions for any designs that YOU would like to see us add to our range, please feel free to e-mail your ideas to us at papericious@gmail.com or message us on our Facebook page. We will be happy to hear from you. 


The chipboards are available for sale with the following stores :


Our creative and talented design team will soon start the inspiration posts using them. Stay tuned to our blog till then!

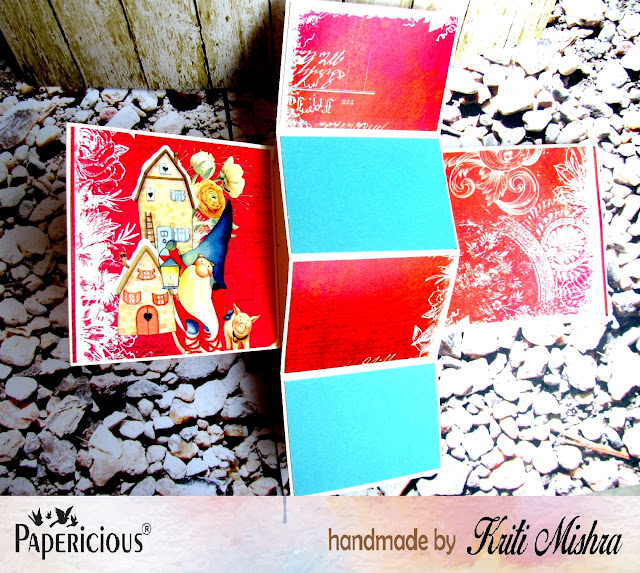
Pop-up Mini album-- Tutorial

Namaste Friends!!

This is Kriti today...today I'll share a tutorial for a mini album with pop-up pages. I have used Papericious recently launched Ethereal Paper pack . This is a Premium Edition paper pack, comes in 12" x 12"size with lots of die-cut elements, Journal sheet, quote sheet and matching card stock.

Have a look...


Tutorial:

Step 1: Take few pieces of card stock of size as mentioned under and score them.

 a) Piece 1--Take 2 pieces measuring 4" x 12". On the 12" side, score them at 6".


 b) Piece 2--Take 3 pieces measuring 3.5" x 10" (These are actual pop-up panels). On the 10" side,
      score at 2.5", 5" and 7.5". It should look like a 'W' when folded


 c) Piece 3--Take 3 pieces measuring 3.5" x 8" ( These are actual mechanism to allow the pop-up
     panel to  pop- up) . On the 3.5" side, score at 1.75". On the 8" side, with a pencil, make a tick
     mark at  2.25" from each side of the card stock, flip it over and repeat. Score a cross joining these
     points, then fold to form this mountain like shape.


 d) Piece 4--Take 1 piece measuring 1.5" x 4". On 1.5" side, score at 0.75".


Step 2: Apply glue to the one side of the pointed ends of piece 3, find the center of the outer
             card(i.e.,    piece 1)and line the point up just under the crease and stick down, now apply
             glue to the other side of the pointed end and close the card to adhere it to the outer end.


Step 3: Now, take the 'W' shaped card, i.e., piece 2, find the center of the mechanism, and place it.
             Now put glue only at two places as shown in the pic. and adhere the 'W' shaped card. And
             the first part is ready.


Step 4: Repeat step 2 and step 3 for the second part of piece 1.

Step 5: Now for the last pop-up panel, put the two portions as shown in the pic., join the two with
             piece 4. And here, on this hinge, repeat step 2 and step 3.


(Sorry for not clicking for last pop-up panel...my camera died after this...)

And voila!!...Your pop-up mini album is ready.

Here are some final pics....


First pop- up panel..


Second pop-up panel...


Third pop-up panel...


Thanks for stopping by!!
With Love

Kriti Mishra

Supplies used:


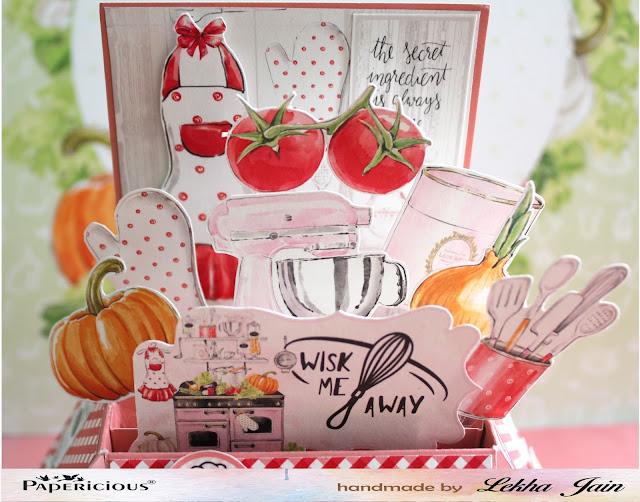
Kiss d Cook Box Card


HI lovely people, 
Here with latest paper pack from Papericious Kiss the Cook. The pack has some gorgeous prints for your kitchen decor, recipe books, fridge magnets etc..
I would be using these papers to create a Box card. 
Box cards are super fun as they have multiple layers to add more interest to the otherwise one dimensional card.


 Though its a 3d card but it lays flat and easy to fit in your normal envelope if

Hope you like this fun box card.
Keep crafting
Lekha
Supplies used: