Card cum Gift Holder using Mi Estilo and Gentleman | Photo Tutorial
Hi, crafty friends!
This is Hussena here, today I have a very quick and easy tutorial to share for making a beautiful card pouch. I really had a lot of fun creating this. This card pouch would make an ideal gift not only to give to your brother for Raksha Bandhan, but it pretty much covers all occasions including the upcoming Teachers' Day.
My son has a male class teacher & coming up with a gift for him was a challenge as I usually tend to create quite feminine project, so I was pretty happy to work with the newest collections from Papericious which has some really good masculine tones.
Here's a look at the card pouch :
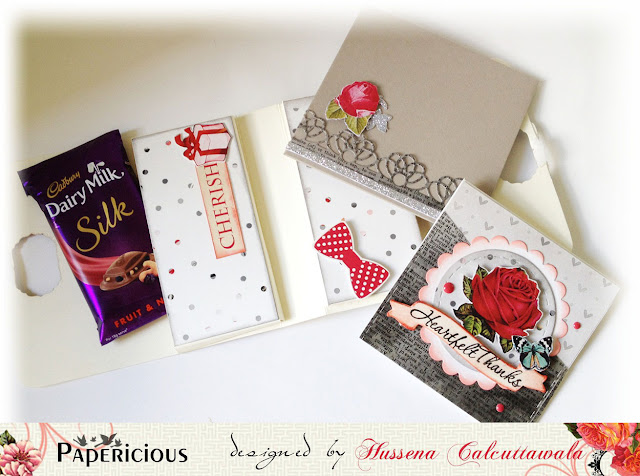
Here's how it looks when opened up :
I have embellished the insides using pattern papers from the Mi Estilo collection. The bow-tie & sentiment have been fussy-cut from the Gentleman pack.
As you can see, it has two pockets and can hold 4 X 4 inch notecards with coordinating envelopes and also there is enough space to hold a candy bar of your choice.
The note-card & coordinating envelope :
The trio together!
The back side of the pouch :
- - - - - - - - - - - - - - - - - - - - - - - - - - - - - - - - - - - - - - - - - - - - - - - - -
Here's the tutorial on how to create this :
TUTORIAL
Step 1 - Take a 12 X 5" piece of cardstock and score at 5 1/2 and 6 1/2 inches.
Step 2 - To create the inside pockets, take TWO pieces of 2 3/4 inches X 5 3/4 inches piece of cardstock.
Step 3 - Score at 1/4 inch TWICE on three sides of this cardstock and fold it to form the pocket. Cut out the two squares on the sides to help create a crisp pocket-fold.
Step 4 - To create handles of the card pouch, you can either use any punch of your choice or a die, I have used Spellbinders label 4 to create my handles.
After die-cutting the handle looks like this :
Step 5 - To further embellish the handles, create a frame using the same die set. I have distressed it using Hickory Smoke Distress ink. ( I have used the Papericious Craft Sheet & Ink Blending Tool )
Step 6 - To embellish the front & back of the pouch, I have used different pattern papers from Mi Estilo and the Gentleman pack.
The Note card and the co-ordinating envelope were also made using these papers.
For the pouch, I die-cut a scalloped border panel using papers from the Mi Estilo collection and layered it with another paper from the same collection. I then made a handmade flower again die-cut using papers from the Mi Estilo pack. Added few leaves, filler flowers and the sentiment, and my bag was ready :)
For the note-card, I have used die-cuts from the Infinity Collection. I have used three different pattern papers from the Mi Estilo collection.
For the envelope, I have again used a die-cut from the Infinity pack.
Have a nice day everyone!


SUPER FANTASTIC !! Loved it to the bits and thank you for sharing the tutorial !
ReplyDeleteJust Fabulous Hussena! Love this card set with an awesome gift holder! Thanks for sharing the tutorial!
ReplyDeletevVry beautiful and very innovative. loved the papers and loved your idea....will surely try it.
ReplyDeleteFantastic creation Hussena! Thats an amazing gift and the recipient s lucky 😊
ReplyDeleteWow!! Such an exquisite project ! Loved it totally. Thanks for sharing the tutorial :)
ReplyDeleteu rock hussena.... so tute is awesome
ReplyDelete