Video Tutorial - "Zig Zag Mini Album" ft. "The Flickers"

11:00 am Kalakriti by Puja and Sneha 0 Comments


Hello Crafty Friends!
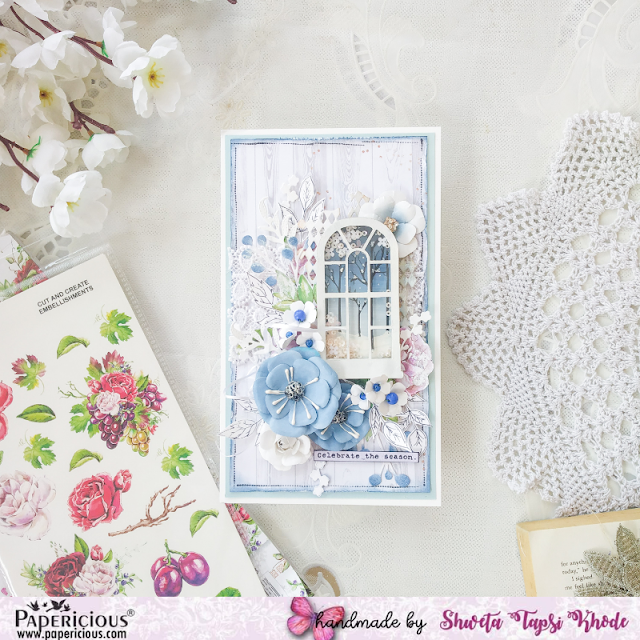
This is Puja and Sneha from Kalakriti. This month Papericious came up with two new Paper Packs " The Flickers" and "Blooms N Berries". Today we are happy to share with you video tutorial post of "Zig Zag Mini Album" using "The Flickers" Paper Pack released by Papericious this December. We have also used Spring Sequins MixChipboard, and Cut and Create Embellishment Sheets.
Have a look at the project.

Here is the Step by Step Video Tutorial:
Supplies Used:


Hope you all will like the projects. We would be very happy if you create and share using this as an inspirational project. Do show some love.

Have a nice day!
Thanks and Regards,
Kalakriti

0 comments:

Winter Shaker Card w/ Video Tutorial

11:00 am Shweta Tapsi Khode 0 Comments


Hi everyone!
This is DT Member, Shweta here on the Papericious blog today to share a new project along with a Video Tutorial. I have made a shabby chic card celebrating the winter season. Have a look.
Winter season is already here. I was inspired by the snow and the whites and the blues that this season reminds me of, to create a subtle card. I've used the Blooms N Berries Paper Pack from Papericious for this card. 

The 3D Victorian Gate Shaker Chippie from the store was a nice addition to my project. I quickly painted a snowy winter night on paper and used it in the chippie which resembled a nice winter view through the window. The subtle It's a Boy Sequins mix went very well with my color theme.


As usual, all the flowers are handmade from the Papericious Sigma Cardtsock, customised to go with the theme. I also used some fussy cut elements from the paper pack and the co-ordinating Blooms N Berries Cut and Create Embellishments.

Want to watch the whole process video? It's right here.

The Papericious Supplies Used:

Picture of Blooms & Berries - Papericious Designer Edition
Picture of Blooms & Berries - Papericious CCE
Picture of Victorian Gate - Papericious 3D Shaker Chippis
Picture of Papericious Sigma Flowerite
Picture of Its a Boy Sequins - Papericious Sequins Mix

I hope you liked my card and enjoyed the tutorial.
Love,
Shweta

0 comments:

Card with Flickers - Tutorial

11:00 am Shilpa Nagaonkar 0 Comments


Hello everyone!
Shilpa here,
Have you checked beautiful foil printed paper collection - The Flickers by Papericious?
You can find it HERE. Don't forget to check out all lovely creations by my teamies during this month.

I am sharing a card today for which I have used Papericious Flickers Collection as well as Blush Cut and Create Embellishments.

Card is created with lots of layers.
Here is the procedure of making it.

I selected these two papers from Flickers Set. 
I have used White Card as a base. I cut out a rectangle from gold foiled white design paper 1/4 inch smaller than card base. 
From black design paper I got this lovely tag using Die.
I also got Doily to add in.

Next, I fussy cut black roses from this beautiful design paper.

I had also fussy cut leaves and butterflies from Blush Cut and Create Embellishments.
Shabby Chic Papericious Sequins goes with design and color of this card.

I layered design paper, black design tag and Doily on the card. Adhered them with strong glue.

Here you will find, I adhered black roses, golden leaves, heart and Lace as my next layers.

I chose this golden butterfly as my focal image. Below that you will see layers of gauze and roses and golden leaves.

Further I added small butterfly and Sequins, and my card was ready.


Thanks so much for stopping by today.

Papericious Product Used:


0 comments:

Bird House ft. Blooms & Berries by Kirti Gupta

11:00 am Kirti's Kraft Kastle 0 Comments


Hello Crafty Friends,
Kirti from Kirti's Kraft Kastle here. How are you doing this winter?
I am sure, during winters, the best thing to keep yourself warm is to do Crafting!
And when we have some amazing newly launched Paper Packs by Papericious like Blooms & Berries in our hand, we just can't stop creating some beautiful creations with it.

Sharing today my recent creation with Blooms & Berries, a Bird House!
When I saw this paper pack Blooms & Berries, all I could feel was inspiration from from nature. And proceeded with the same thought and decided to create this bird house. I wanted to use these papers for some unusual use of scrapbook papers, so I went ahead to use them for adorning my home decor, which can also be use as Lamp, Shade when fitted with electric circuit over lamp stand.

This Bird house is made of Grey Chipboard by Papericious and is adorned with Embellishments from Papericious Elements Sheets - Blooms & Berries & Indie Chic

Here are some close-ups of my bird house for you all!


I hope you find this inspirational to create and use this wonderful paper packs for creating your own version of home decor.

Supplies Used:


Thanks for stopping By,
Love,
Kirti Gupta

0 comments:

I 💖U Easel Card ft. The Flickers by Swati

11:00 am swati nahata 0 Comments


Good Morning, Crafty Minds!

Hello, this is Swati Nahata from Swati's Crafting World. I hope y'all had an amazing Christmas with some fun time with your family & friends. Today I'll sharing a detailed pictorial of a project which I made using the newly launched Papers - THE FLICKERS & Cut & Create Embellishment Sheets - LOVE ACTUALLY. I must say both the papers & embellishments are very gorgeous.

I💖U EASEL CARD FT. THE FLICKERS

An easel card is another fun alternative to the ordinary fold. It has a built-in easel, so artwork stands beautifully on display. As an added bonus, the card lies flat. This is a show stopper card yet very easy to make. Follow along with these simple pictorials on how to make easel cards with just a couple of score lines & folds.

FOR THE LARGE CARD:
  1. 1 piece of 12"x 6" black cardstock for the card blank.
  2. Score along the 12" side at 3" & 6".
  3. 1 piece of 6"x 6" black cardstock for the easel part.
  4. 2 pieces of 53/4"x 53/4" red cardstock for the front & inside.
  5. 2 pieces of 51/2"x 51/2" pattern paper to layer over the red cardstock.                                                  

FOR THE MEDIUM CARD:

  1. 1 piece of 9"x 41/2" black cardstock for the card blank. 
  2. Score along the 9" side at 21/4" & 41/2". 
  3. 1 piece of 41/2"x 41/2" black cardstock for the easel part. 
  4. 2 pieces of 41/4"x 41/4" red cardstock for the front & inside. 
  5. 2 pieces of 4"x 4" pattern paper to layer over the red cardstock.


FOR THE SMALL CARD:
  • The small card will be pasted on the top the 41/2"x 41/2" card.
  • 1 piece of 7"x 31/2" black cardstock for the card blank.
  • Score along the 7" side at 31/2"
  • 3 pieces of 3"x 3" red cardstock for the front & inside.
  • 3 piece of 23/4"x 23/4" pattern paper to layer over the red cardstock for the front.
I've used mulberry flowers, leaves, paper doily, & few fussy cut few sentiments from the Cut & Create Embellishment Sheets - LOVE ACTUALLY to decorate front of the easel part.

ON-TO THE PICTURES


SUPPLIES USED

That's all for today. Hope you like it & will definitely try this. I would love to see your gorgeous creation. Thank You so much for dropping by. Your likes, comments, creation from my tutorials, & shares motivates me to prepare more craft ideas & tutorials for you.
Until next time, Take Care & Keep Crafting!
LOVE,
Swati

0 comments: