Showing posts with label Happy Diwali. Show all posts

DIY Ready Rangoli ft. Papericious Foiled Essential Papers | Photo Tutorial


Hello friends!
Festivities is in the air and we all are gearing up for celebrations! This is Parita Galani, here today sharing with you all DIY Rangoli, I made using Papericious' recently launched Foiled Essentials Paper Collection.

During festive times we all love to decorate our homes in our own way. With Diwali being round the corner, I thought of doing some festive project. Papericiou' Foiled Essential Papers are simply perfect for all our festive projects as well as Wedding-themed projects. I have made a ready to use Rangoli which can beautify your home or can make for a beautiful gift as well.

Lets have a look at my project:

Step by Step Tutorial:

Step 1 - Take a Thick Chipboard piece sized 3.5" by 3.5", draw a Diya on it cut it and trace on the other 3 pieces, so that they are all similar in nature.

Step 2 - Trace the Chipboard Diya on a sheet of the  Ethnica Foiled Patterned Paper and then adhere the Patterned Paper on it using liquid adhesive or any adhesive of your choice. It should look like so:  
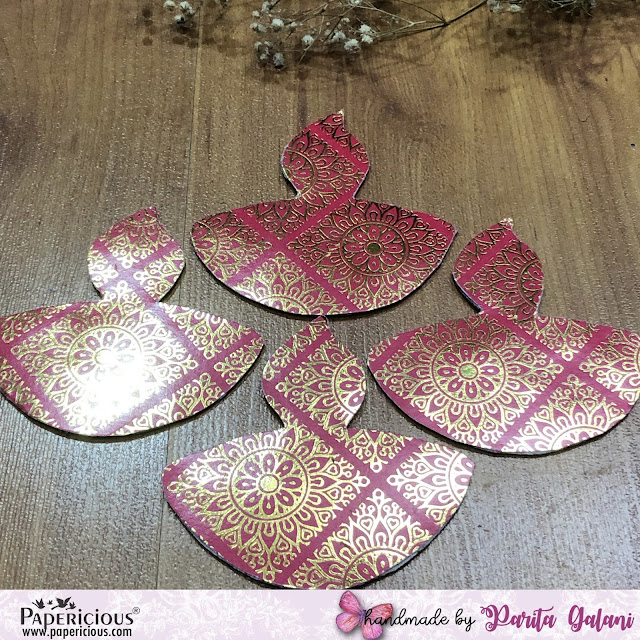
Step 3 -  Take a 4" by 4" Chipboard piece and cut it in inverted C curves as shown below.

Step 4 - Take the square Chipboard piece, trace it on a sheet of Fun Fiesta Foiled Patterned Paper and adhere it like we did for the Diya.

Step 5 - Embellish it with Mirror Pieces, Sequins, or any such embellishment of your choice. Arrange the Rangoli as shown below. You can embellish it even further with Diyas, fresh flowers, or any festive embellishments of your choice.

I have one more little project to share with you guys. I followed the same method as shown above, but slightly tweaked it by punching holes to the Thick Chipboard pieces and attaching strings and tassels. 

 I  created a DIY Shubh Labh Wall Hanging using the Fun Fiesta Foiled Patterned Paper Pack. You can use the sae technique to create a number of projects. 

Supplies Used:
I hope you liked my project and are inspired to create some fun projects of your own. We would love to see your work using Papericious products, so don't forget to tag us.

Festive Regards,
Parita K Galani

Festive Favours ft. Foiled Essential Patterned Papers


 Hello friends!
This is Parita Galani, here today sharing with you few festive crafts with Papericious' recently released gorgeous Foiled Essential Papers. I am absolutely in love with papers, with its variety of colors with different foiled patterns, they are perfect for absolutely any project.

As Diwali is round the corner I have made some variety of mini projects which is perfect for this beautiful festive season.

Project 1
I have created below an entire project using just 2 sheets of 12" by 12" of Papericious Fun Fiesta 12" X 12" Foiled Paper Pack. It includes Mini Treat Box, Scalloped Envelope, 2 Gift Cards/Coin Gifting Envelopes and 2 Gift Tags. I so love the combination of hot pink with lime green along with foiled patterns. It's so very festive!


Project 2
 I have created Money Envelopes using the Ethnica 12" X 12" Foiled Paper Pack, which are perfect for gifting in upcoming festive as well as wedding season. The bright shades of red, orange, and blue are just so fantastic!
Lets have a look at my project:


Supplies Used:

I hope you guys liked my projects and will create such festive projects of your own using this beautiful collection.
Keep crafting!

Best regards,
Parita K Galani

A flip- flap album using Love Actually (Tutorial ) + An Altered hoop

Namaste Friends!!

This is Kriti from Handcrafted Expressions by Kriti , hope you all are doing well.

Today I have created a flip-flap album using Papericious newly launched valentine themed paper pack Love Actually and shaker chipboards.

This paper pack has very bright colours...its very beautiful with lots of die- cut elements and sentiments...

This is what I have created...


This album is 6" x 6" in size with a spine of 1" and it has flaps...flaps...and flaps...

Now, I will explain it with a pictorial....please bear with me as it is a picture heavy post...

STEP BY STEP TUTORIAL

STEP 1. Take 8 pieces of paper of size
   a) Piece 1:- 6" x 11" and score on 11" side at 6"and 7".


b) Piece 2:- 6" x 5.5"  and score on 5.5" side at 3.5" and 4.5".


   c)  Piece 3:-  6" x 5" for back reinforcement.


d)  Piece 4 and 5:-  6" x 7"  and score on 7" side at 5" and 6". 


  e)  Piece 6 and 7:-  6" x 6.25"  and score on 6.25"side at 4.75" and 5.25".


f)  Piece 8:-  6" x 9.5"  and score on 9.5" side at 6" and 6.5".


STEP 2.  Attach piece 2 to piece 1 as shown


After attaching the album will look like this


Now, for back reinforcement attach piece 3 as shown


Now attach piece 4 and piece 5 to the left and right of the arrangement, as shown


Next, attach piece 6 (left) and piece 7 (right) over piece 3, leaving the 1"spine , as shown


Lastly add piece 8 over the piece 3, as shown


And, voila...album is ready with lots of flaps....

Some close- up pics....


It opens up like this...


Now, moving onto my second project...

I have altered an embroidery hoop using some Papericious art mediums and pattern papers.

Have a look...


For this firstly I have covered the entire hoop with two coats of Papericious white gesso, then applied the Papericious crackle paste. When crackle started to appear, I sprayed the hoop with blue color in an uneven manner.

After that I took a paper from Papericious Azealian paper pack and covered it with clear gesso. Using Papericious modelling paste and rose stencil given some texture to it...
When it dried, sprayed it with blue color.
And lastly added my embellishments.(i have used few sheets from Papericious Diwali Paper Pack too)

Few close-ups....


Hope you like the project...

Kriti Mishra

Supplies used