Card with tags and thanks!

12:11 pm Unknown 10 Comments

Hello dear friends!

It's that time.... this post marks the end of my term at Papericious.

Wow... one year....

It's been an absolutely amazing journey but I couldn't just end it without saying thanks now could I? ^__^

Aastha, thank you.
For believing in me, giving me the freedom to experiment and most importantly, trusting me with your brand.

Thank you dear readers. Your feedback was something I absolutely loved going through and I tried my best to revert to everybody who took some time out to go through my blog posts. I truly am grateful for the love and kindness that you have bestowed upon me.

*Big panda hugs.*

Today I've used the MI ESTILO paper pack by Papericious but before we look into that I hope you remember....

Papericious papers now come in thickness of 200 gsm! (That's pretty amazing if you ask me!)

And that's not all!

Apart from the 10 gorgeous designs (10x3 = 30 sheets) in MI ESTILO, this pack also contains 2 sheets full of co-ordinating die-cuts!

Yep, no need to go hunting for matching stuff & embellishments!

So now... for the last time, let me take you through these projects that I've created :

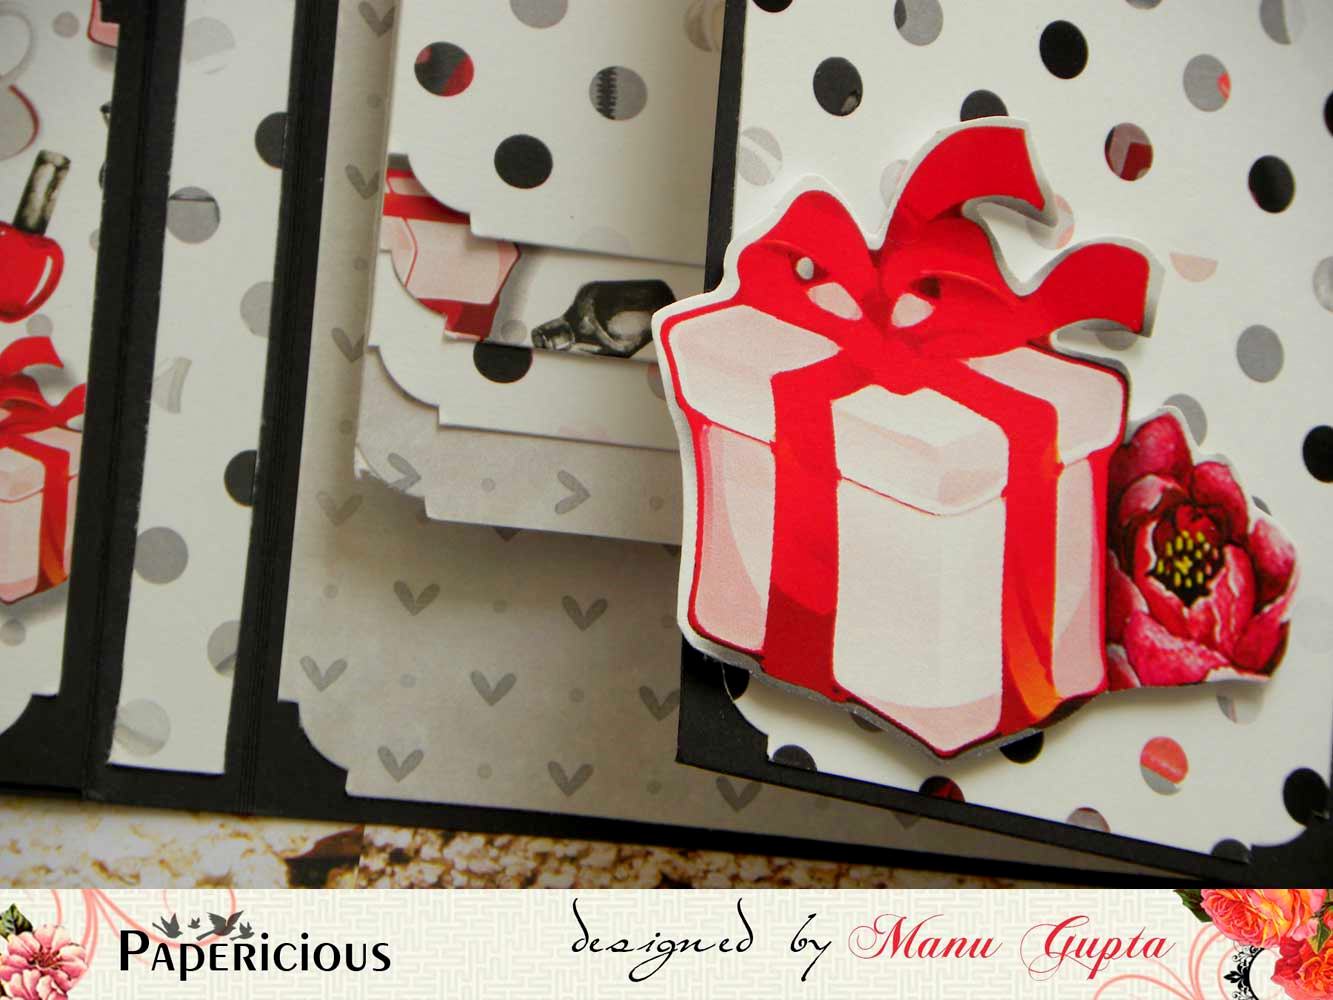
First up is a card I created using the pattern papers with the die-cuts from the embellishment sheet.

Here's a closeup :

I also made a couple of tags to co-ordinate with my card.

The tag at the extreme left is created by using plain white cardstock on pattern paper base. I left it white and added some subtle stenciling to it.

Here's a closeup :

I started with white cardstock for the tag in the center too, only difference here is that I colored it up using violet Color Burst.

The tag on the extreme right consists completely of pattern papers.
(All pattern papers for all the tags are from Mi Estilo paper pack.)

I've used different embellishments in each tag. [Sequins, half pearls and rhinestones.]
Also, I picked different colors for the tags to show you that these fussy-cut embellishments co-ordinate beautifully with a variety of colors!

I fussy-cut the teeny tiny make-up accessories out of this sheet from the pack :

This paper pack is perfect for that fashionista friend or a make-up diva sibling! I had a lot of fun working with it and I'm sure so will you!

That brings us to an end of the post my friends.

Thank you so much for stopping by! Have a fabulous day!

This is Halak, signing off.


Posted via Blogaway

10 comments:

Gate fold tag album tutorial

11:16 am kavitha 1 Comments

Hello everyone,
 Kavitha here today and I am sharing a fun pocket mini album tutorial with "The Gentleman collection".This collection has some awesome red n grey combination n fun prints which suit perfectly for masculine project .

Here is my project:

Inside view:

This has lots of room for pockets n tags

Procedure:
Take a card stock measuring 6 by 10 1/4 inches,score at 5" and 51 /4"
 Take another cardstock measuring 6 by 5 3/4 inches,score at 5" and 5 1/4 ".Glue the 1/2 inch flap to the previous card stock.
 Take two cardstocks measuring 6 by 51/2 inches and score at 5",cut at an angle on one side
 Decorate all the panels with pattern paper


Finally attach the pockets to the base by applying glue on three sides.I also added some straight pockets on all three panels.I added some photo mats n tags,decorating one side with the pattern paper.I also used the die cut elements comes with the paper pack to decorate the insides,i kept it minimal as the paper by itself looks awesome.


Thank you for stopping by.
Happy crafting,
Kavi

1 comments:

Card cum Gift Holder using Mi Estilo and Gentleman | Photo Tutorial

11:00 am Hussena 6 Comments


Hi, crafty friends!
This is Hussena here, today I have a very quick and easy tutorial to share for making a beautiful card pouch. I really had a lot of fun creating this. This card pouch would make an ideal gift not only to give to your brother for Raksha Bandhan, but it pretty much covers all occasions including the upcoming Teachers' Day.
My son has a male class teacher & coming up with a gift for him was a challenge as I usually tend to create quite feminine project, so I was pretty happy to work with the newest collections from Papericious which has some really good masculine tones. 

Here's a look at the card pouch :


Here's how it looks when opened up :

I have embellished the insides using pattern papers from the Mi Estilo collection. The bow-tie & sentiment have been fussy-cut from the Gentleman pack.

As you can see, it has two pockets and can hold 4 X 4 inch notecards with coordinating envelopes and also there is enough space to hold a candy bar of your choice.

The note-card & coordinating envelope :


The trio together!


The back side of the pouch :


- - - - - - - - - - - - - - - - - - - - - - - - - - - - - - - - - - - - - - - - - - - - - - - - -
Here's the tutorial on how to create this :

TUTORIAL

Step 1 - Take a 12 X 5" piece of cardstock and score at 5 1/2 and 6 1/2 inches.

Step 2 - To create the inside pockets, take TWO pieces of 2 3/4 inches X 5 3/4 inches piece of cardstock.

Step 3 - Score at 1/4 inch TWICE on three sides of this cardstock and fold it to form the pocket. Cut out the two squares on the sides to help create a crisp pocket-fold.

Step 4 - To create handles of the card pouch, you can either use any punch of your choice or a die, I have used Spellbinders label 4 to create my handles.

After die-cutting the handle looks like this :

Step 5 - To further embellish the handles, create a frame using the same die set. I have distressed it using Hickory Smoke Distress ink. ( I have used the Papericious Craft Sheet & Ink Blending Tool )

Step 6 - To embellish the front & back of the pouch, I have used different pattern papers from Mi Estilo and the Gentleman pack.

The Note card and the co-ordinating envelope were also made using these papers.

For the pouch, I die-cut a scalloped border panel using papers from the Mi Estilo collection and layered it with another paper from the same collection. I then made a handmade flower again die-cut using papers from the Mi Estilo pack. Added few leaves, filler flowers and the sentiment, and my bag was ready :)

For the note-card, I have used die-cuts from the Infinity Collection. I have used three different pattern papers from the Mi Estilo collection.

For the envelope, I have again used a die-cut from the Infinity pack.


Hope you liked the tutorial and give it a try. Please do leave me your comments/suggestions regarding it I would love to hear from you.

Have a nice day everyone!

6 comments:

Wallet card tutorial

11:12 am Manu Gupta 0 Comments

Hello Everyone!!

Manu here and I have a wallet style card tutorial. I made a wallet card for the Blog hop that happened between Mudra and Papericious sometime back and I got quite a few requests on how did I made the wallet card. So I decided to make a tutorial for the same.

Here's the card I made


Here's the tutorial.

1. Take a cardstock measuring 8*12 inches and score as marked in the picture below.


2. Now to add flaps, add two flap measuring 3.5*8 inches. Place it as per the picture below


Now the base is done and the wallet card can be assembled as per the choice. I used the Mi Istilo collection to embellish it

Here are the closer pics.


I hope you will like it. Do post your feedback ! I would love to hear your views on this simple wallet card!

Happy Crafting!
Manu

0 comments:

Card Tutorial-LIFE IS A GIFT

10:49 am Artforte 3 Comments

Dear Friends
Shalini Pahwa here from artforte. My latest creation is a card dedicated to the beautiful gift that we all have received from God – The GIFT OF LIFE.
I truly believe that Life is a gift and every day beholds a miracle to cherish. We should live each day as it is the last day of our life. We should fill our life with colors of joy, of giving, of helping, of praying and of love for all. This thought forms my inspiration for this card.

In this card, I have used pattern paper from the widest range of Papericious -Mi-Estilo. 
Below is a brief tutorial describing process of how I have made this card.
1.: Take Black card-stock 12"x6" and fold it into half. and then take the pattern paper of you choice from Mi-Estilo Stack. and torn the edges and then paste.
 2:Make two tags as shown in the pix below. Size is 2"x 3" and distress the edges.
 3:Next i had taken Spellbinders Nestabilties Romantic Rectangles die and then pasted pattern paper-distress the edges.
4: Gift box, flowers, tea glass with flowers are the cutouts from the same stack and before pasting them i have used stampendious shabby pink embossing enamel. And do the arrangement and spread some sequins  and your card is ready!!!


I hope you all will love this creation and tutorial and would like to hear some words from you.


Have A Nice day!!!


3 comments: