Winners for August Challenge | Vellum/Acetate

9:15 pm Parul 0 Comments


Hello everyone!
Parul here with the announcement of Winner and Top 3 for August 2019 Challenge - Vellum/ Acetate. We received so many wonderful entries this time and we loved seeing your creations using Papericious products.
So, without further delay here are top three in no particular order.


It's a beautiful Wallet Album which is shown in a video.


And the Winner is,
.
.
.
Congratulations, Gayatri! This was an amazing album. Please send us an email at hussenacal@gmail.com with the subject "August Challenge Winner" to claim your prize. 
You can grab your Winner's badge from HERE and flaunt it on your blog.

Top 3 Winnersplease grab your Top 3 badge from HERE and flaunt it on your blog!

We have our September Challenge Live! Do Check out and participate. Would love to see your entries there!

Happy Crafting!
Parul

0 comments:

Mini Folio Card Ft. Pretty Pixie by Swati

11:00 am swati nahata 1 Comments


Good Morning & Happy Thursday, all!

Hello Guys, I hope y'all are doing great. This is Swati from Swati's Crafting World back with another pictorial post. I've a new tutorial to share with you today featuring the "PRETTY PIXIE" Paper collections by Papericious. Please visit www.papericious.com to buy this & other amazing collections of Papers, Cardstocks, MDF Trays, Shakers, etc. In my today's project I've made a MINI FOLIO CARD. The card looks so pretty in person. And here's the close-up picture.


MINI FOLIO CARD FT. PRETTY PIXIE

 Planning to get a gift for someone, who is really special? Mini Folio Card is a perfect & an ideal gift. I'm here today to show that Mini Folio Card are super fun & easy! By breaking it down to clean & simple design, I hope it makes Mini Folio Card more approachable. An interactive fold folio with waterfall mechanism on inside & pockets on the both sides with tags. This card has a lot of space to accommodate your beautiful & precious memories. I've decorated it with some paper sentiments, mulberry rose & leaves, Chipboard cuts from Papericious to give it a lustrous look. 

STEP BY STEP TUTORIAL :

The size of the Book is 6 by 6 inches.
STEP - I
Take a piece of Cardstock of size - 14" x 6"
Score at 21/2", 3", 9", 91/2".
STEP - II
Take another piece of Cardstock of size -14" x 53/4"
Score at 4", 41/4", 10", 101/4".
STEP - III
Now vertically place the 14" x 6" Cardstock & on the top horizontally place the 14" x 53/4" Cardstock. You can also paste it vice versa.
STEP -  IV
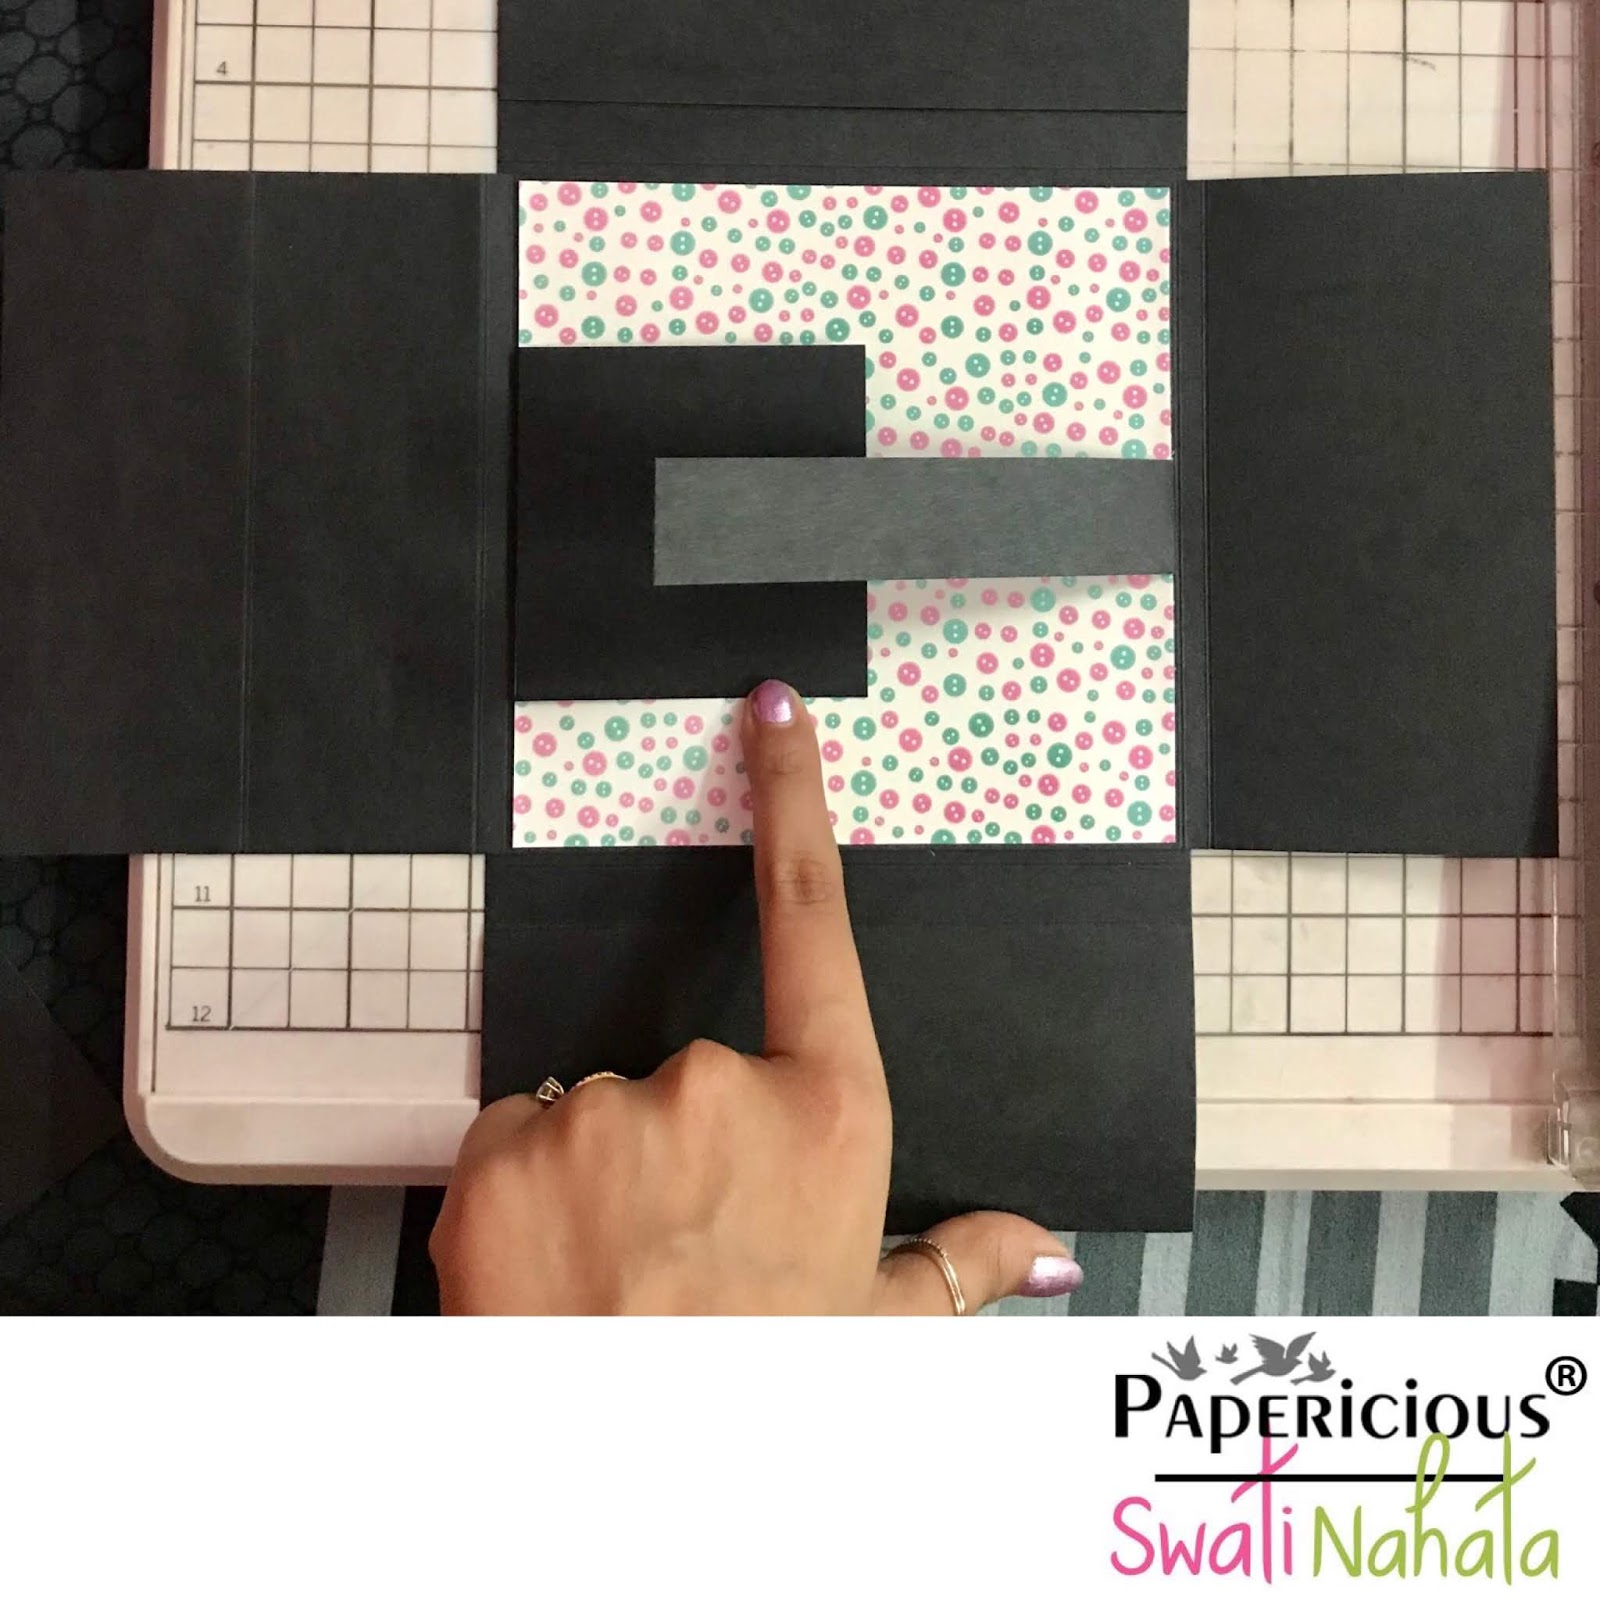
Take 6 pieces of size - 3"x 31/2"
Score at 1/2" from 31/2" side.
Add pattern paper in the middle & start pasting the 3" x 31/2" Cardstock horizontally as waterfall  in the centre as shown in the picture below
 
STEP - V
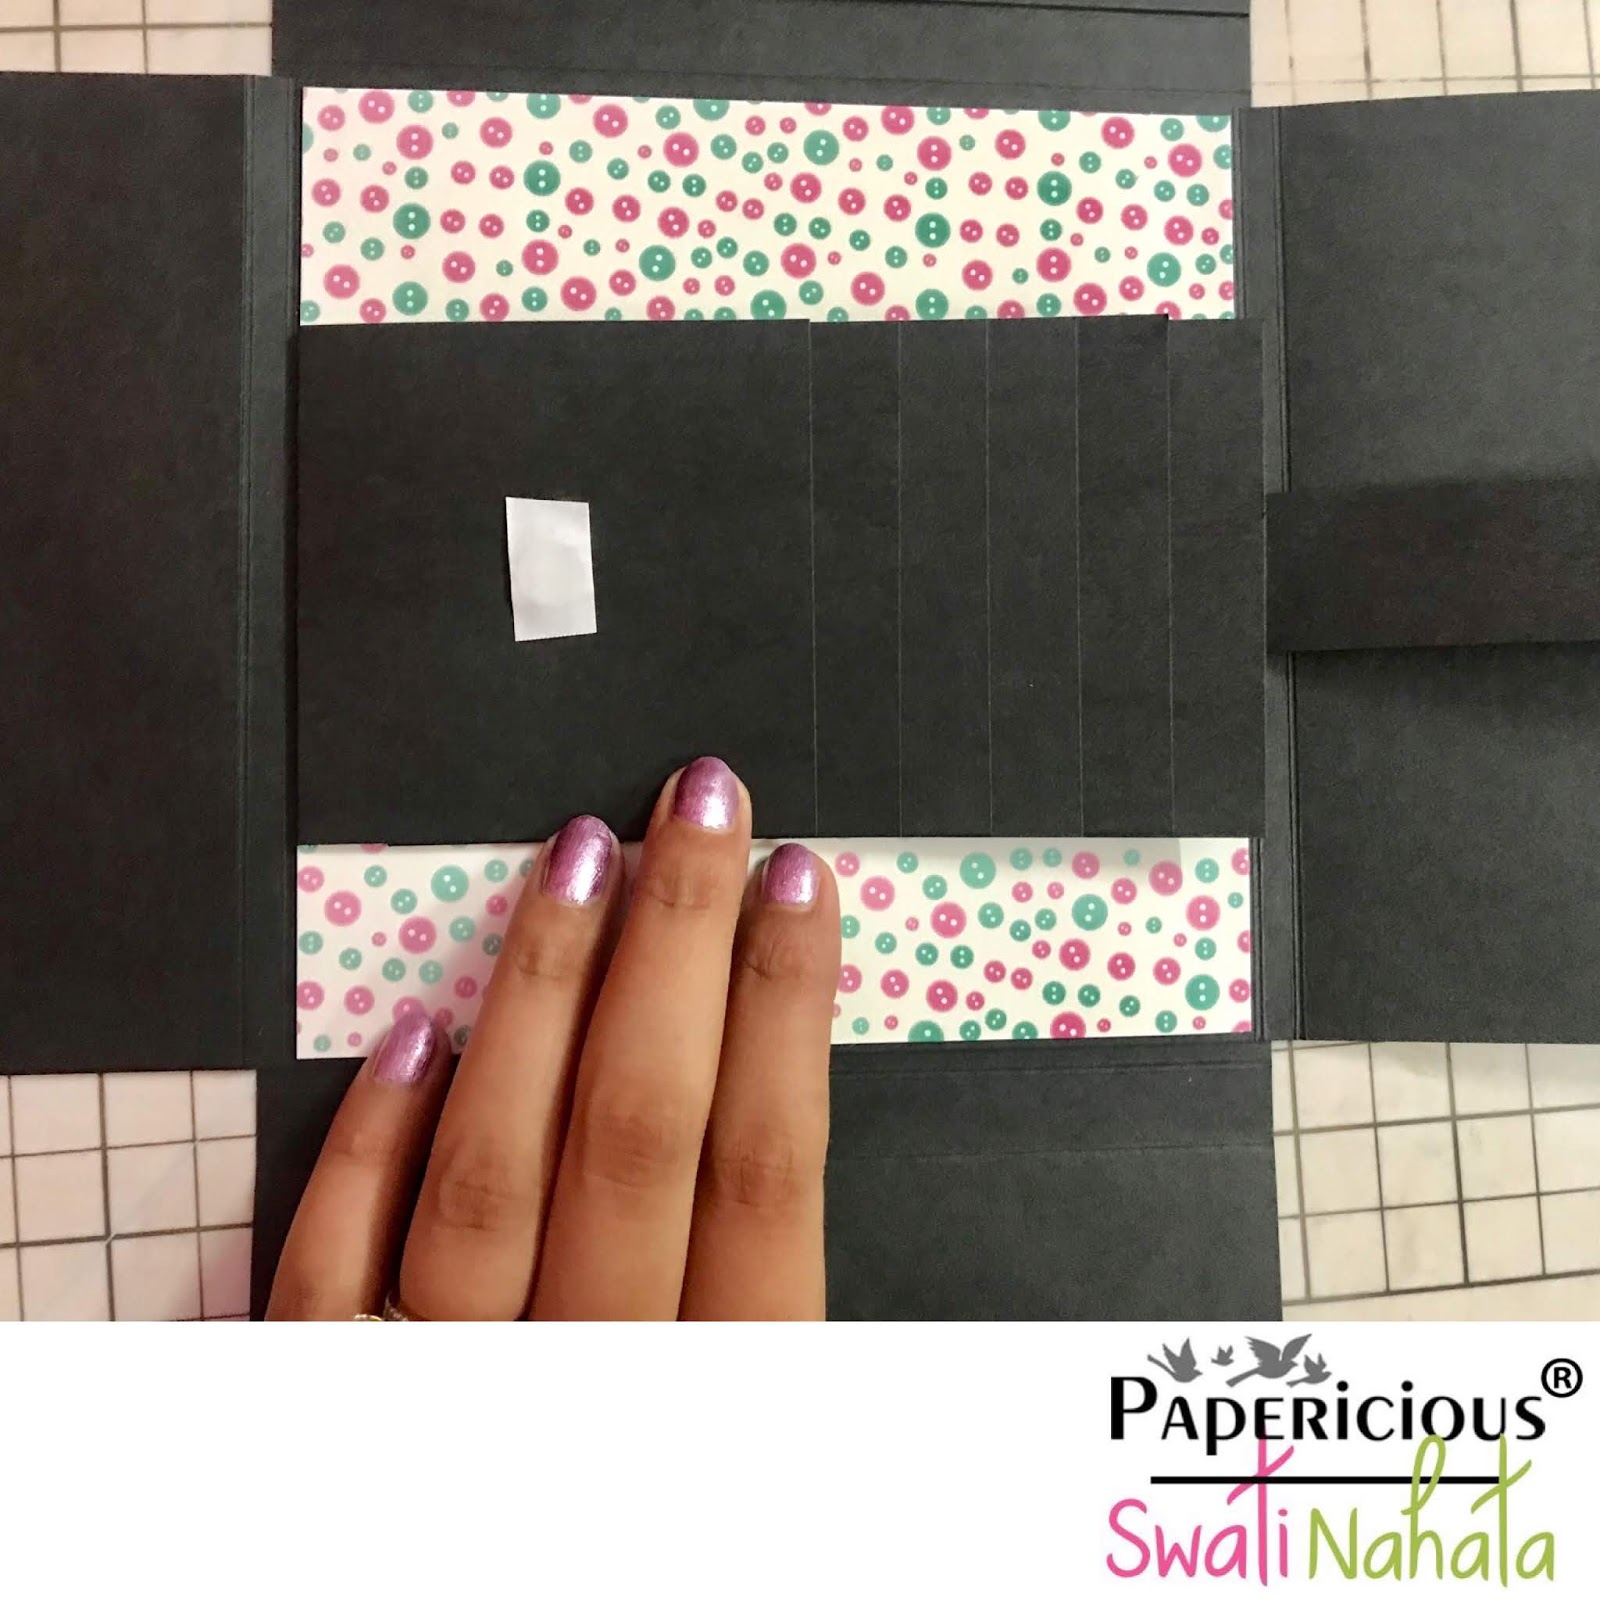
Now add magnets to the waterfall, & then on the sides add coloured cardstock or pattern papers & add pockets.
 
STEP - IV
For the pockets I've made tags using the coloured cardstock & pattern papers.

ONTO THE PICTURES :


SUPPLIES USED :


That's all for today. Hope you like it & will definitely try this. I would love to see your gorgeous creation. Thank You so much for dropping by. Your likes, comments, creation from my tutorials, & shares motivates me to prepare more craft ideas & tutorials for you.
Until next time take care & keep crafting!

LOVE,


1 comments:

Pop Up Gift Card Holder Card

11:00 am Tanvi 0 Comments

Good Morning!
Choosing the right gift is always a difficult task, despite (or rather because of!!!) so many online & in store gifting options nowadays. Gift cards have made this task so much convenient. So today I have a quick handmade card which doubles as a gift card holder too.
This one measures 5.5" x 4.25" & holds a gift card that pops up when opened.
Let me quickly take you through the steps to make this - 

Trim the Cardstock to 5.5" X 8.5", score at 4.25"on the 8.5 side. This is the card base.
Trim the polka dot pattern paper to 4 1/8" x 5 3/8" & glue it to the front of the card base.
Use some die cuts & fussy cuts to embellish the card as you wish.
  • To make the pop up holder we need 2 pieces of pattern paper measuring 5"x5" scored at 1/2", 1-3/4" x 2-3/4" and 4"


Using a bone folder crease the scored lines & make 2 rectangles by gluing the right edge of the 1/2"tab.To make the holder adhere tape to the ends only. Attach to the second box.

This is a fun way to give gift card holders & by changing the papers can be made for all occasions. I always have a few of these handy.

Supplies Used

Thanks for visiting today!
Hugs, 
Tanvi

0 comments:

Mini Mail Box - Tutorial

11:00 am Chirali Shah 0 Comments


Hello people!
Chirali here with a cute Mini Mail Box tutorial using Pretty Pixie Paper Pack.
Here it is:

Let's start with the tutorial:
Take one sheet from Pretty Pixie Paper Pack of your choice and draw the lines as shown in picture.
Cut and fold the same as above.
Stick 0.5"x4" part to the opposite side to make such a dome.
Now, fold the dome on both the sides one by one and draw the circle with pencil.
Draw such triangles as shown in picture on any one side, cut both the sides and stick the side with triangles from inner side of the dome. Cut the drawn half circle on the other side.
It will look like this.
Take one stripe of 1.5"x10", score at 0.5" and cut such triangles in the same way as before and stick the same to the lose half circle to make door of the Mail box. If 10" is longer than needed, cut the same accordingly.
I gave it a magnetic closure.
Base is ready. :)
Now time to decorate and add some mails in it. I made 3 envelopes of 3"x3" to keep in it.
My final result of Mail Box:

I hope you liked it.
Thanks for stopping by!

Hugs,
Chirali :)

Supplies Used:

0 comments:

September Challenge - Gifts Galore

11:43 am Tanvi 0 Comments


Hello, this is Tanvi & I am here to announce the challenge this month - 
Gifts Galore:
Create any project that is suitable for giving gifts and it should have a matching tag along with it.
Papericious Challenge Rules :
1. You can create ANY project - Altered Items, 3D projects, Home Decor, Layouts, Mini Albums, Scrapbooks, etc.

2. Remember that you need to use Papericious Products as your main focus to qualifying for the win.

3. The last date of submission of your projects is 10th October, 2019 at 11:55pm IST.

4. Please go through the general guidelines HERE before you link up your projects. Any project not following the rules will be disqualified and it will not be eligible for the prize.

5. If you are entering the challenge via social media platforms like Instagram or Facebook, please remember to write in your post that you are participating in the Papericious Monthly Challenge and give a direct link to the challenge blog post in your post description. Mention the Papericious products used in your post as well. Then, come back and link your entry using the InLinkz tool provided at the end of the post.


PRIZES:
The Design Team will be selecting a Merit based Winner at the end of the challenge who will stand a chance to win a gift voucher worth INR 1,000 from the Papericious Store. 

We will also be picking three entries as our Top 3, who will be awarded a badge to flaunt on their blog.

Now back to the theme - Gifts Galore. I love gifting unique handmade decoupage items. For today's theme I have made a birdhouse with a coordinating tag using the Flora Season Decoupage Paper

Sharing some close ups of the birdhouse now. I have decoupaged two sides & done a bit of stenciling over the decoupage.


To add some texture to the roof, I have used one step crackle medium.

Here is the coordinating tag - 
Supplies used - 

We also have my teamie Parul sharing her inspiration for this challenge.
Lets see what she has for you -
I wanted to gift something to my mom and what could be better than a set of cash envelopes. So I came up with this set. It has got 10 money envelopes and a keepsake box to keep them all.  I also made a matching tag with it :)  And she really loved this present.  
I used "Hooked" Paper Pack from Papericious. 


That's all from us today & hope you will all share the handmade gifts made for this festive season & join the September Challenge.
Love,
Tanvi


0 comments: