Pop-Up Box Card ft. Star Gazer by Nikkita Sethi

11:00 am Nikkita 0 Comments


Hello everyone! 
This is Nikkita, and today I am back with a cute Pop-Up Box Card featuring the adorable Star Gazer Paper Pack from Papericious.
I have used the Elements Sheets and fussy cut the cute images and used in my card. These papers are just amazing, too cute and I totally love using them in my projects. 
These are perfect for any baby theme projects.

Card when folded flat.

Isn't this a cute one? I totally loved making the card.
Hope you like my inspirational post.
Do leave some love.

SUPPLIES USED
WHITE 12" X 12" CARDSTOCK

STAR GAZER 12" X 12" Patterned PAPER PACK

HAPPY CRAFTING!
LOVE,
NIKKITA

0 comments:

Door Hanger with Giggles Galore Pack by Tanvi Shah

10:58 am Tanvi 0 Comments

Good Morning!
Hope you are all enjoying the inspiration posts from my teamies showcasing the adorable baby packs. It's my turn today & I have a cute door hanger to share. I enjoy using papers to decoupage & selected a broad striped pattern from the pack to decoupage the hanger. 
 I had a super easy hack to use Scrapbook Papers for Decoupage in my post HERE. I proceeded the same way.
Once the base was ready, I selected another cute product Feeder - 3D Shaker Chippis to embellish the same. Some fussy cutting & flowers to adorn the door hanger & viola I had made a quick & cute accessory!


Supplies Used

Feeder - Papericious 3D Shaker Chippis


That's all from me today,
Happy Crafting!

0 comments:

Mini Album - Pretty Pixie Paper Pack

7:50 pm Chirali Shah 0 Comments


Hello People!
Chirali this side with a quick post of a Mini Album with the super cute paper pack of Papericious.
Here it is:

Some inside photos:
This is such a cute pack to make such instant albums and cards with the shaker chippies from Papericious.

I hope you liked it. :)
Hugs,
Chirali

Supplies used:

0 comments:

Baby Theme Money Envelopes by Swati

11:00 am swati nahata 0 Comments


Mornin' & Happy Friday, all!
This is Swati from Swati's Crafting World back with another Pictorial Post. Hope y'all are doing great. I've a cute project to share CASEin' one of the Papericious amazing newly launched Paper Pack LITTLE MS. MUFFETThe Papers are gorgeous medley of Vintage & Shabby Chic designs in BABY Theme apt for creating card & albums for both - Baby Girl & Baby Boy. I'm sure you're 
going to love these pretty papers. 

BABY THEME MONEY ENVELOPE 

Money Envelopes are something that can be used in any season, & in any festival. I've made two envelopes, one for a Baby Girl in the shades of pink, & one for Baby Boy in the shades of brown.

STEP BY STEP TUTORIAL

STEP-1
Take one piece of white cardstock of size 7.5"x7.5" & one piece of black cardstock of size 7.5"x7.5".

STEP-2
Score both the pieces of cardstock at 3" from one side & then turn the piece & score at 0.5" & 7". Fold the scoring lines & chop off the extra parts.

STEP-3
* For Baby Boy - I've taken two small pieces & adhered them on the base & made small pocket of size 3.25"x1" & made two Tags from the Tags available in the Paper Pack, & adhered paper sentiment of  Best Wishes from Double Sided Tape.
 
* For Baby Girl - I've tried giving layers, pasted pink cardstock on the base & on the top I've adhered the pattern paper. Decorated the envelope with a bow & paper sentiment of Congratulations. I've made the Bow from We R Punch Board, & if you don't have the Punch Board you can make a Bow from a ribbon also.
 

ON-TO THE PICTURES


SUPPLIES USED:


Well that's all from me today. Thank You so much for dropping by. I hope y'all like it. 
Your likes, comments & shares will definitely excite me to prepare more craft items & I'll be thankful to y'all for it. Update your love in the comment section below.
Until next time, Take Care & Keep Crafting!
XOXO 

0 comments:

Tutorial : Cute Name Banner using Little Ms. Muffet Pattern Papers

4:42 pm Parul 0 Comments


Hello everyone!
Parul here with yet another inspiration post. Today I am sharing a Name Nanner I have made for my 3 months old niece Anayta. :) She is planning to come to my place next month and I thought it will be good to have a name banner for her room. :)

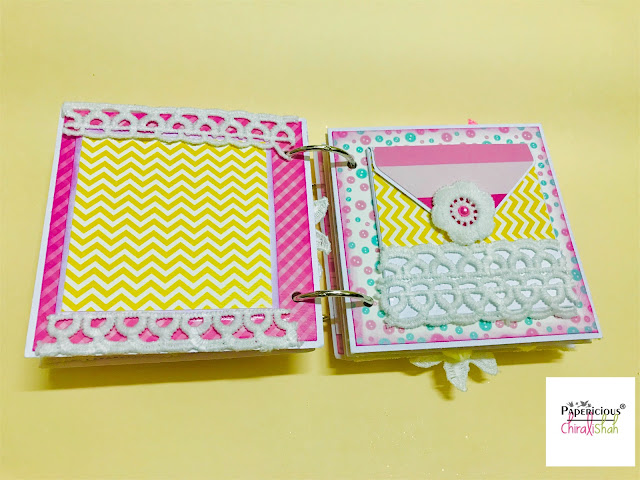
I have used two pattern paper packs to make this banner, first being Little Ms. Muffet and second being, Pretty Pixie. The left paper with polka dots is from Little Ms. Muffet and I chose this paper to make base for my banner's pennants. Second paper on right side with stripes is from Pretty Pixie. I loved these ombre stripes on it and thought of cutting letters from it.
And here you can have a look at the banner. 

Tutorial 

Step 1 
Cut 4"x4" squares from polka dot pattern paper and round their corners using corner punch.
Step 2
Cut alphabets in the name with the help of alphabet dies or digital die cutting machine. 
Step 3
Adhere the alphabets on the pennants with the help of foam tape to give them some dimension and they now look as following.
Step 4
Now you need to fussy cut some elements from Pretty Pixie Pattern Papers like I did or you can use other embellishments from your stash.
Step 5
Now embellish all the pennants however you like.
Step 6
Now make two holes in each pennant at same place with a normal punch and pass a matching ribbon through all pennants. 

And the banner is ready to use :)
Hope you liked the tutorial post. Please let me know in comments. 
Supplies Used:

0 comments: