Hello there & thank you so much for joining me today.
This is Tanvi & I share a fun card tutorial. This one is called a WIPER CARD, with a hidden interactive element. While it may sound complicated, its really easy peasy & I am surprised I have never tried this in my many years of card making.
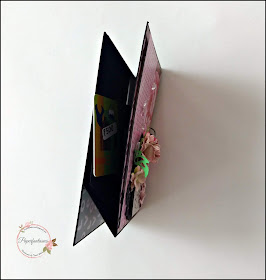
A Wiper Card is a pop-up card with a swinging tab that pops out when the ends are pulled. This tab can be used to hold a sentiment, a balloon, a flower, a quote anything. What did I use? Well.......Wait for the surprise 😍
Here are some close ups of the front -
Score at 1 1/2" and 3". Create a valley fold on one score line and a mountain fold on the second, as shown below. Repeat for the second piece of cardstock. These when glued will form the card base.
Next use 1 piece of cardstock - 1 1/2 x 3" for the "wiper". Mark at 1 1/2" on the long side.
- Score from the top right corner to the 1 1/2" mark by placing the right hand corner in the 1" groove and line the left hand corner up with the 1" mark on the left hand side of the scoring board.

- To assemble the card, add adhesive to the edges of both 4 1/4" sides of the cardstock piece. Place the second 4 1/4" x 8 1/2" piece of cardstock over the card front. This time make sure the score lines are on the left. This is how it looks after gluing both the pieces
 Pull both the sides together & out pops the gift card -


- Here is a small video of the card -
- I loved playing with this fun fold and I am sure you will too if you decided to give it a go. Cheers!
- Supplies used -


Wow....such an amazing idea
ReplyDelete