Namaste, all
Swati from Swati's Crafting World. I hope y'all had a relaxed Sunday with some fun time
with your family & friends. I've a pretty pictorial post to share with you.
I hope y'all like it.
In my today's post I'll be sharing detailed post on how to make a Shaker Explosion Box. I've used recently launched Papericious Paper pack - "I LOVE YOU" Talking about the papers, I feel the textures, & the designs they carry are extremely gorgeous. I've preserved all the bits & pieces of this collection that remained so that I create something for myself later.
ABOUT THE SHAKER EXPLOSION BOX :
A box for any occasion. A box that doesn't literally explode, it just fall open. A way to show a lot of Love & Appreciation for the person it is created for, so it is a card & much more. These beautiful boxes are a wonderful & a perfect as a present.
STEP BY STEP TUTORIAL :
The size of the box is 5 by 5 inches & it has three layers & a small box inside of size 2 by 2.5 inches.
Step 1 : The Base ( 5 by 5 inches )
1. Take a piece of 15 by 15 inches.
2. Mark at 5, 10 inches from all the sides.
3. Fold the sides.
4. Cut the line in each corner, & fold them.
Step 2 : The Base ( 4 by 4 inches )
1. Take a piece of 12 by 12 inches.
2. Mark at 4, 8 inches from all the sides.
3. Fold the sides.
4. Cut the unwanted 4 corners of size 4 by 4 inches
Step 3 : The Base ( 3.5 by 3.5 inches )
1. Take a piece of 10.5 by 10.5 inches.
2. Mark at 3.5, 7 inches from all the sides.
3. Fold the sides.
4. Cut the unwanted 4 corners of size 3.5 by 3.5 inches
5. Paste Pattern Papers.
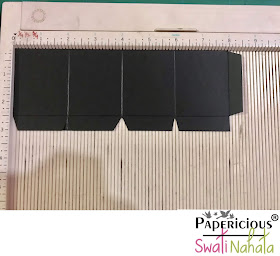
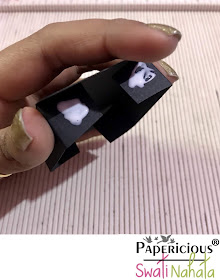
Step 4 : The Small Box (2 by 2.5 inches )
1. Take a piece of 9 by 3 inches.
2. Mark at 2,4,6, 8 inches from 9 inches side.
3. Mark at 2.5 inches from 3 inches side.
4. Fold the sides.
5. Cut the unwanted pieces as shown in the picture.
Step 5 : The Lid (5 by 5 inches )
1. Take a piece of 10 by 10 inches.
2. Mark at 2.5 inches from all the side.
3. Make a square of 3 by 3 inches on the centre & cut it
4. Fold the sides.
5. Cut one line in each corner
6. Put adhesive on the corners.
7. Stick the sides together.
8. Turn the lid & on the back side add OHB or Acetate Sheet & add Chipboard on the corners to create Shaker Element
9. Put some sequins, glitters on the Acetate sheet, add Glue & pack the back side from the pattern papers.
Step 6 : The Lid (2 by 2 inches )
Step 7 : Assembling
1. Take the 5 by 5 inches base.
2. Put adhesive on the center & paste by 4 inches base on the top.
3. Put adhesive on the center & paste by 3 inches base on the top.
4.Put adhesive on the center & paste by 2 by 2.5 inches box on the top.
5. The box is ready.
6. Decorate the box. I've used some fussy cuts from the "I LOVE YOU" Paper Pack.
ONTO THE DETAILED PICTURES OF THE BOX :
SUPPLIES USED :

That's all for today. Thanks for dropping by. I hope y'all will try your hands & don't forget to tag me. Your likes, comments, & shares motivates me to prepare more craft ideas & tutorials for you.
Until next time Take Care & Keep Crafting!
LOVE,


No comments:
Post a Comment