Hello Everyone,
Shilpa here,
Hope you are enjoying viewing lovely planners by Papercious Design team,
here is my version...
I've got this Vintage theme - Retro Chic Planner and I am loving it!! It has some beautiful papers and planner elements.
I would like to share with you ... how do I use pockets in my planner?
I pick out my favorite supplies and stuffing them into my front pocket.
A full pocket is one that will help me throughout month.
I keep the current month section in the front, you will notice, I've February month tab. I made it with diecuts which are available in Planner kit. I've also kept small note cards, sometimes need them to write immediately. Next there are Mini washi tape bookmarks and sticker sheets.
I wanted one more pocket in my planner so I made my own with Papericious Infinity paper pack.
I made small pocket, distressed the edges and punched the holes to add it in my planner.
Papericious Retro chic planner has one pocket making paper sheet. I made two pockets out of it and adhered them on my large pocket to keep small things like tags.
In my large pocket I kept planner stamps, enamel dots, and more stickers.
Here’s a look at how the whole thing works together.
Next.... how I added tabs to planner from Planner set
This set also contains tabs.... as I said it is wonderful planner set!
I cut them, and attached according to the month sections...
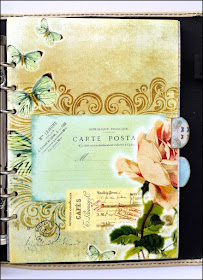
Here are inside pages
Aren't these papers Gorgeous!!
Oaky.. we can make tabs for other sections like Goals, projects, Ideas... and many more!
Hope you liked my post and got inspired!
Do try Papericious Planners available in many Indian Online stores!
Thanks so much for stopping by.


Wow..Such a Beautifully decorated planner !
ReplyDeleteAwesome post Shilpa! :) Loved how you made an extra pocket with the infinity paper pack and those pins with washi are super cute! Thank you for sharing! *Hugs*
ReplyDeletesuper gorgeous ...i liked the details added to it
ReplyDeleteGreat post shilpa,i love how colorful your planner is
ReplyDelete