Hello everyone,
Heena here from bloomingpaperbuds.com, today I have some decoupage inspiration and an easy DIY for you all.
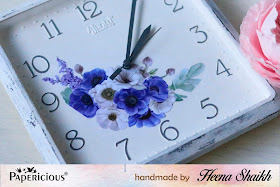
I had bought some inexpensive wall clocks to create altered projects and these were lying around in my craft room so I thought why not use it to decoupage, and they look so pretty!
For this clock, I have used natural white chalk paint on the base and fussy cut the image from 8 by 8 Whimsical Decoupage paper set.
I have distressed the clock frame for that, I used country grey chalk paint as the base coat and topped it with natural white chalk paint. I used a candle for distressing.
For this clock, I have fussy cut the image from 8 by 8 pretty peonies set and decoupaged it on the base of my clock. Doesn't get any simpler than this!
Now onto the DIY...
For this Diy, I have taken a 4 by 4 wooden box and painted the sides with Villa plum chalk paint.
Here I have taken this decoupage paper from the pretty peonies set to demonstrate the image transfer technique and trimmed it to the size of my box.
Next, Apply a generous amount of Papericious soft gloss gel where you want to transfer the image.
And place the image print side down carefully on the box. Leave it overnight. Next, use a damp towel or sponge to wet the paper and begin rubbing gently to remove the paper and expose the transferred image below. Seal it with the top coat or decoupage varnish.
Look how beautifully the image has transferred to the wood. (I rubbed a little too harshly and scrapped off a small piece of the image )
I used a background stamp and heat embossed the sides and sealed everything with decoupage varnish.
I hope you found this inspirational and give it a try!
Don't forget to tag us with your amazing creations on social media with #papericious.
Thank you for visiting,
Heena xo
Supplies used:


Beautiful! Loved the altered wall clocks and the box looks very pretty .
ReplyDeleteThank you:)
DeleteBeautiful done projects !!! Thank you for the tutorial too :)
ReplyDeleteThank you:)
Delete